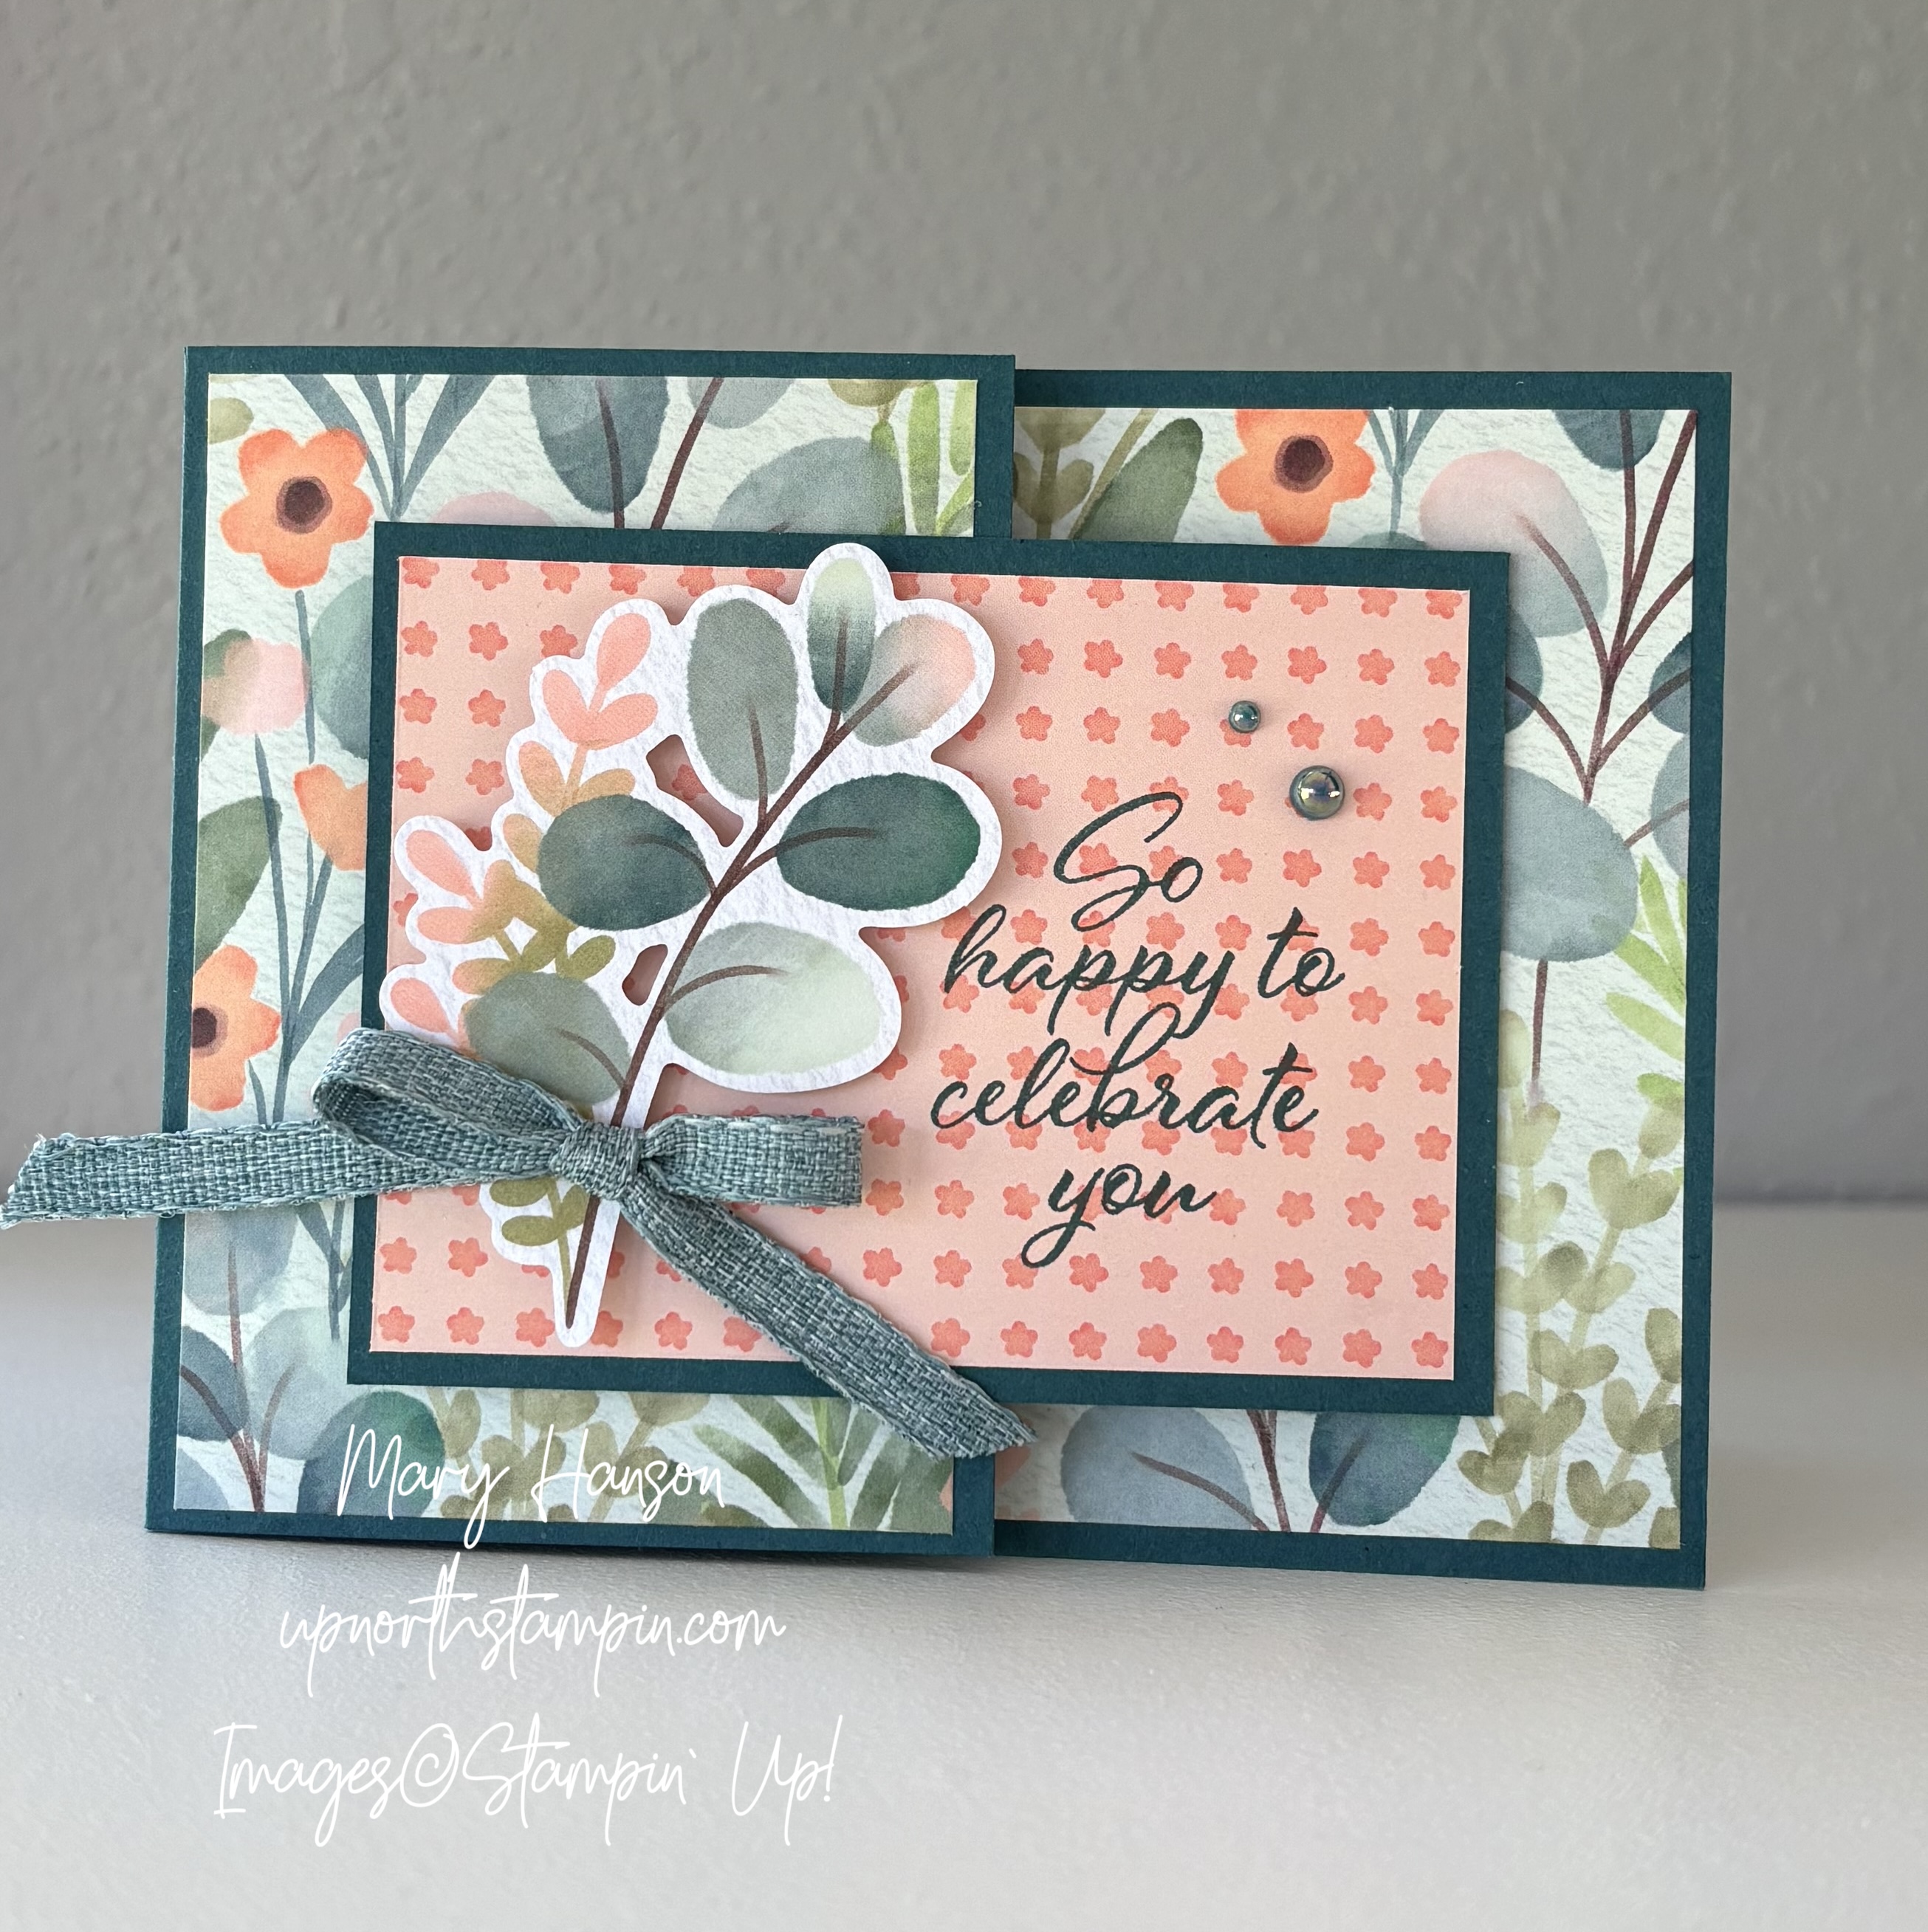
The Joy Fold card layout has been around for awhile, but for whatever reason, this is the first time I’ve made one. This joy fold was made for my card club, and we sure had fun making it, using the Frames & Flowers Designer Series Papers. Here’s the fun fold card I created:
Although many people have created this Joy Fold design over the years, I took my inspiration from Lynn Dunn, who had such clear instructions! Here are the easy steps:
- Start with an 8 1/2 x 11” cardstock. On 11” side, cut at 4 1/4.” You will have a 4-1/4 x 8 1/2 piece of cardstock.
- Take one of these card bases and score it at 5-1/2 inches on the 8-1/2 inch side.
- Fold on the 5-1/2 inch score line and use a bone folder to burnish the fold. You will end up with a 3 x 4-1/4″ flap on the card base.
Interactive Fun Fold Section:
- To create the inside fun fold section, cut a piece of the same color cardstock @ 3 x 8.” You should have plenty of cardstock left from the original 8-1/2 x 11 inch sheet to cut this piece.
- Score this piece, on the 8 inch side, at 4 inches.
- Fold on the score line and use a bone folder to burnish the fold. You will end up with a piece of cardstock that measures 3 x 4 inches when closed.
- Now before you adhere these pieces together, you need to decorate the card!

- The base of the Joy Fold Card is the 4-1/4 x 8 1/2 inch piece of cardstock that we scored at 5-1/2 inches (refer to the Joy Fold Card Base instructions above).
- Cut a 5-1/4 x 4 inch piece of patterned paper and adhere it to the inside section of the card base.
- Cut a 2-3/4 x 4 piece of patterned paper and adhere it to the front of the flap on the card base. Note: I used the same patterned paper to decorate these two sections of the base of the card. However, you could certainly use different patterns or even embossed cardstock to decorate the different sections of this card base.
- It’s important to pay attention to the direction of the fold on as you are decorating this piece. When this piece is adhered to the card base, the folded section will be on the right hand side.
- Decorate the top front of the card. I used one of the pieces from the Frames & Flowers Designer Series Papers. Love the little punch-out elements that I can just pop up onto my card fronts!
Once you do this fold once, you’ll see how very easy it is!
BEFORE YOU GO, a reminder that Stampin’ Up! has a sale going on the month of June! All bundles are 10% off the ALREADY BUNDLED price of 10% off, so guess what? That means 20% off all stamp and die bundles! Not only that, but all machines are 10% off this month STARTING JUNE 5.
Product List  |  |  |
 |  |
")
 Designer Series Paper")

EWPJKTSU is the June Host Code!
When you place an order of $50 or more online using the Host Code above, you will receive a free gift from me — a tutorial bundle of over 20 card tutorials with complete instructions and measurements!
Please let me know if you have any questions. And be sure to join my Up North Stampin’ Gang Facebook page. We are having SO much fun over there! We post, we share, and just enjoy life! Here’s the link to request to join: https://www.facebook.com/groups/199783410436824
Mary

