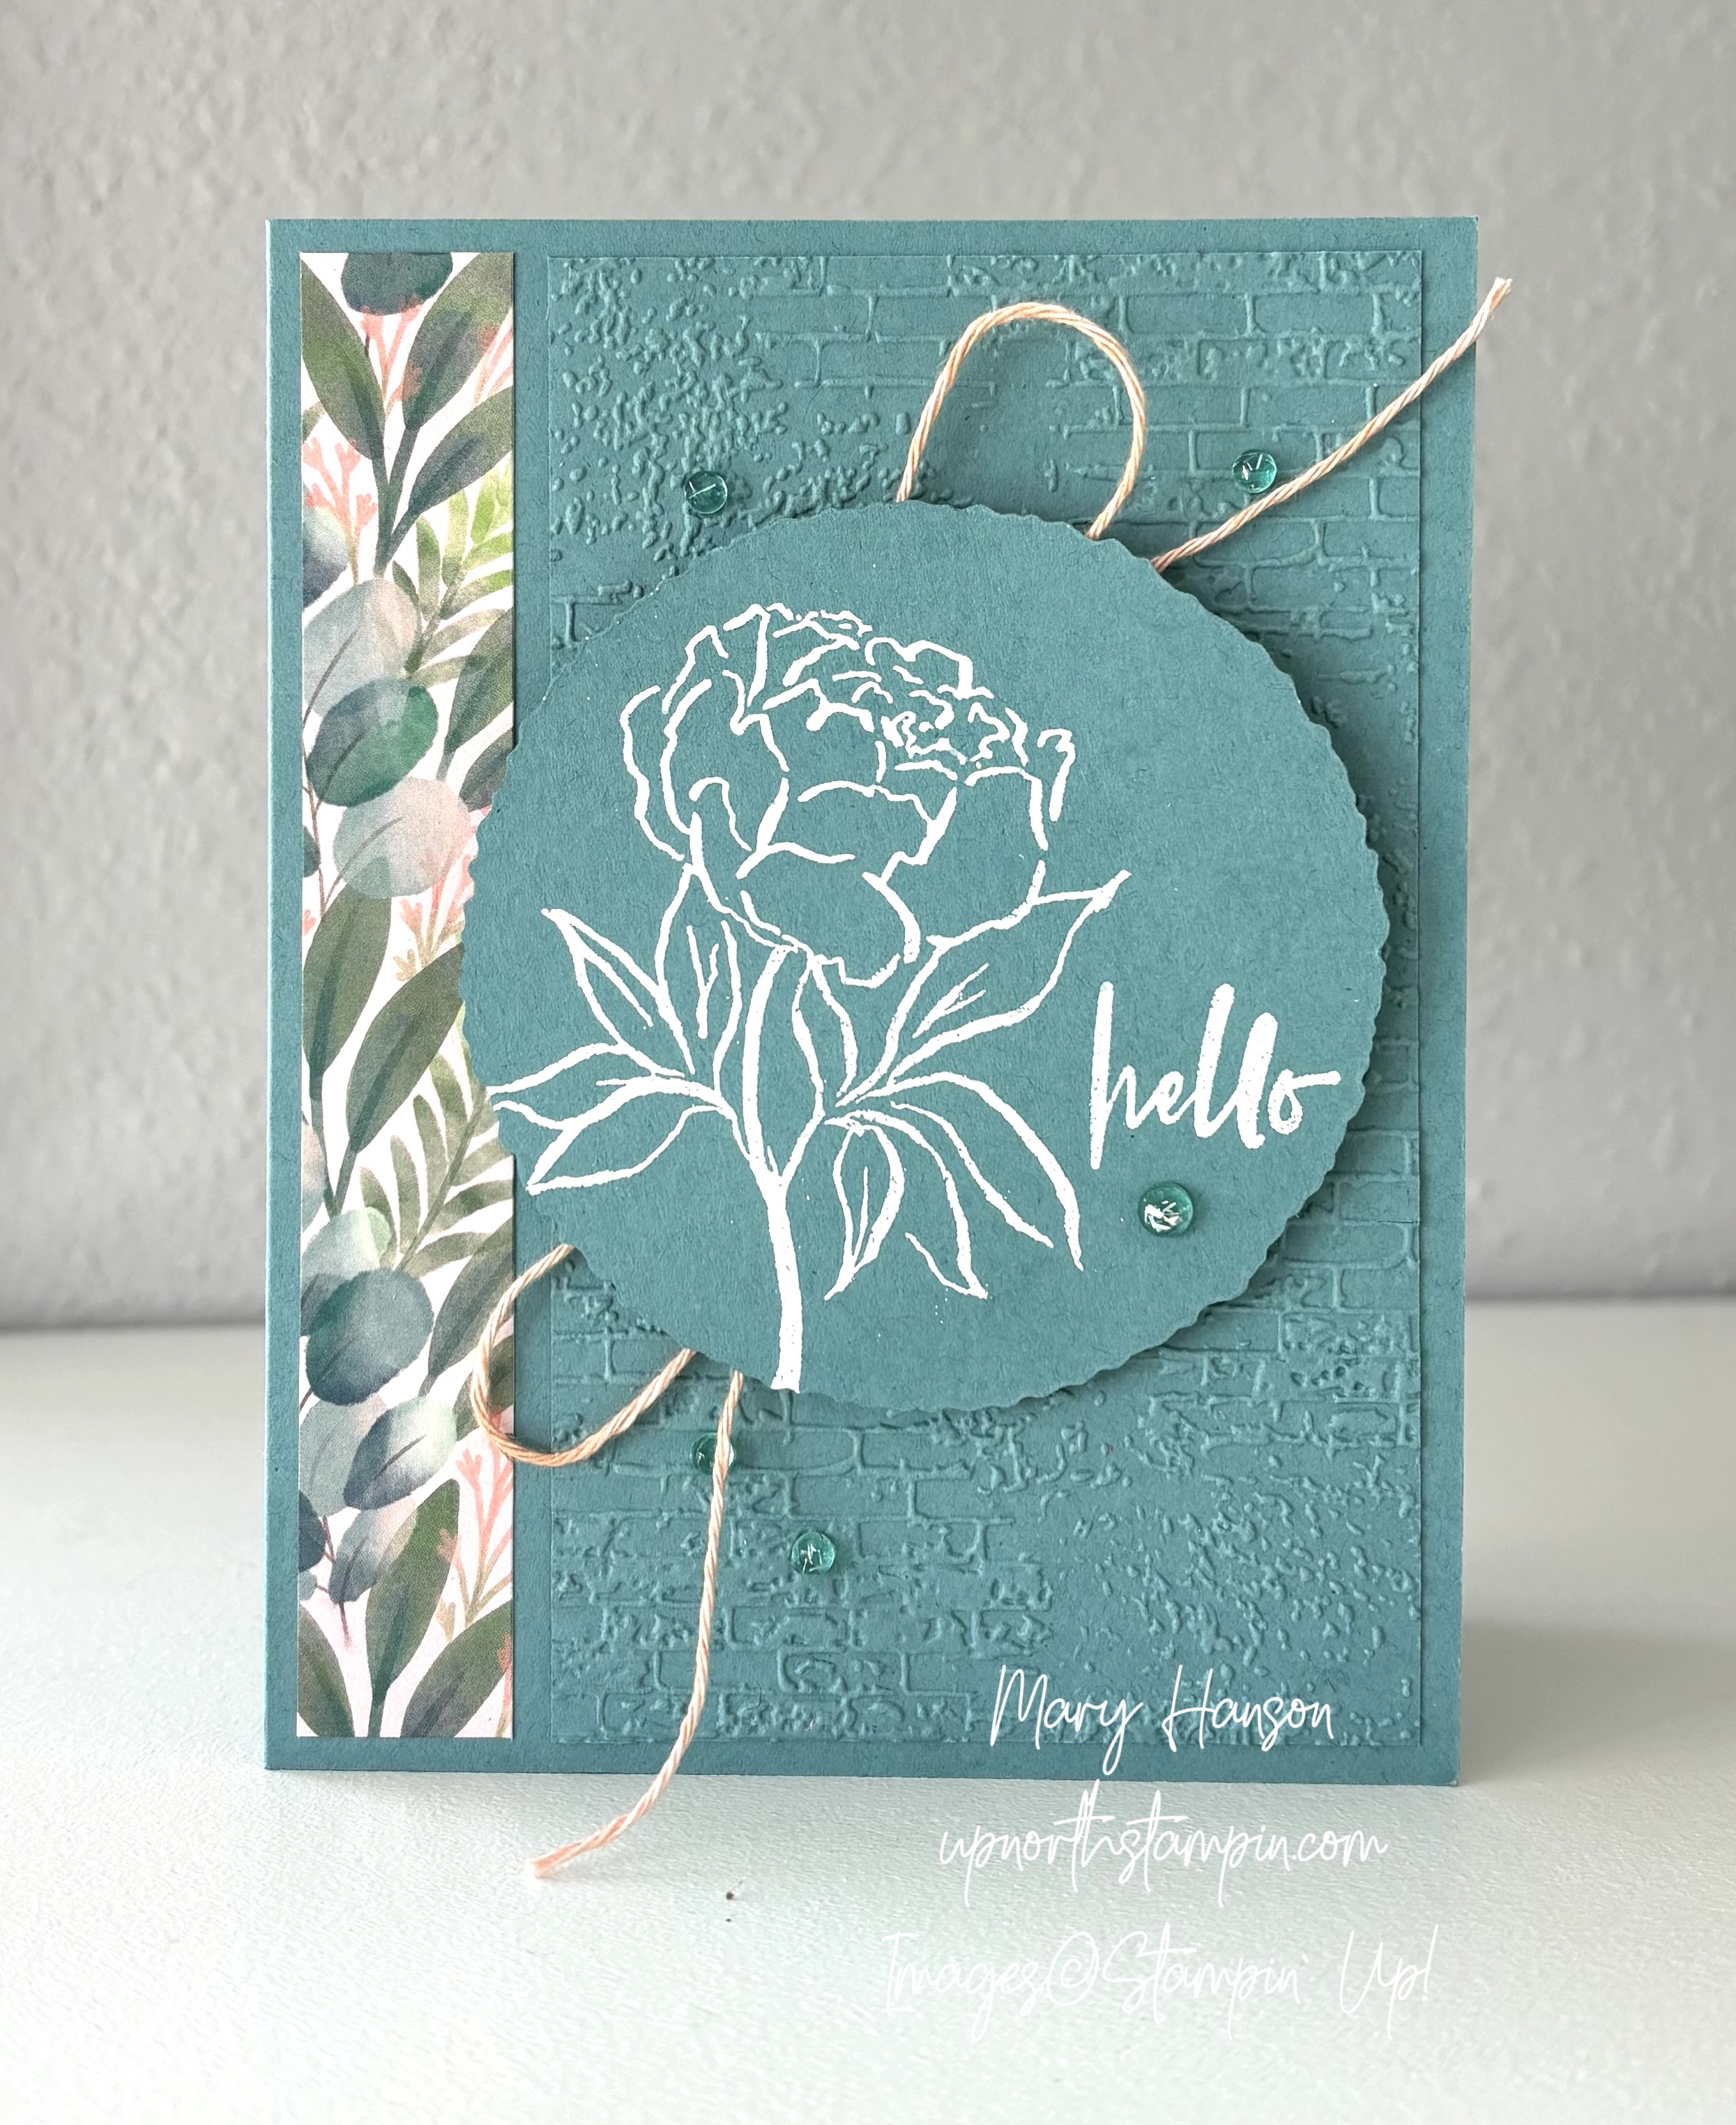
I recently took part in the June Crafty Collaborations Virtual Swap. It’s peony season up here in Northern Minnesota, so I decided to create a card using the Poised Peony Stamp Set.
Here are the Measurements:
- Card Base 8 1/2″ x 5 1/2,” scored at 4 1/4″
- Layer 1: Designer Series Paper strip 3/4″ x 5 1/4″
- Layer 1 Also: 3″ x 5 1/4″ Lost Lagoon panel, embossed with embossing folder
- Layer 2: Deckled Circles Die, 6th from the center
- Layer 3: Basic White Cardstock for inside of card: 5 1/4″ x 4″

Directions:
- Cut card base in Lost Lagoon to A2 size; score and fold in half.
- Adhere Designer Series Paper strip to the left side of card front. Emboss Lost Lagoon panel with embossing folder using Stampin’ Cut & Emboss Machine.
- Adhere embossed panel to fit on card base beside DSP strip with equal space on all sides.
- Cut Deckled Circle die in Lost Lagoon. Heat emboss peony stamp and sentiment on circle using white embossing powder.
- Using the Petal Pink ink pad, and your fingers, ‘dye’ a length of white baker’s twine to the proper shade of Petal Pink.
- Trim as desired and loop behind the sentiment circle, using tape adhesive. Add Stampin’ Dimensionals to Deckled Circle sentiment and add to card front. Add embellishments as desired to finish card.
There are so many ideas swimming in my head using their beautiful and simple Poised Peony stamp set. Get yours now to enjoy this summer! All the products above can be found below. Just click on one to start shopping with me!
Product List  | ||
 |  |  |
 | ||
 |  |  |
 |  |  |
") |  |
")
 Designer Series Paper")


EWPJKTSU is the June Host Code!
When you place an order of $50 or more online using the Host Code above, you will receive a free gift from me — a tutorial bundle of over 20 card tutorials with complete instructions and measurements!
Please let me know if you have any questions. And be sure to join my Up North Stampin’ Gang Facebook page. We are having SO much fun over there! We post, we share, and just enjoy life! Here’s the link to request to join: https://www.facebook.com/groups/199783410436824
Mary

