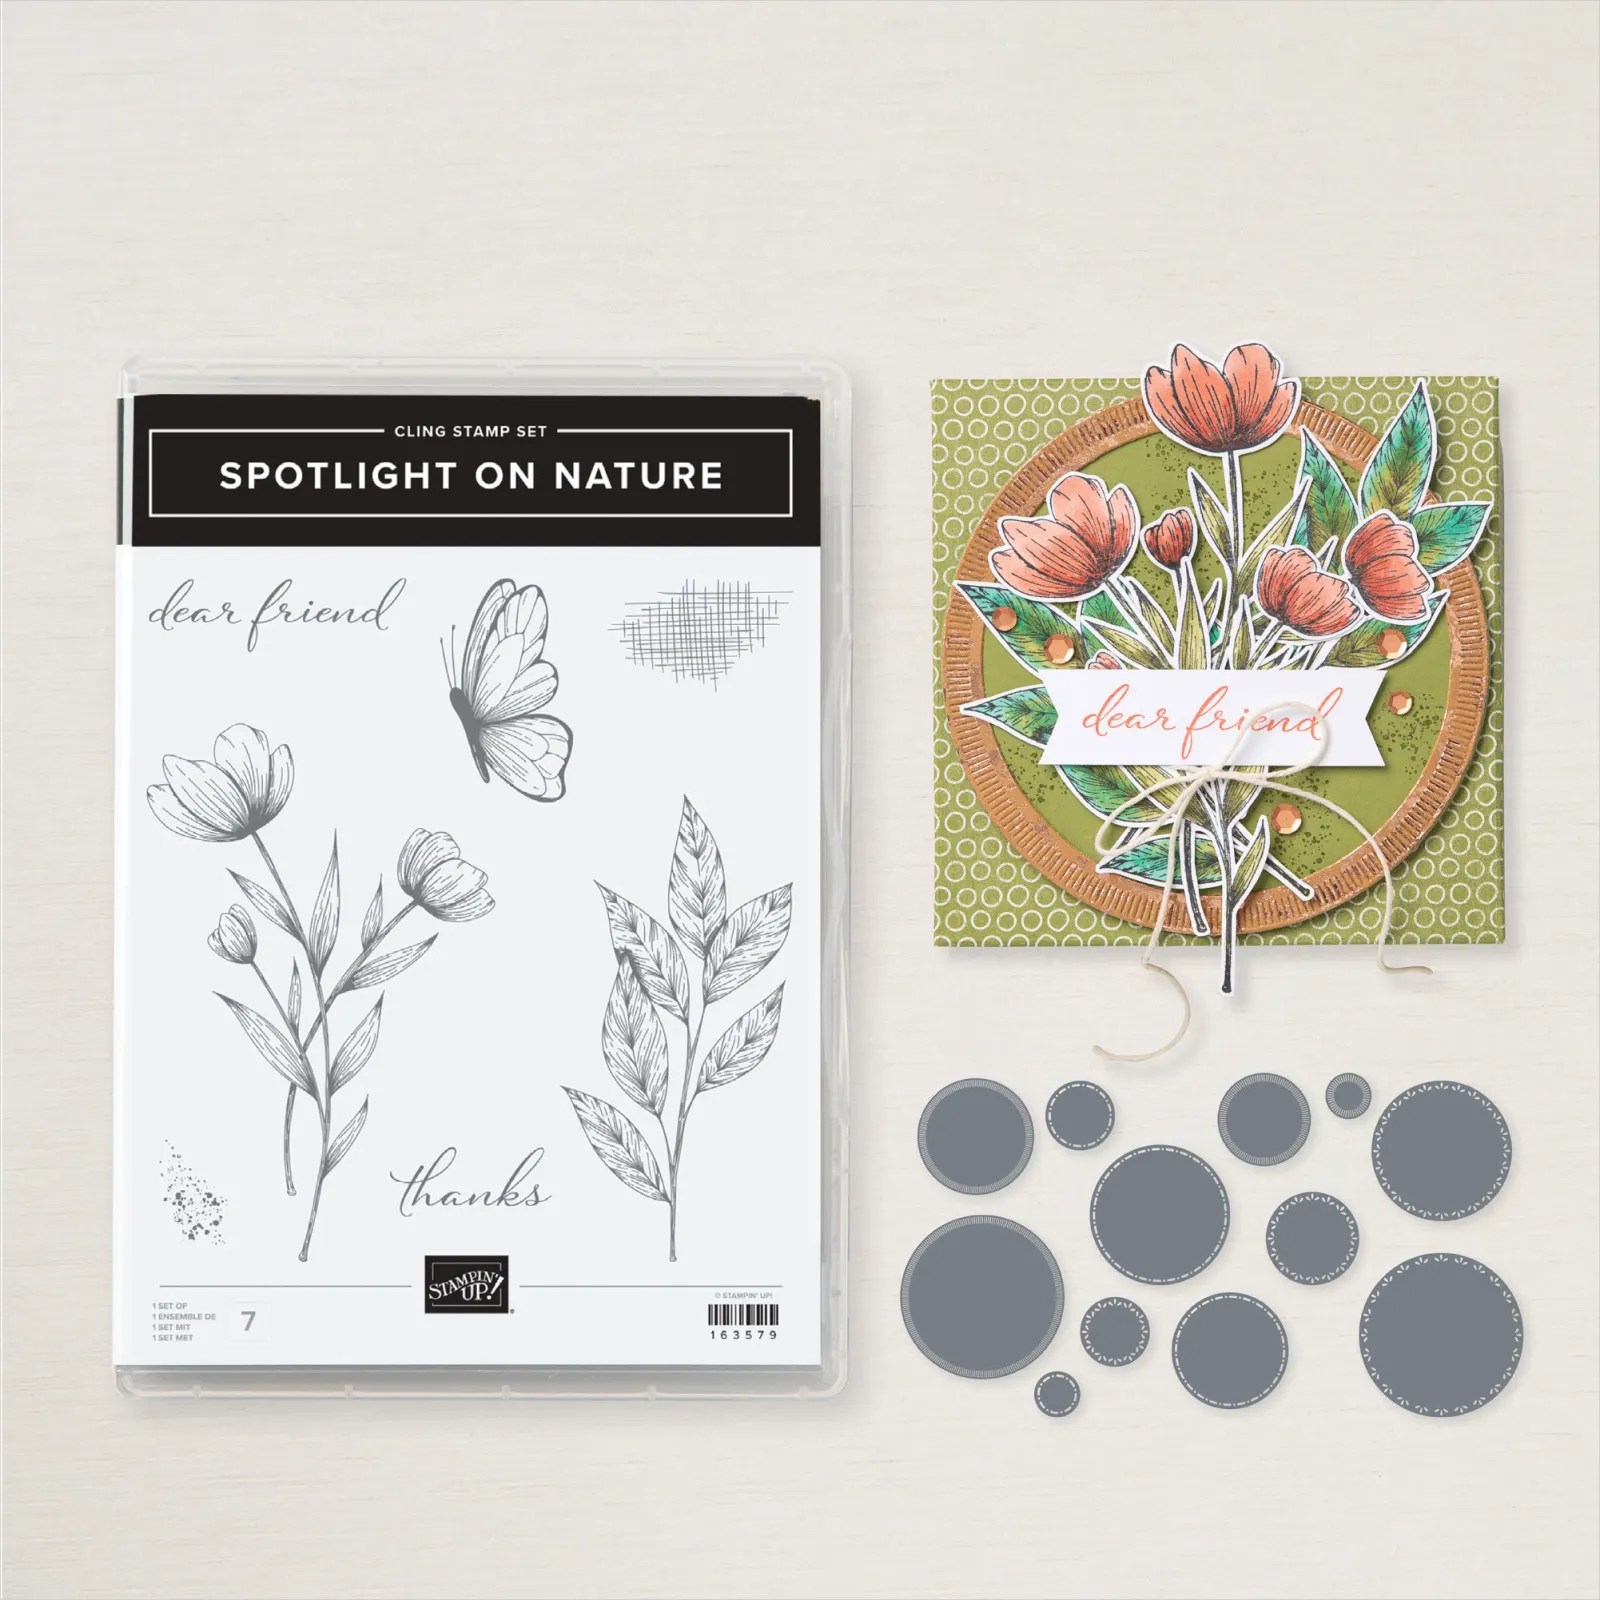
Hi again, everyone! Just letting you know that if you were looking for a few of the new bundles from Stampin’ Up’s annual catalog, and they were unavailable, they are now back in stock. These two super popular bundles come to my mind. Have you seen the Circle Dies from the Spotlifht on Nature bundle up close? They are FABULOUS — and perfect for so many backgrounds and sentiments. AND the rosettes are SO cute from the Round We Go bundle — lots of great samples out there on Pinterest!
Remember, all the Stamp/Die bundles are on sale for an ADDITIONAL 10% off their usual sale price, so 20% off total, for the month of June only! SHOP HERE to see all the Sale Bundles in one place!
When you place an order of $50 or more online using the Host Code above, you will receive a free gift from me — a tutorial bundle of over 20 card tutorials with complete instructions and measurements!
Please let me know if you have any questions. And be sure to join my Up North Stampin’ Gang Facebook page. We are having SO much fun over there! We post, we share, and just enjoy life! Here’s the link to request to join: https://www.facebook.com/groups/199783410436824
Boy oh Boy — Stampin’ Up! hit it out of the park with this new kit, found in the Online Exclusives or Kit Collection areas of the SU! website. Get this gorgeous kit while supplies last! Here are the two styles of cards you will create:
Aren’t they beautiful?? I honestly don’t know which one I love more!
Share heartfelt cards with the Expressions of Kindness Kit. Featuring nostalgic-looking floral designs in beautiful color tones, this kit is perfect for all-occasion cards for friends and loved ones. Pair the desired sentiment and images from the kit to quickly create timeless cards. Wish happy birthday, send a friendly note, or more, and let the people in your life know you care!
You will receive everything you need to create 8 beautiful cards. The Kit includes:
Expressions of Kindness Photopolymer Stamp Set
Clear stamp block
Blackberry Bliss Stampin’ Spot
Predesigned projects
Step-by-step instructions
Precut pieces (No prep work! Get right to crafting)
Make 8 cards, 4 each of 2 designs
8 printed card bases
8 printed envelopes
Folded card: 5-1/2″ x 4-1/4″ (14 x 10.8 cm)
Printed die-cut images and gold foil labels
Adhesive-backed gold sparkle gems
Enough adhesive to complete projects
As mentioned, there is a stamp set included in this kit, and it’ll be great for uses throughout the year!
Did anyone notice the sweet Stamp that says “Kindly deliver to:?” Super cute for the front of your envelope!
When you place an order of $50 or more online using the Host Code above, you will receive a free gift from me — a tutorial bundle of over 20 card tutorials with complete instructions and measurements!
Please let me know if you have any questions. And be sure to join my Up North Stampin’ Gang Facebook page. We are having SO much fun over there! We post, we share, and just enjoy life! Here’s the link to request to join: https://www.facebook.com/groups/199783410436824
The Joy Fold card layout has been around for awhile, but for whatever reason, this is the first time I’ve made one. This joy fold was made for my card club, and we sure had fun making it, using the Frames & Flowers Designer Series Papers. Here’s the fun fold card I created:
Although many people have created this Joy Fold design over the years, I took my inspiration from Lynn Dunn, who had such clear instructions! Here are the easy steps:
Start with an 8 1/2 x 11” cardstock. On 11” side, cut at 4 1/4.” You will have a 4-1/4 x 8 1/2 piece of cardstock.
Take one of these card bases and score it at 5-1/2 inches on the 8-1/2 inch side.
Fold on the 5-1/2 inch score line and use a bone folder to burnish the fold. You will end up with a 3 x 4-1/4″ flap on the card base.
Interactive Fun Fold Section:
To create the inside fun fold section, cut a piece of the same color cardstock @ 3 x 8.” You should have plenty of cardstock left from the original 8-1/2 x 11 inch sheet to cut this piece.
Score this piece, on the 8 inch side, at 4 inches.
Fold on the score line and use a bone folder to burnish the fold. You will end up with a piece of cardstock that measures 3 x 4 inches when closed.
Now before you adhere these pieces together, you need to decorate the card!
The base of the Joy Fold Card is the 4-1/4 x 8 1/2 inch piece of cardstock that we scored at 5-1/2 inches (refer to the Joy Fold Card Base instructions above).
Cut a 5-1/4 x 4 inch piece of patterned paper and adhere it to the inside section of the card base.
Cut a 2-3/4 x 4 piece of patterned paper and adhere it to the front of the flap on the card base. Note: I used the same patterned paper to decorate these two sections of the base of the card. However, you could certainly use different patterns or even embossed cardstock to decorate the different sections of this card base.
It’s important to pay attention to the direction of the fold on as you are decorating this piece. When this piece is adhered to the card base, the folded section will be on the right hand side.
Decorate the top front of the card. I used one of the pieces from the Frames & Flowers Designer Series Papers. Love the little punch-out elements that I can just pop up onto my card fronts!
Once you do this fold once, you’ll see how very easy it is!
BEFORE YOU GO, a reminder that Stampin’ Up! has a sale going on the month of June! All bundles are 10% off the ALREADY BUNDLED price of 10% off, so guess what? That means 20% off all stamp and die bundles! Not only that, but all machines are 10% off this month STARTING JUNE 5.
When you place an order of $50 or more online using the Host Code above, you will receive a free gift from me — a tutorial bundle of over 20 card tutorials with complete instructions and measurements!
Please let me know if you have any questions. And be sure to join my Up North Stampin’ Gang Facebook page. We are having SO much fun over there! We post, we share, and just enjoy life! Here’s the link to request to join: https://www.facebook.com/groups/199783410436824
Welcome to the Stampin’ Pretty Pals’ Blog Hop! This month, the theme is the new 2024-2024 In Colors. We hope to inspire you with our creations today! You will find the lineup at the end of my post to help you “hop” along from Pal to Pal.
All of the 2024-2026 In Colors are so pretty, but this fun fold card focuses on one of my favorites: Peach Pie. This new color is so beautiful and warm, and pairs well with another new color: Petunia Pop. Here’s the fun fold card I created:
The card features papers from two sets of Designer Series Papers: Unbounded Beauty and Country Woods. I chose this particular wood pattern because it has shades of a warm ‘peachy-pink’ in the grain. The steps to making this fun fold are quite easy. Keep scrolling for a visual guide as well!
Start with a piece of 8 1/2″ x 11” Peach Pie cardstock. Mark a tick with a pencil on the 8 1/2″ side at 3” from the right side of the cardstock and at 3” from the left at the bottom of the cardstock, and then cut diagonally from one tick mark to the other. One piece of cardstock makes two card bases. Set one card base away for another time. (See photo below where I’ve diagrammed the tick marks.)
Take one card base and score on the long side at 3″ and 6 3/4,” as shown. Fold and burnish at the scorelines. This is the foundation for your fun fold.
Cut three coordinating panels of Designer Series Paper:
Large Panel: 4” x 5 1/4″
Medium Panel: 3 1/2″ x 4 1/4″
Small Panel: 2 3/4″ x 3 1/2″
Also cut a panel from Basic White cardstock at 3 1/2″ x 4 1/4″ for the inside of the card.
To cut the correct angles for the DSP, simply take the piece of DSP for the correct panel and line it up at the very top corner of the panel you’ll be adhering it to. Make a tick mark or draw a light line with a pencil to show what will need to be cut off. (See below!) Trim with your paper snips, then move down to center it on the panel. The angle will be just right! Here’s a little visual step-by-step to help you get it. Click on the first photo, and advance your way through. Once you do it once, it’s super easy!
Adhere all the DSP panels to your card base. When opened, the DSP lines up like this, with the white cardstock as the second panel. When closed, the white doesn’t show. The wood-grained cardstock is on the opposite side.
After adhering all the panels, it’s time to decorate the front of the card. Cut a diecut in Peach Pie from the Unbounded Love Dies and heat emboss a sentiment from the Unbounded Love Stamp Set. Cut a few decorative sprigs from the same dies in Petunia Pop, and then pop the sentiment piece up onto the card front with Stampin’ Dimensionals, tucking the sprigs behind it. Finish the card with a few embellishments, and you are done!
I hope you enjoyed my project. All the products I used can be found below. Just click on any item to start shopping with me!
There’s more inspiration to show you, so use the lineup below to visit the rest of the Design Team. Please mark your calendars for our next blog hop next month, when our theme will be Our Favorites in the New Catalog.
Until then, have fun in your craft space. BEFORE YOU GO, a reminder that Stampin’ Up! has a sale going on the month of June! All bundles are 10% off the ALREADY BUNDLED price of 10% off, so guess what? That means 20% off all stamp and die bundles! Not only that, but all machines are 10% off this month STARTING JUNE 5.
When you place an order of $50 or more online using the Host Code above, you will receive a free gift from me — a tutorial bundle of over 20 card tutorials with complete instructions and measurements!
Please let me know if you have any questions. And be sure to join my Up North Stampin’ Gang Facebook page. We are having SO much fun over there! We post, we share, and just enjoy life! Here’s the link to request to join: https://www.facebook.com/groups/199783410436824
We all get it – that dreaded ‘stamper’s block’ where we look at the beautiful papercrafting products in front of us and can’t think of ONE thing to make….devoid of creative juices. Well, do not despair. There are ALWAYS things we can do to get ourselves creating again.
CASE a project – To case is to Copy And Share Everything…
You can CASE a project from the catalog. That’s what all those beautiful samples are for — make it exactly as you see it, or take your own twist at it!
CASE something from Pinterest – Make sure you give credit to the person who originally made it. This is just common courtesy.
Take out a stamp set you haven’t used for a long time. Maybe it’s an old favorite! It might just stir up some creativity!
Die cut different shapes from all kinds of dies! I love having little stashes of my favorite diecuts — especially sentiment dies — so I don’t always have to pull out everything to make a single sentiment piece!
4. Die cut shapes from our Designer Series Papers that coordinate with our dies. They’ll be ready the next time you want them!
5. Make a kit! The Stampin’ Up! kits are so handy and fun – everything you need it right there, no thinking involved. And they’re beautiful!
6. Stamp some images using Tuxedo Black ink and color them. Use your Stampin’ Blends, Stampin’ Markers, or colored pencils. Coloring can be so relaxing.
7. Ephemera, ephemera…I even like just saying the WORD! Use the new Ehemera packs to make a quic, and fun card. The graphic elements use the Stampin’ Up! colors for perfect coordination!
Any of these steps might easily get your creativity moving in the right direction again!
Did these ideas help? What do YOU do when you get Stamper’s Block? Please share in a comment below!
BEFORE YOU GO, a reminder that Stampin’ Up! has a sale going on the month of June! All bundles are 10% off the ALREADY BUNDLED price of 10% off, so guess what? That means 20% off all stamp and die bundles! Not only that, but all machines are 10% off this month STARTING JUNE 5.
EWPJKTSU is the June Host Code!
When you place an order of $50 or more online using the Host Code above, you will receive a free gift from me — a tutorial bundle of over 20 card tutorials with complete instructions and measurements!
Please let me know if you have any questions. And be sure to join my Up North Stampin’ Gang Facebook page. We are having SO much fun over there! We post, we share, and just enjoy life! Here’s the link to request to join: https://www.facebook.com/groups/199783410436824
The Flowering Zinnias Suite continues to delight papercrafters with its zinnia stamps and dies, along with bright and beautiful Designer Series Papers and a zinnia embossing folder. I seriously can’t get enough of the entire suite! Here is a project I made as a card with a fun surprise inside!
The steps were quite easy!
I created a card base from cardstock cut at 11” x 4 1/4”.
I scored that panel on the long side at 4 3/4,” flipped the paper all the way around, and scored at 1 1/2” on the other side (which will become a little pocket for the surprise — see below.)
Before folding the card at the score lines, I embossed the front side ONLY with the Zinnia embossing folder.
I added a 1 1/2” strip of DSP on the front
I cut out five pieces of the zinnia dies plus one leaf to create one flower with an accompanying leaf, and layered them onto the front of the card.
I folded up the 1 1/2” side of the card, and add Tear n Tape on both sides to make a pocket.
I added a sentiment panel on the inside of the card.
I tucked a zinnia seed packet inside the pocket, and I was done!
These zinnias are so bright and cheerful. The papers are some of the prettiest we’ve had. Have you seen them?
Get this sweet bundle now so you can use them on all your summer projects! All the products above can be found below. Just click on one to start shopping with me!
BEFORE YOU GO, a reminder that Stampin’ Up! has a sale going on the month of June! All bundles are 10% off the ALREADY BUNDLED price of 10% off, so guess what? That means 20% off all stamp and die bundles! Not only that, but all machines are 10% off this month STARTING JUNE 5.
When you place an order of $50 or more online using the Host Code above, you will receive a free gift from me — a tutorial bundle of over 20 card tutorials with complete instructions and measurements!
Please let me know if you have any questions. And be sure to join my Up North Stampin’ Gang Facebook page. We are having SO much fun over there! We post, we share, and just enjoy life! Here’s the link to request to join: https://www.facebook.com/groups/199783410436824
Two new kits hit the Stampin’ Up! website today, and they’re both so cool, I had to show them to you!
The first is a beautiful card kit called “Expressions of Kindness.”
Share heartfelt cards with the Expressions of Kindness Kit. Featuring nostalgic-looking floral designs in beautiful color tones, this kit is perfect for all-occasion cards for friends and loved ones. Pair the desired sentiment and images from the kit to quickly create timeless cards. Wish happy birthday, send a friendly note, or more, and let the people in your life know you care!
Kit includes: * Expressions of Kindness Photopolymer Stamp Set * Blackberry Bliss Stampin’ Spot * Predesigned projects * Step-by-step instructions * Precut pieces (No prep work! Get right to crafting) * Make 8 cards, 4 each of 2 designs * 8 printed card bases * 8 printed envelopes * Folded card: 5-1/2″ x 4-1/4″ * Printed die-cut images and gold foil labels * Adhesive-backed gold sparkle gems * Enough adhesive to complete projects
Look at all the fun supplies you receive with this kit!
Have fun watching while Sara Douglass, CEO of Stampin’ Up! puts this beautiful kit together!
Make a handmade travel journal with the Scenic Route Travel Journal Kit. This kit is great for memory keeping. Use it to document a special moment or trip spent with loved ones and friends! You can arrange the included fold-out pages the way you desire, as well as the sentiments and images, and create the words of your choice using the adhesive-backed alphabet sheets. The sticker sentiments are available in English, French, German, and Dutch.
Kit includes: * Step-by-step instructions and guided layouts * Precut pieces (No prep work! Get right to crafting) * Make 1 travel journal * 2 fold-out pages with pockets * 2 tri-fold pages * Size of the travel journal: 5-3/4″ x 9-1/4″ x 7/8″ (14.6 x 23.5 x 2.2 cm) * Printed adhesive-backed die-cut alphabets, sentiments, and images * Paper die-cut journaling pieces * Enough adhesive to complete projects
Product colors: Calypso Coral, Early Espresso, Lost Lagoon, Petal Pink, Wild Wheat
All the fun ingredients included in your kit!
Watch this fun unboxing video!
Kits by Stampin’ Up! are perfect for new crafters, busy crafters, or crafters who want quick and easy projects. All-inclusive project kits have everything you need in one box! Give as a gift or try them yourself. Kits are while supplies last. Order today!
BEFORE YOU GO, a reminder that Stampin’ Up! has a sale going on the month of June! All bundles are 10% off the ALREADY BUNDLED price of 10% off, so guess what? That means 20% off all stamp and die bundles! Not only that, but all machines are 10% off this month STARTING JUNE 5.
EWPJKTSU is the June Host Code!
When you place an order of $50 or more online using the Host Code above, you will receive a free gift from me — a tutorial bundle of over 20 card tutorials with complete instructions and measurements!
Please let me know if you have any questions. And be sure to join my Up North Stampin’ Gang Facebook page. We are having SO much fun over there! We post, we share, and just enjoy life! Here’s the link to request to join: https://www.facebook.com/groups/199783410436824
I recently took part in the May Crafty Collaborations Virtual Swap. The theme of the swap was “New Products,” so I created a card featuring the new and beautiful “Thoughtful Journey” Designer Series Papers, as well as the “Thoughtful Designs” Specialty Designer Papers. Here is my project from the swap:
This card goes together quickly with some cutting on my Stampin’ Trimmer:
Card Base: 8 1/2″ X 11″, scored at 4 1/4″
Layer 1: Thoughtful Journey Designer Series Paper, cut at 5 3/8″ X 4 1/8″
Layer 5: Thoughtful Journey Designer Series Paper, 4 5/8″ by 1 7/8″
Layer 6: Sentiment Panel from Unbounded Love Dies in Petunia Pop Cardstock
Cut a standard A2 card base at 8 1/2″ X 11,” scored at 4 1/4.”
Adhere Layer 1 to the card base. Adhere Layer 3 to Layer 2, then adhere to the card front, centered.
Adhere Layer 5 to Layer 4, then adhere to the card front, to the left of center.
Cut the Sentiment Panel from the Unbounded Love dies using the Stampin’ Cut and Emboss Machine.
Rub the Embossing Buddy over the sentiment panel, then stamp the sentiment from the Unbounded Love stamp set using the Versamark Pad. Heat emboss the sentiment in white embossing powder using the Heat Tool.
Tie a bow using the White Baker’s Twine, then adhere on back of sentiment panel.
Pop the sentiment panel onto card front toward the bottom right using Stampin’ Dimensionals.
Embellish with three Adhesive-Backed Pearls in Petunia Pop.
Optional: Decorate envelope flap with coordinating Thoughtful Designs Specialty Designer Series Paper by applying adhesive to the flap, then adhering patterned paper (cut slightly larger than the flap) to the flap, then snipping excess paper around the flap.
If you haven’t had a chance to get these beautiful papers, I hope I helped convince you that there are so many ways to enjoy this paper! All the products above can be found below. Just click on one to start shopping with me!
BEFORE YOU GO, a reminder that Stampin’ Up! has a sale going on the month of June! All bundles are 10% off the ALREADY BUNDLED price of 10% off, so guess what? That means 20% off all stamp and die bundles! Not only that, but all machines are 10% off this month STARTING JUNE 5.
When you place an order of $50 or more online using the Host Code above, you will receive a free gift from me — a tutorial bundle of over 20 card tutorials with complete instructions and measurements!
Please let me know if you have any questions. And be sure to join my Up North Stampin’ Gang Facebook page. We are having SO much fun over there! We post, we share, and just enjoy life! Here’s the link to request to join: https://www.facebook.com/groups/199783410436824
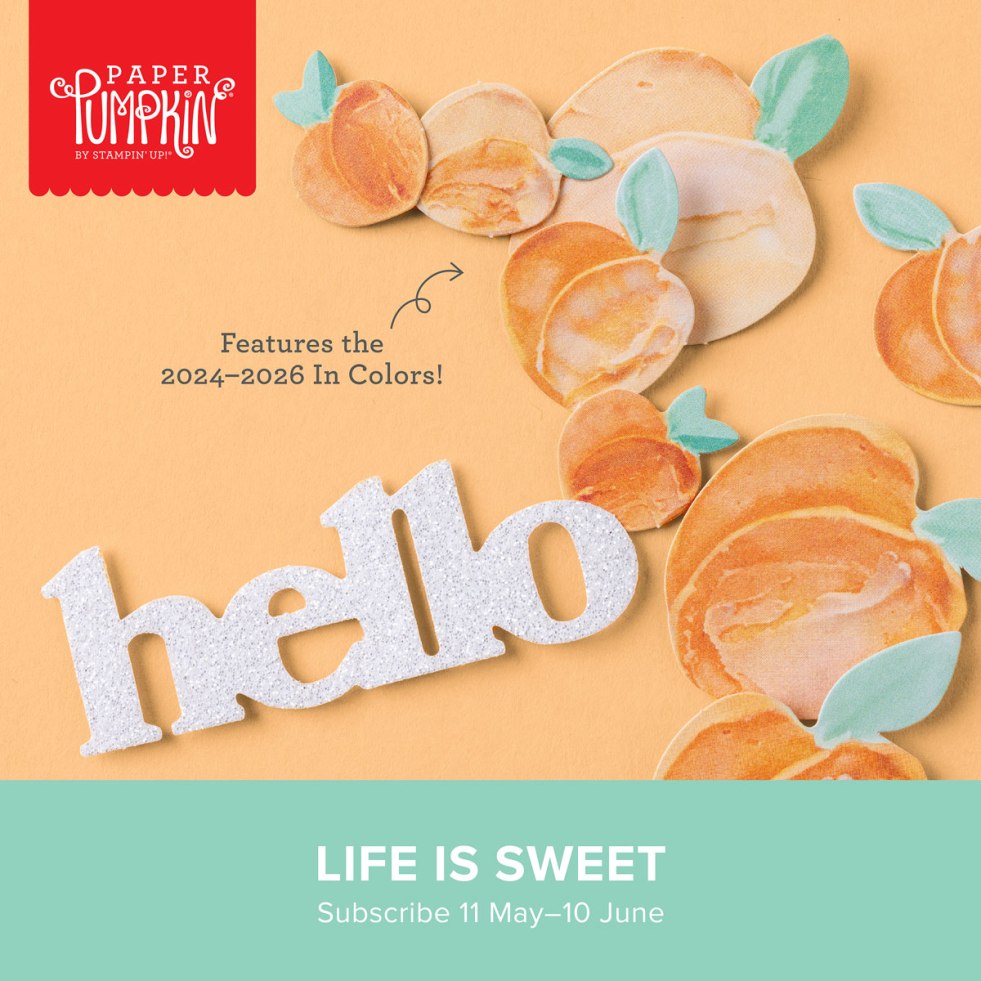
Celebrate the sweet things in life with textured, artistic cards. Subscribe May 10-June 10!
You have a few days left to jump onto the Paper Pumpkin bandwagon! I’ve been receiving Paper Pumpkin kits for many years, and I just love the fun and anticipation of my little box of creative fun! If you subscribe by the 10th of June, you’ll be receiving this “Life is Sweet” June kit. Although the exact contents of the kit are always a surprise, we have gotten this little ‘sneak peek,’ and I already can’t wait to get mine, full of summery goodness. Look at this fun fruit, and the sparkly letter! Here’s what we know about the kit so far:
• Makes 9 cards: 3 each of 3 designs with 9 coordinating envelopes
• Iridescent glimmer sentiments and precut paper pieces
• Vellum accents, iridescent pearls, and linen thread
• Coordinating colors: Poppy Parade, Peach Pie, Lemon Lolly, Shy Shamrock (Classic Stampin’ Spot), Pool Party, Pretty In Pink
You might be asking, What is Paper Pumpkin?
Paper Pumpkin is our monthly One-Stop Box™ that offers a unique variety of paper projects for subscribers of any skill level to enjoy! These thoughtfully-themed and all-inclusive craft kits will help you to explore your creativity, try new techniques, and discover your potential in papercrafting.
You can subscribe to Paper Pumpkin by going to paperpumpkin.com and completing the info. This is what I do. I can skip a month if I’m busy, suspend my subscription, or stop anytime. But why would I do any of those things? Hee hee! It’s way too much fun!
You can also buy a number of months’ worth of boxes at stampinup.com and enter the special code that gets emailed to you at paperpumpkin.com. Some people like to buy a one-month, three-month, six-month, or even twelve-month subscription for the discounted prices as you go up in months, OR to receive stampin’ rewards because the Paper Pumpkins are a part of a Stampin’ Up! order.
It’s totally up to you how you do it — just do it! You’ll have so much fun creating with friends, children, grandchildren, or all by yourself with a cup of coffee or a nice glass of something else!
Be sure to use this Host Code for JUNE if you make an online order of $50 or more. You will receive (from me) a free gift from me!
Please Note: This host code is not for club members.
Please let me know if you have any questions. And be sure to join my Up North Stampin’ Gang Facebook page. We are having SO much fun over there! We post, we share, and just enjoy life! Here’s the link to request to join: https://www.facebook.com/groups/199783410436824
You have about three days to take advantage of this fantastic deal. To be honest, I can’t remember when we’ve seen an Ultimate Bundle offer like this! When you join Stampin’ Up! in May 2024, in addition to the $125 in products that you get to select, you will also receive the following products for FREE!
All 5 New In Color Ink Pads – $40.50 value
All 5 New In Color Markers – $17.50 value
Assorted Pack of In Color Cardstock – $11.50 Value
In Color Designer Series Paper – $12.50 Value
This really is a GREAT deal! FREE SHIPPING, $125 in products PLUS the In Color Products!! A $207 value!
In addition, there are also many benefits to joining Stampin’ Up!
20-25% off all purchases
A chance to be a part of the nationally renowned Stampin’ Pretty Pals. We have SO much fun together!
Early releases and sneak peeks, plus FREE catalogs sent directly to you.
NO need to sell, unless you want to. Enjoy your discount! Have an event! Offer the catalog to a friend — You Do YOU! No commitments, nothing to give back. Email me with any questions, or message me on Facebook!

")


")


")
 Designer Series Paper")


")
 Designer Series Paper")
 Designer Series Paper")


")


")

 Designer Series Paper")


 Designer Series Paper")
 Specialty Designer Series Paper")