Catch the Petal Passion!

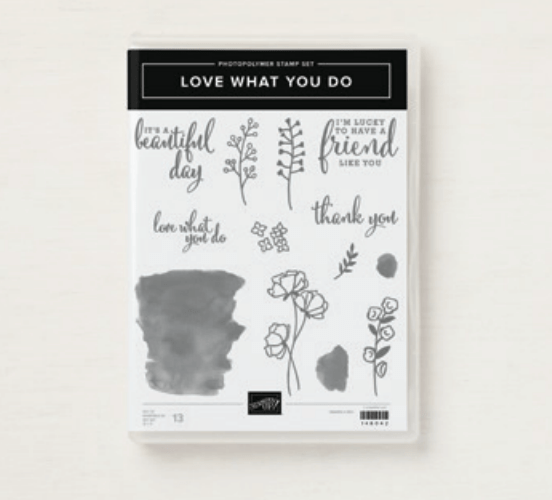
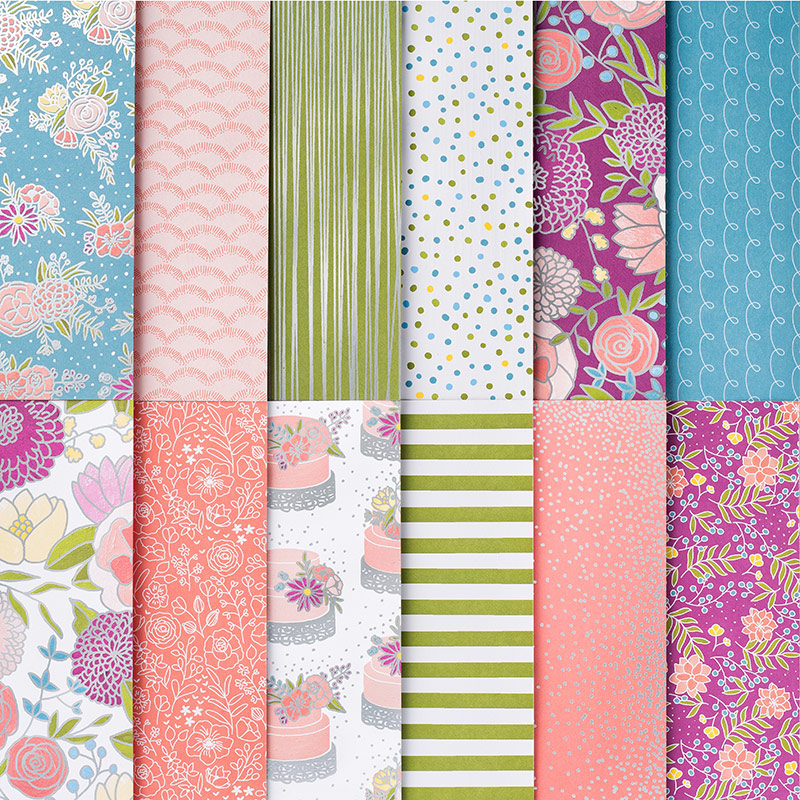
Oh, how I loved this Petal Passion Designer Series Paper from the 2018 Stampin’ Up! Occasions Catalog. I’ve loved working with it, but it’s now onto the Stampin’ Up! Retiring Products List, and only available while stocks last through May 31st.

Petal Passion

The three main reasons I loved it, were:

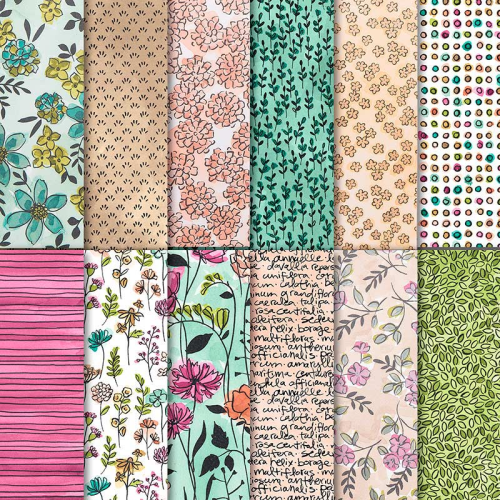
  • It is a great neutral paper as a black and white, but this one for me was particularly useful because the contrast of the black was toned down quite a bit by the sketch look of the images, so there is actually quite a lot of softer grey in there too;
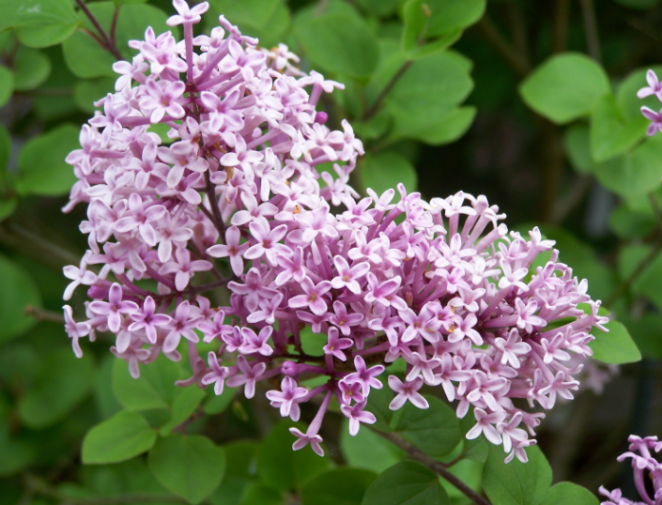
  • It has a floral / nature theme which is my favorite paper themes;
  • It was FABULOUS to color with Stampin’ Blends ( 11 fabulous new colors in light and dark are coming June 1st!)
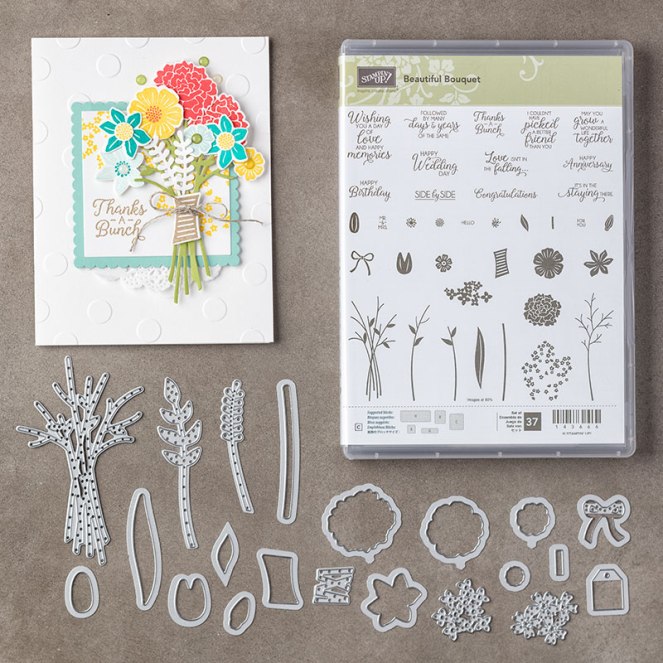
  • It coordinates beautifully with the Petal Palette bundle (carrying over to the 2018-2019 Stampin’ Up! Annual Catalog, but only available at the 10%  bundle price until May 31st.

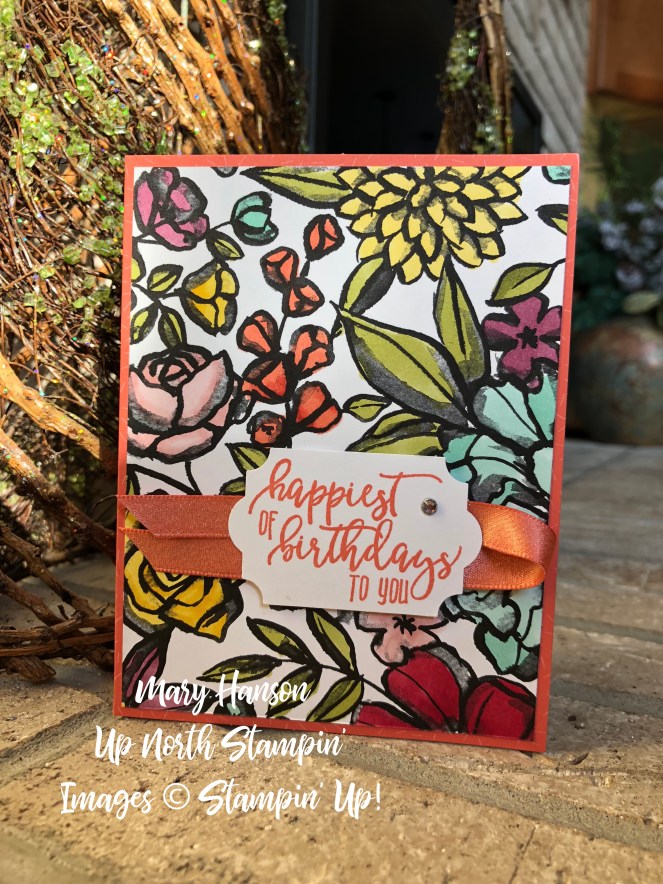
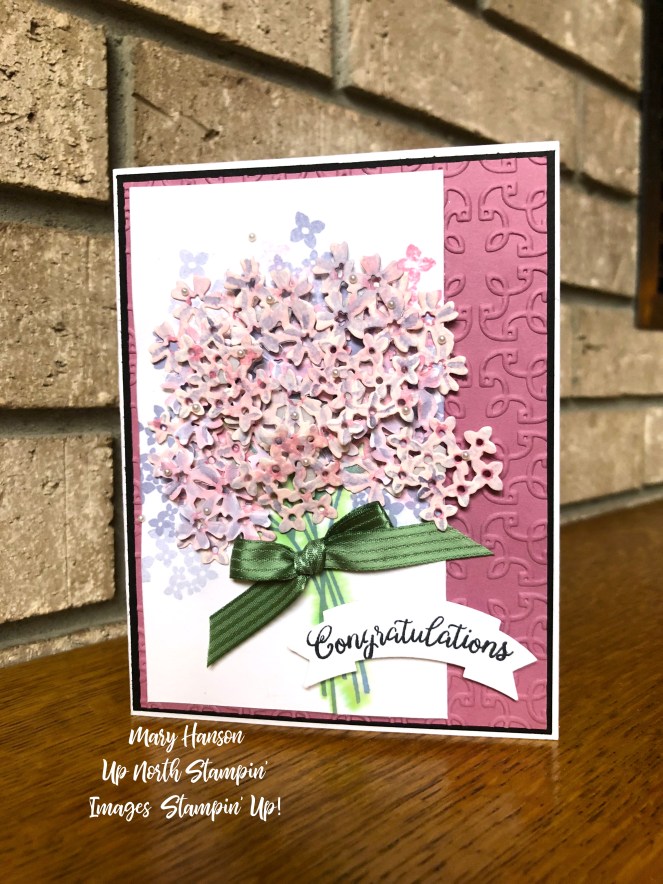
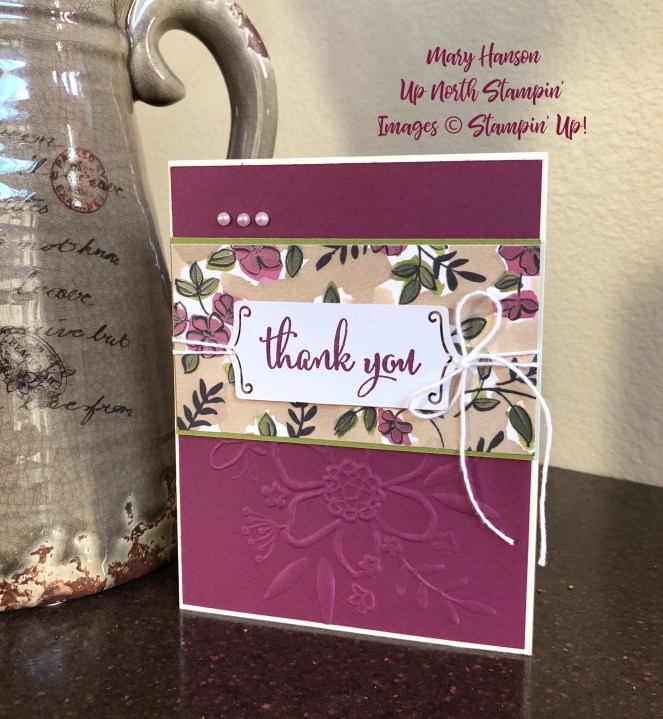
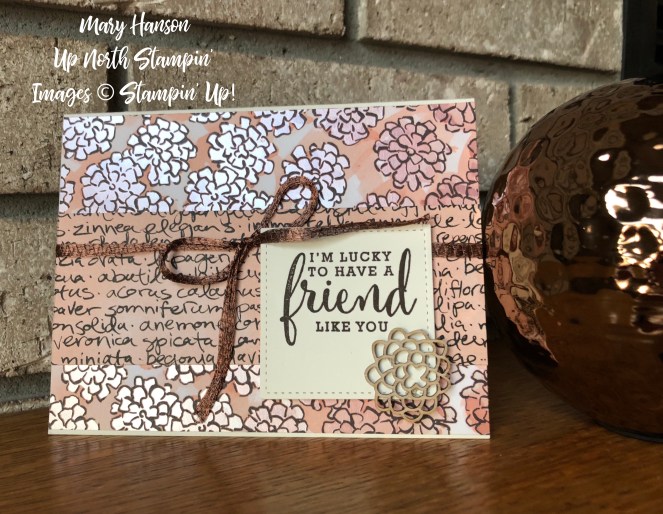
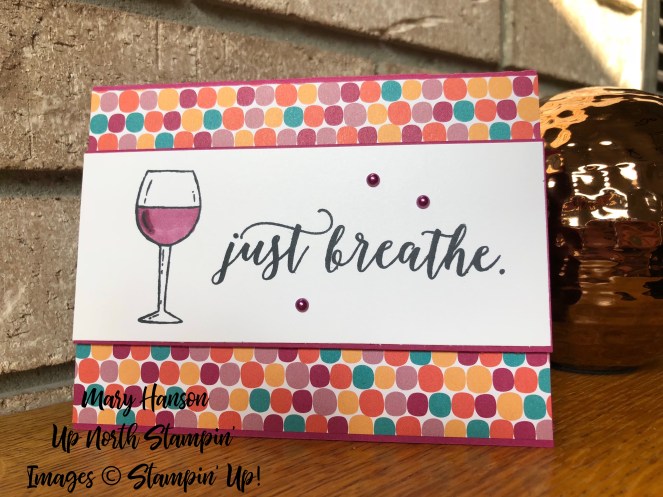
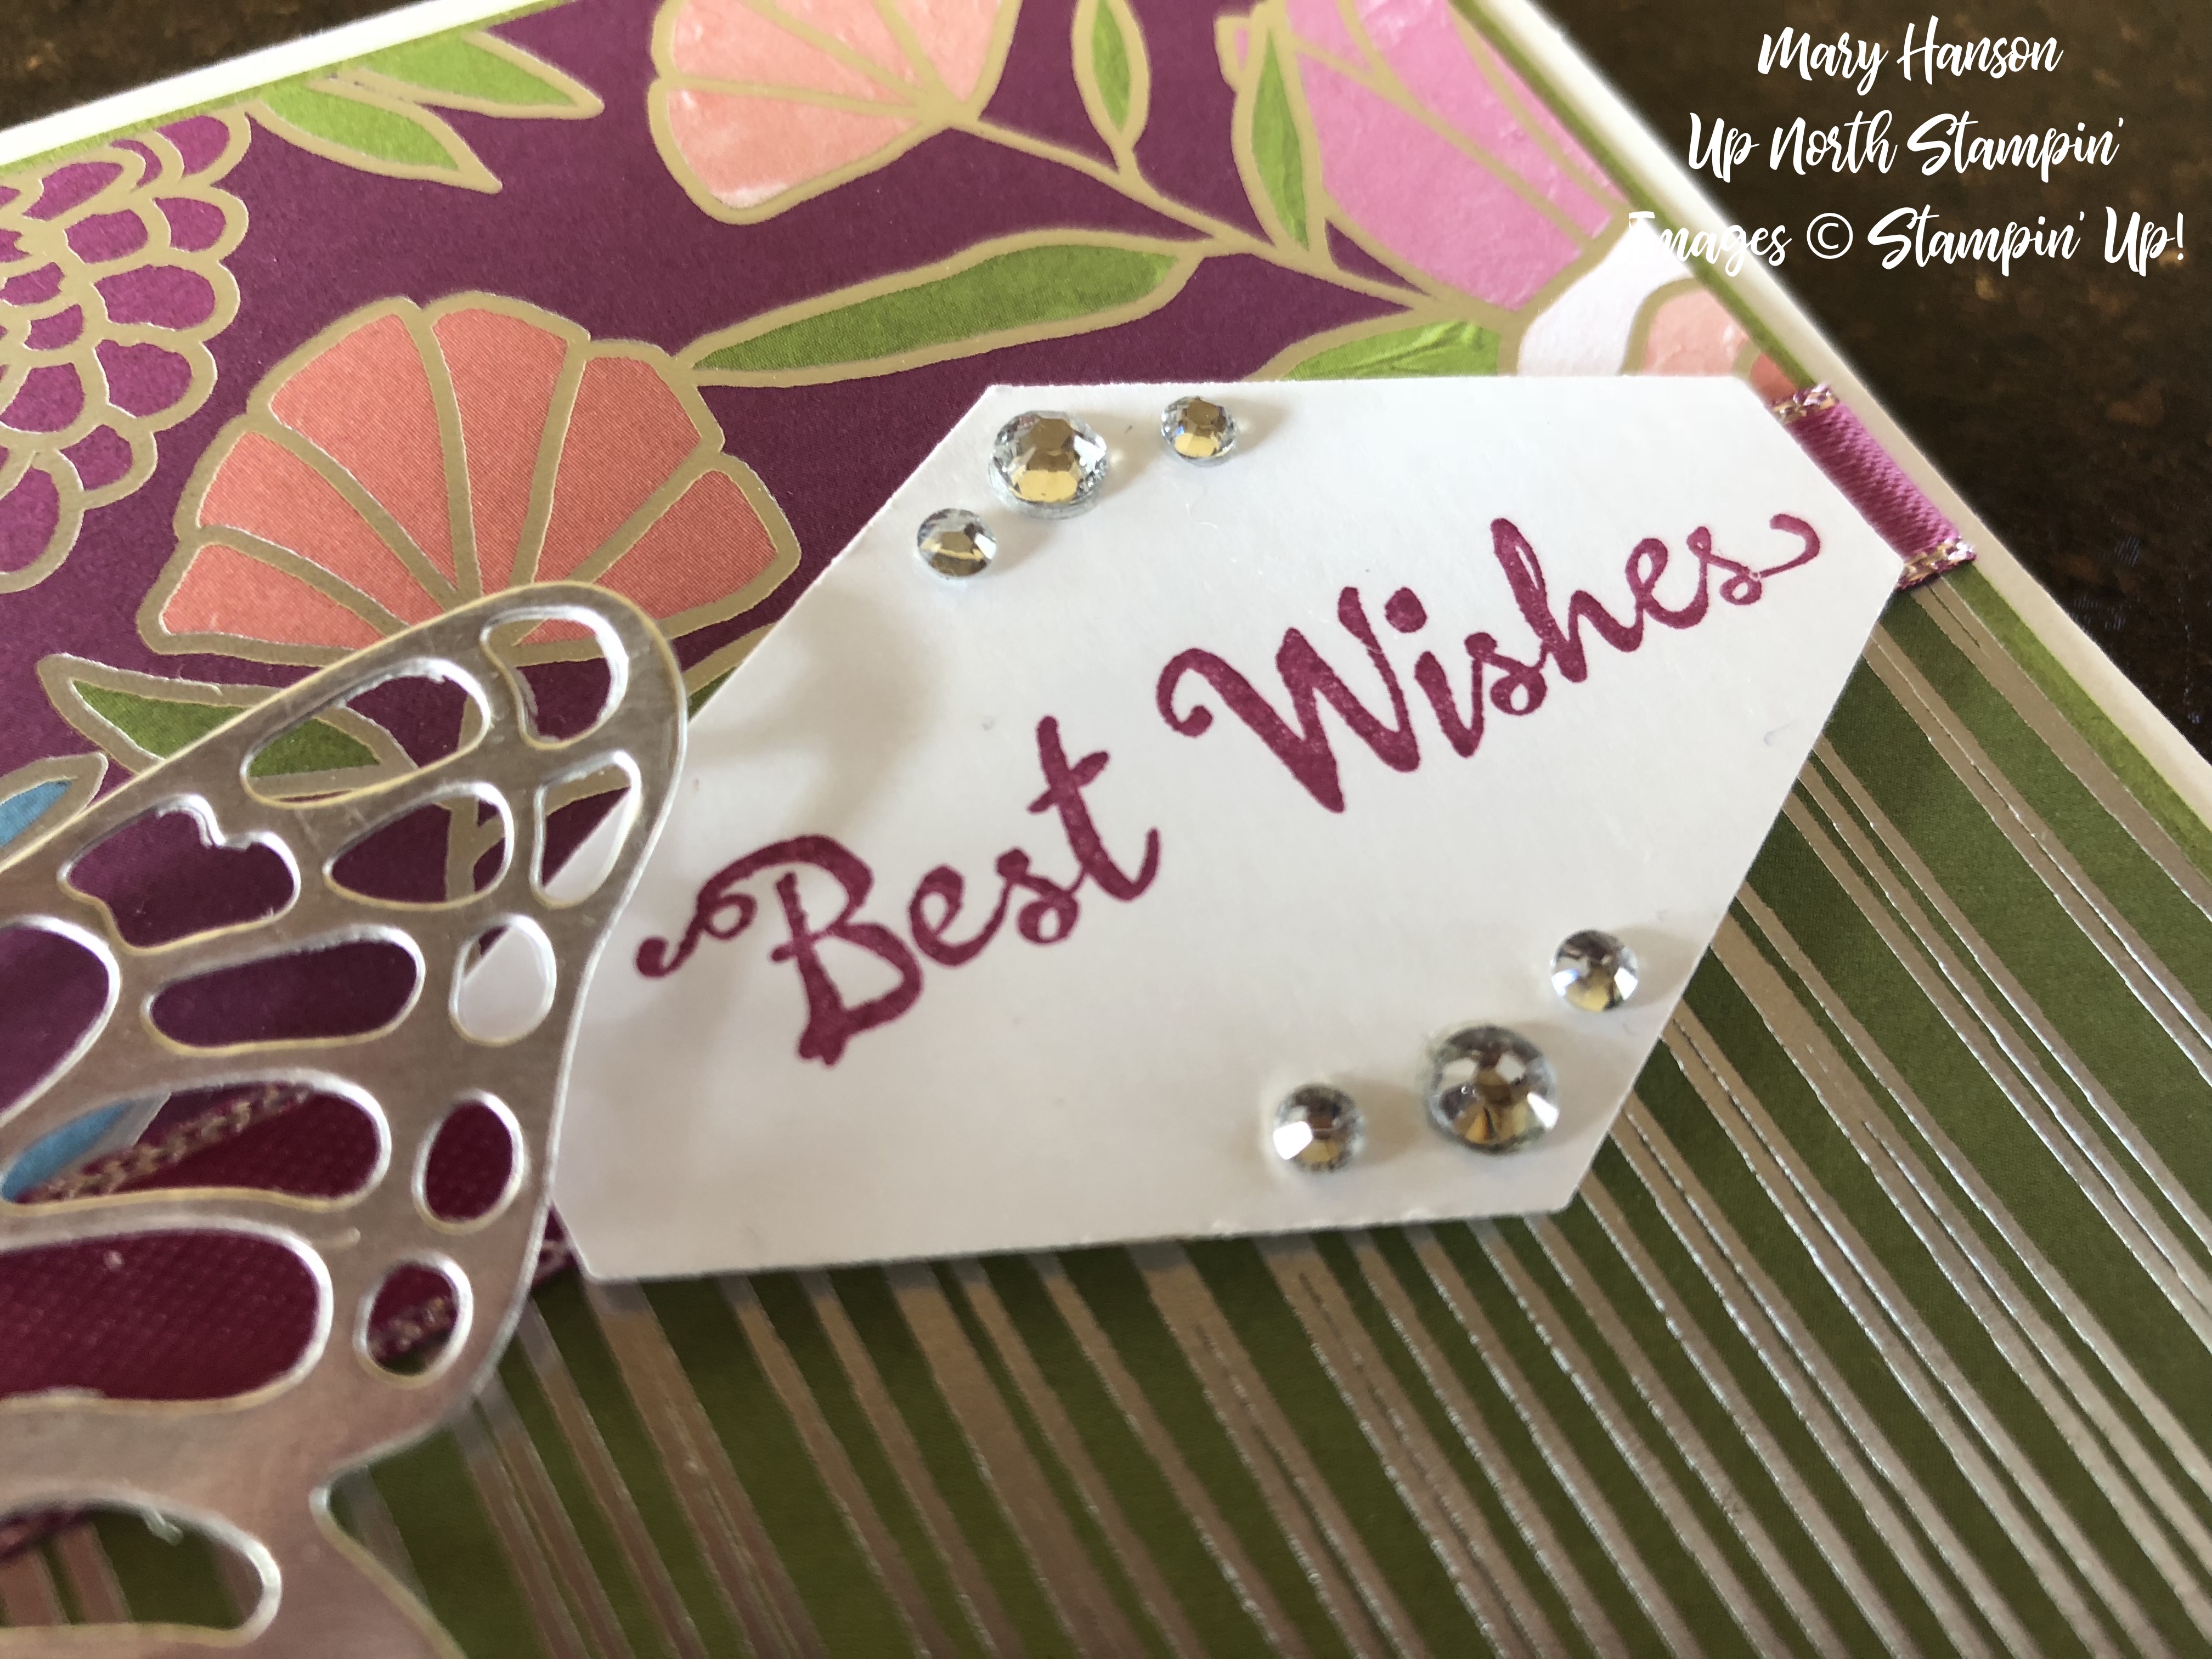
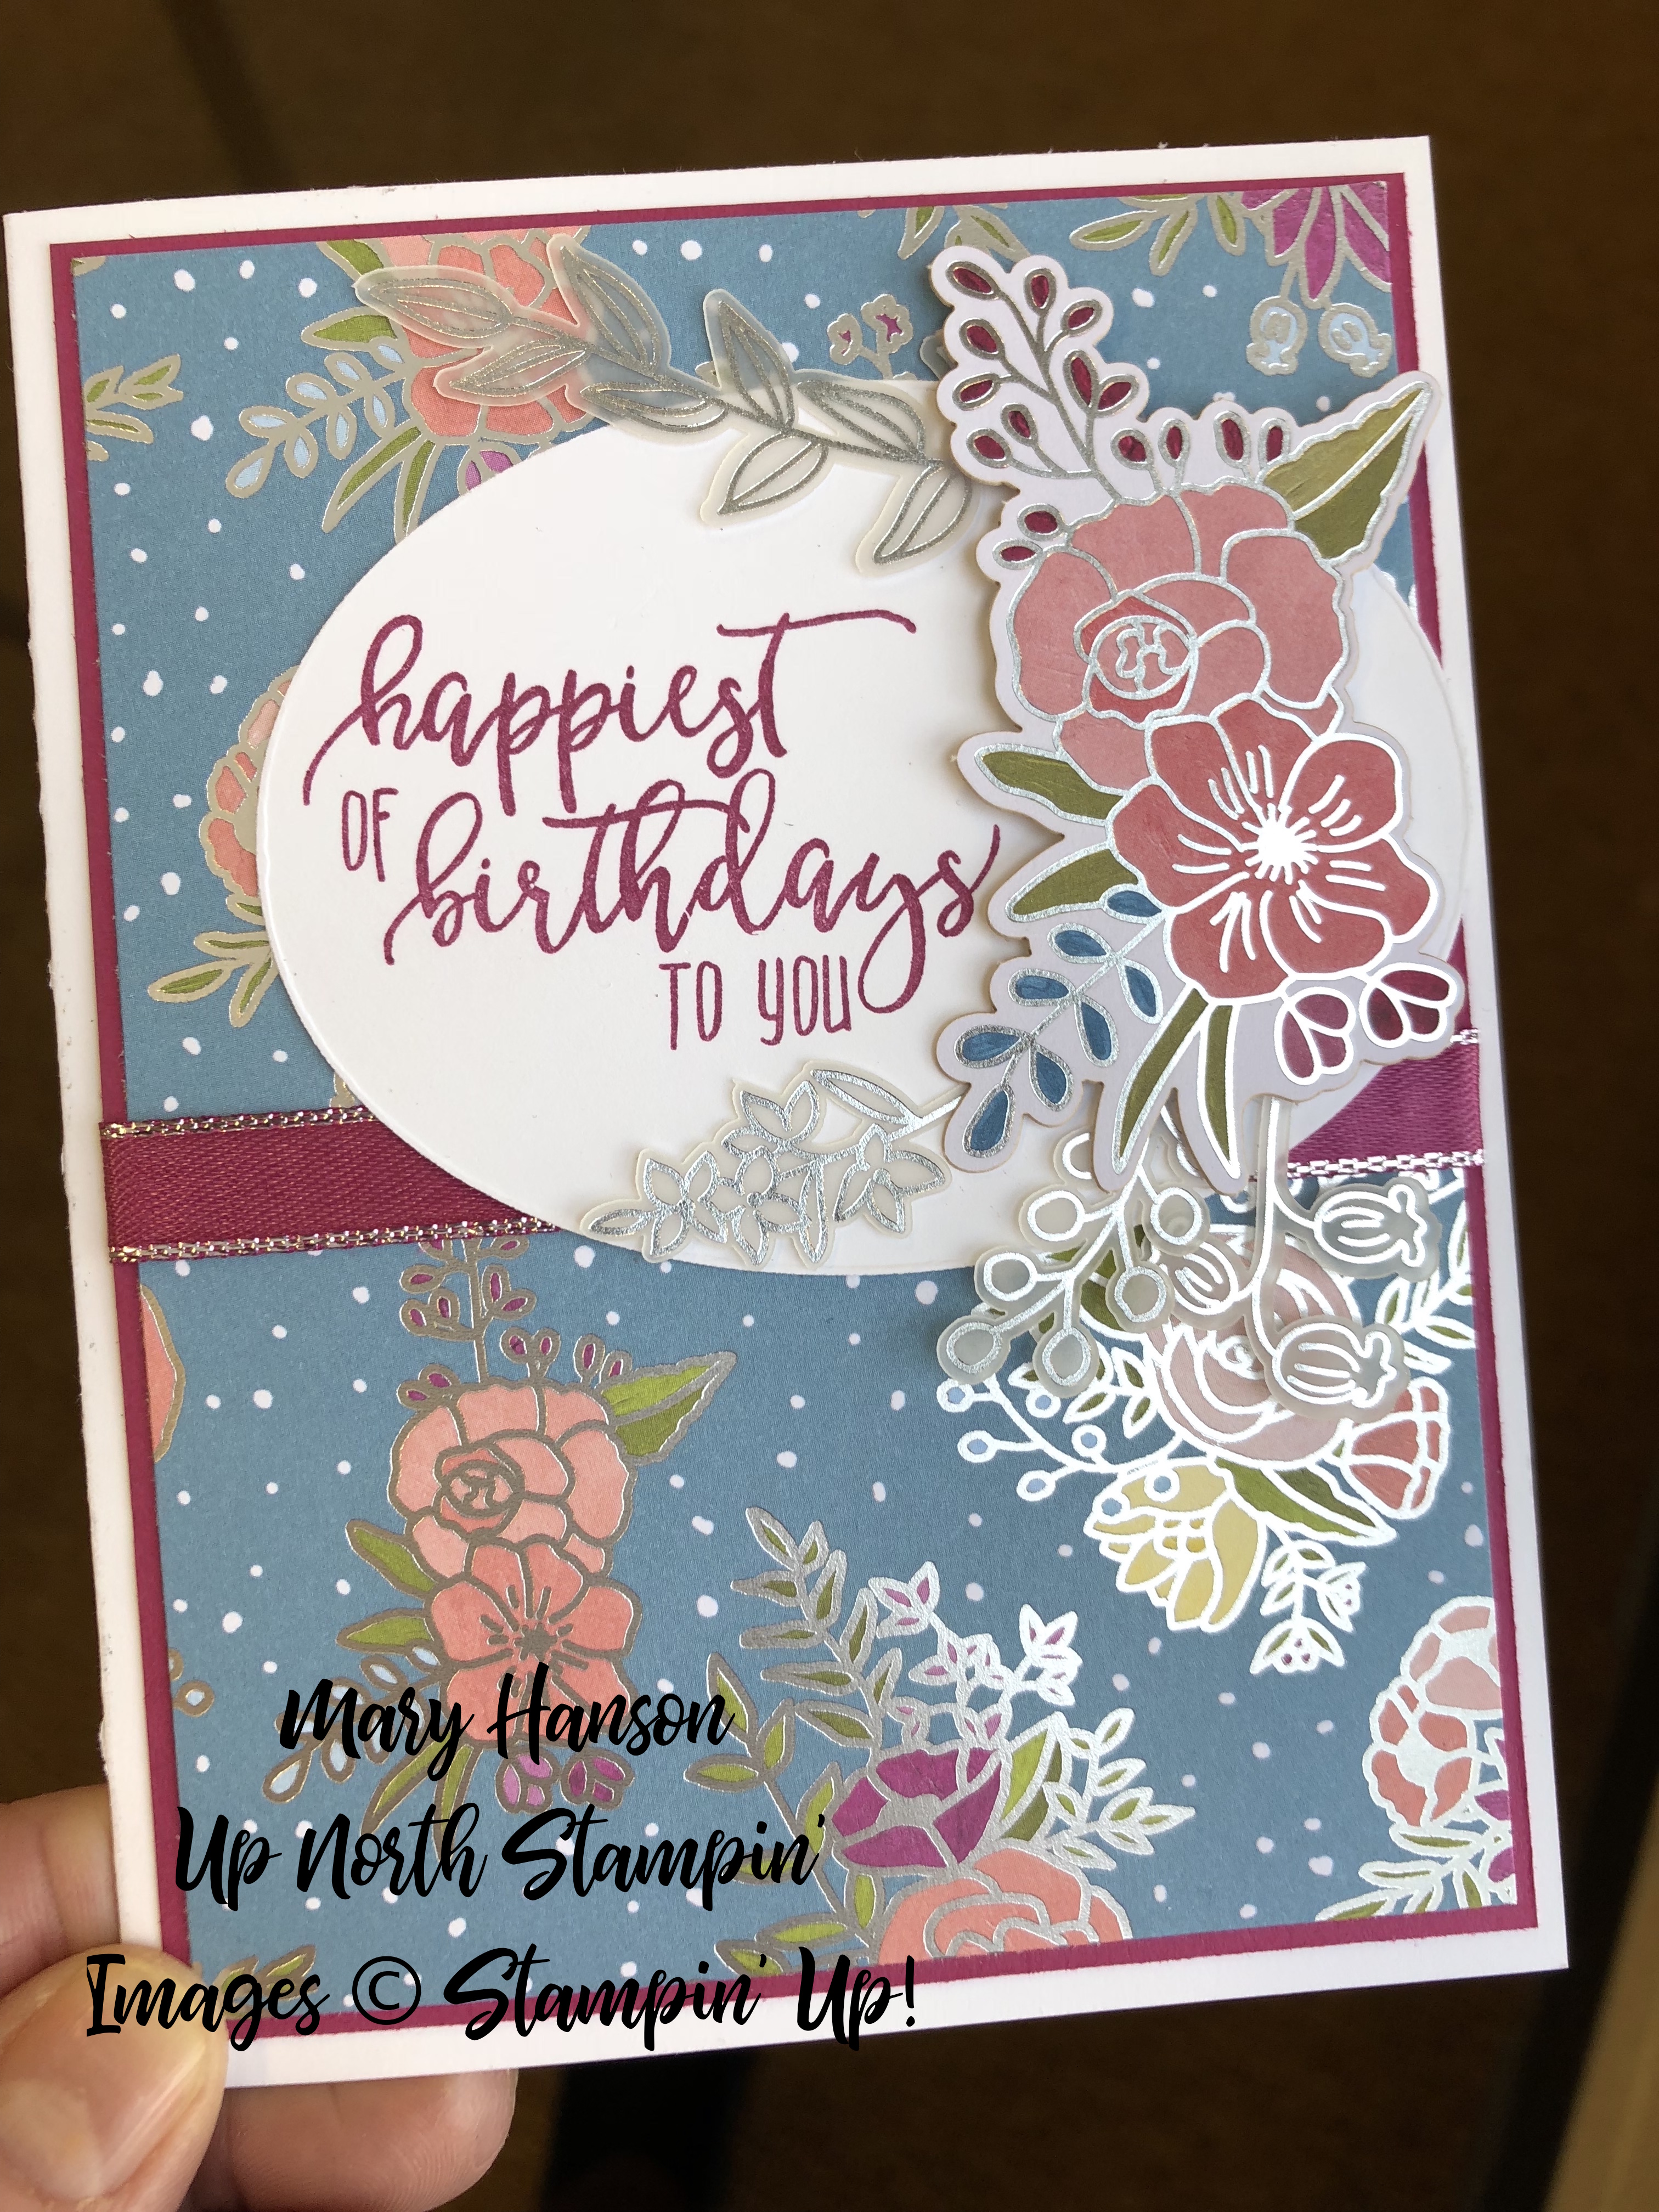
So as you can see, it is super versatile. Here are a couple of cards I made with this beautiful paper.  For this card, I have just used different colors of the Stampin’ Blends to color flowers on the paper.
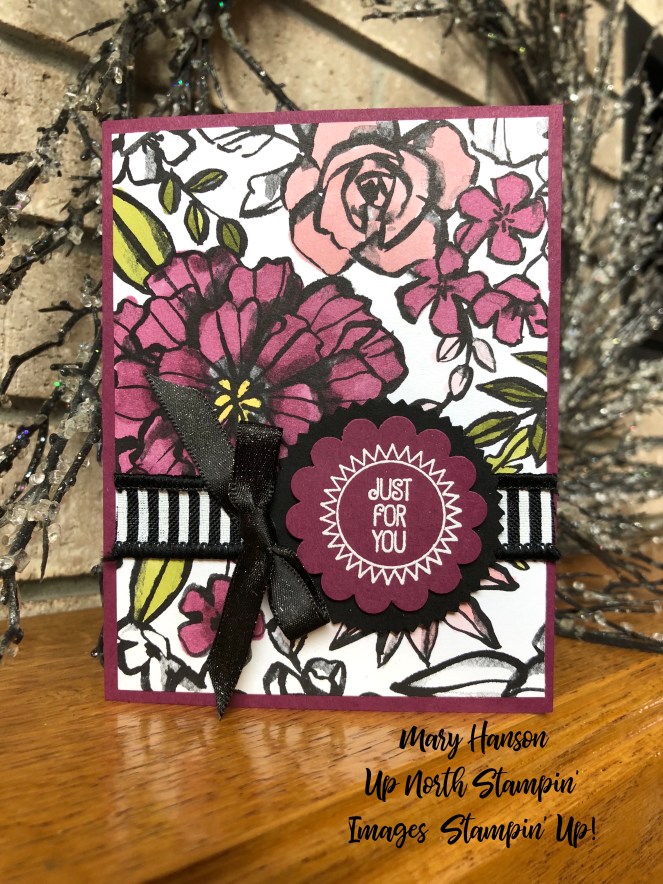
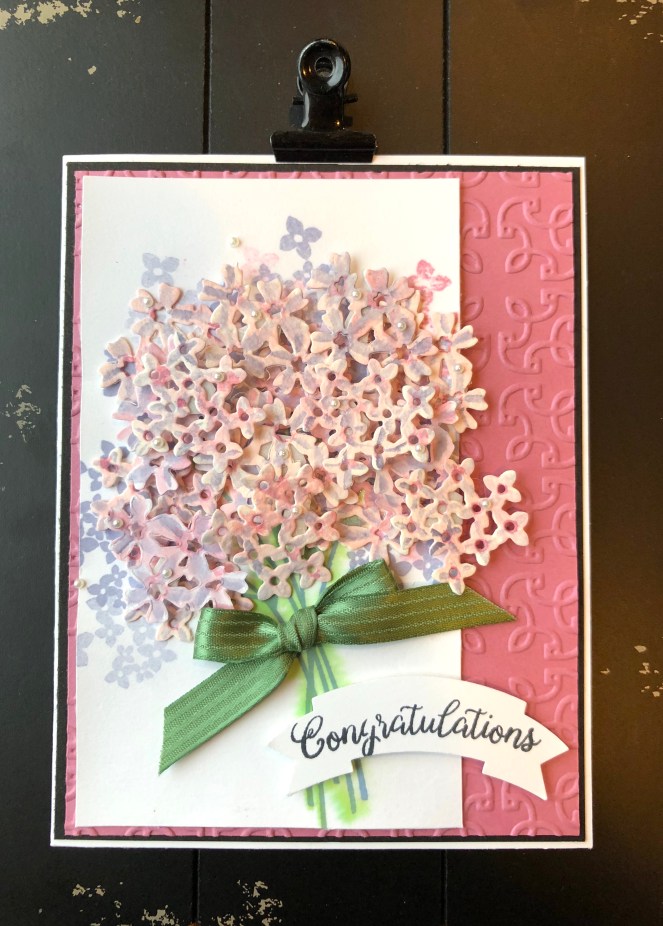
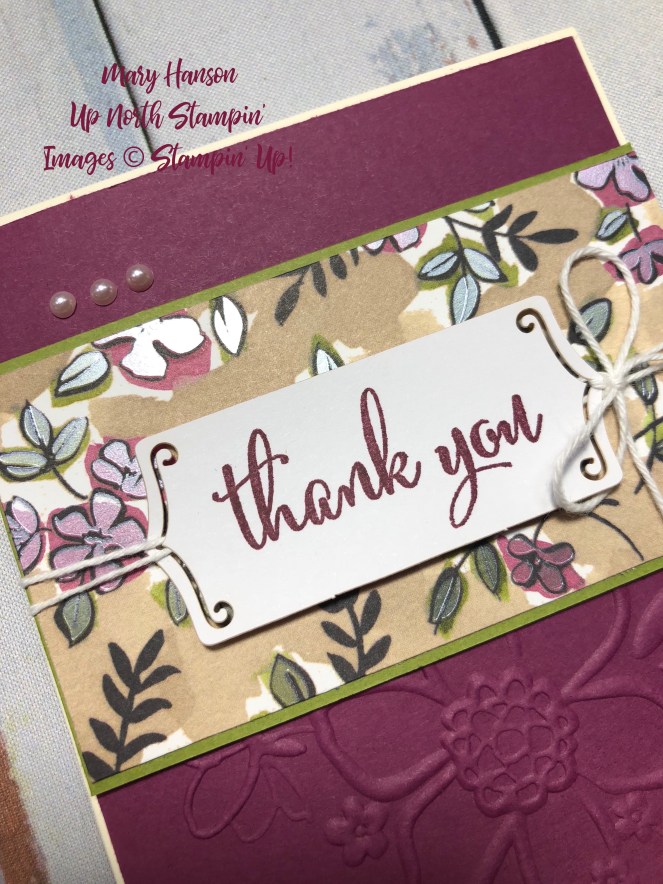
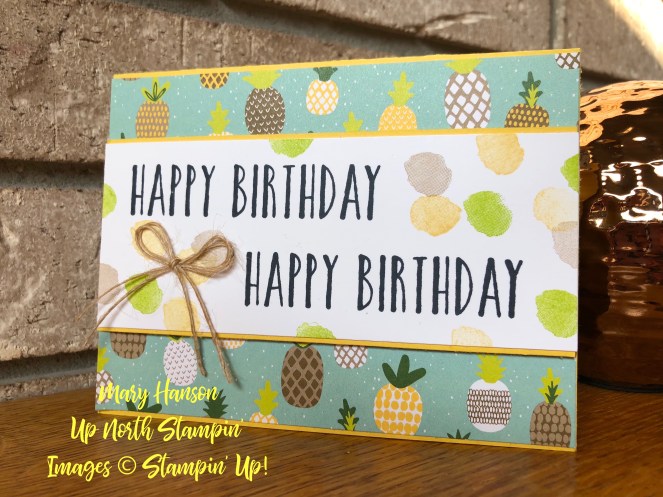
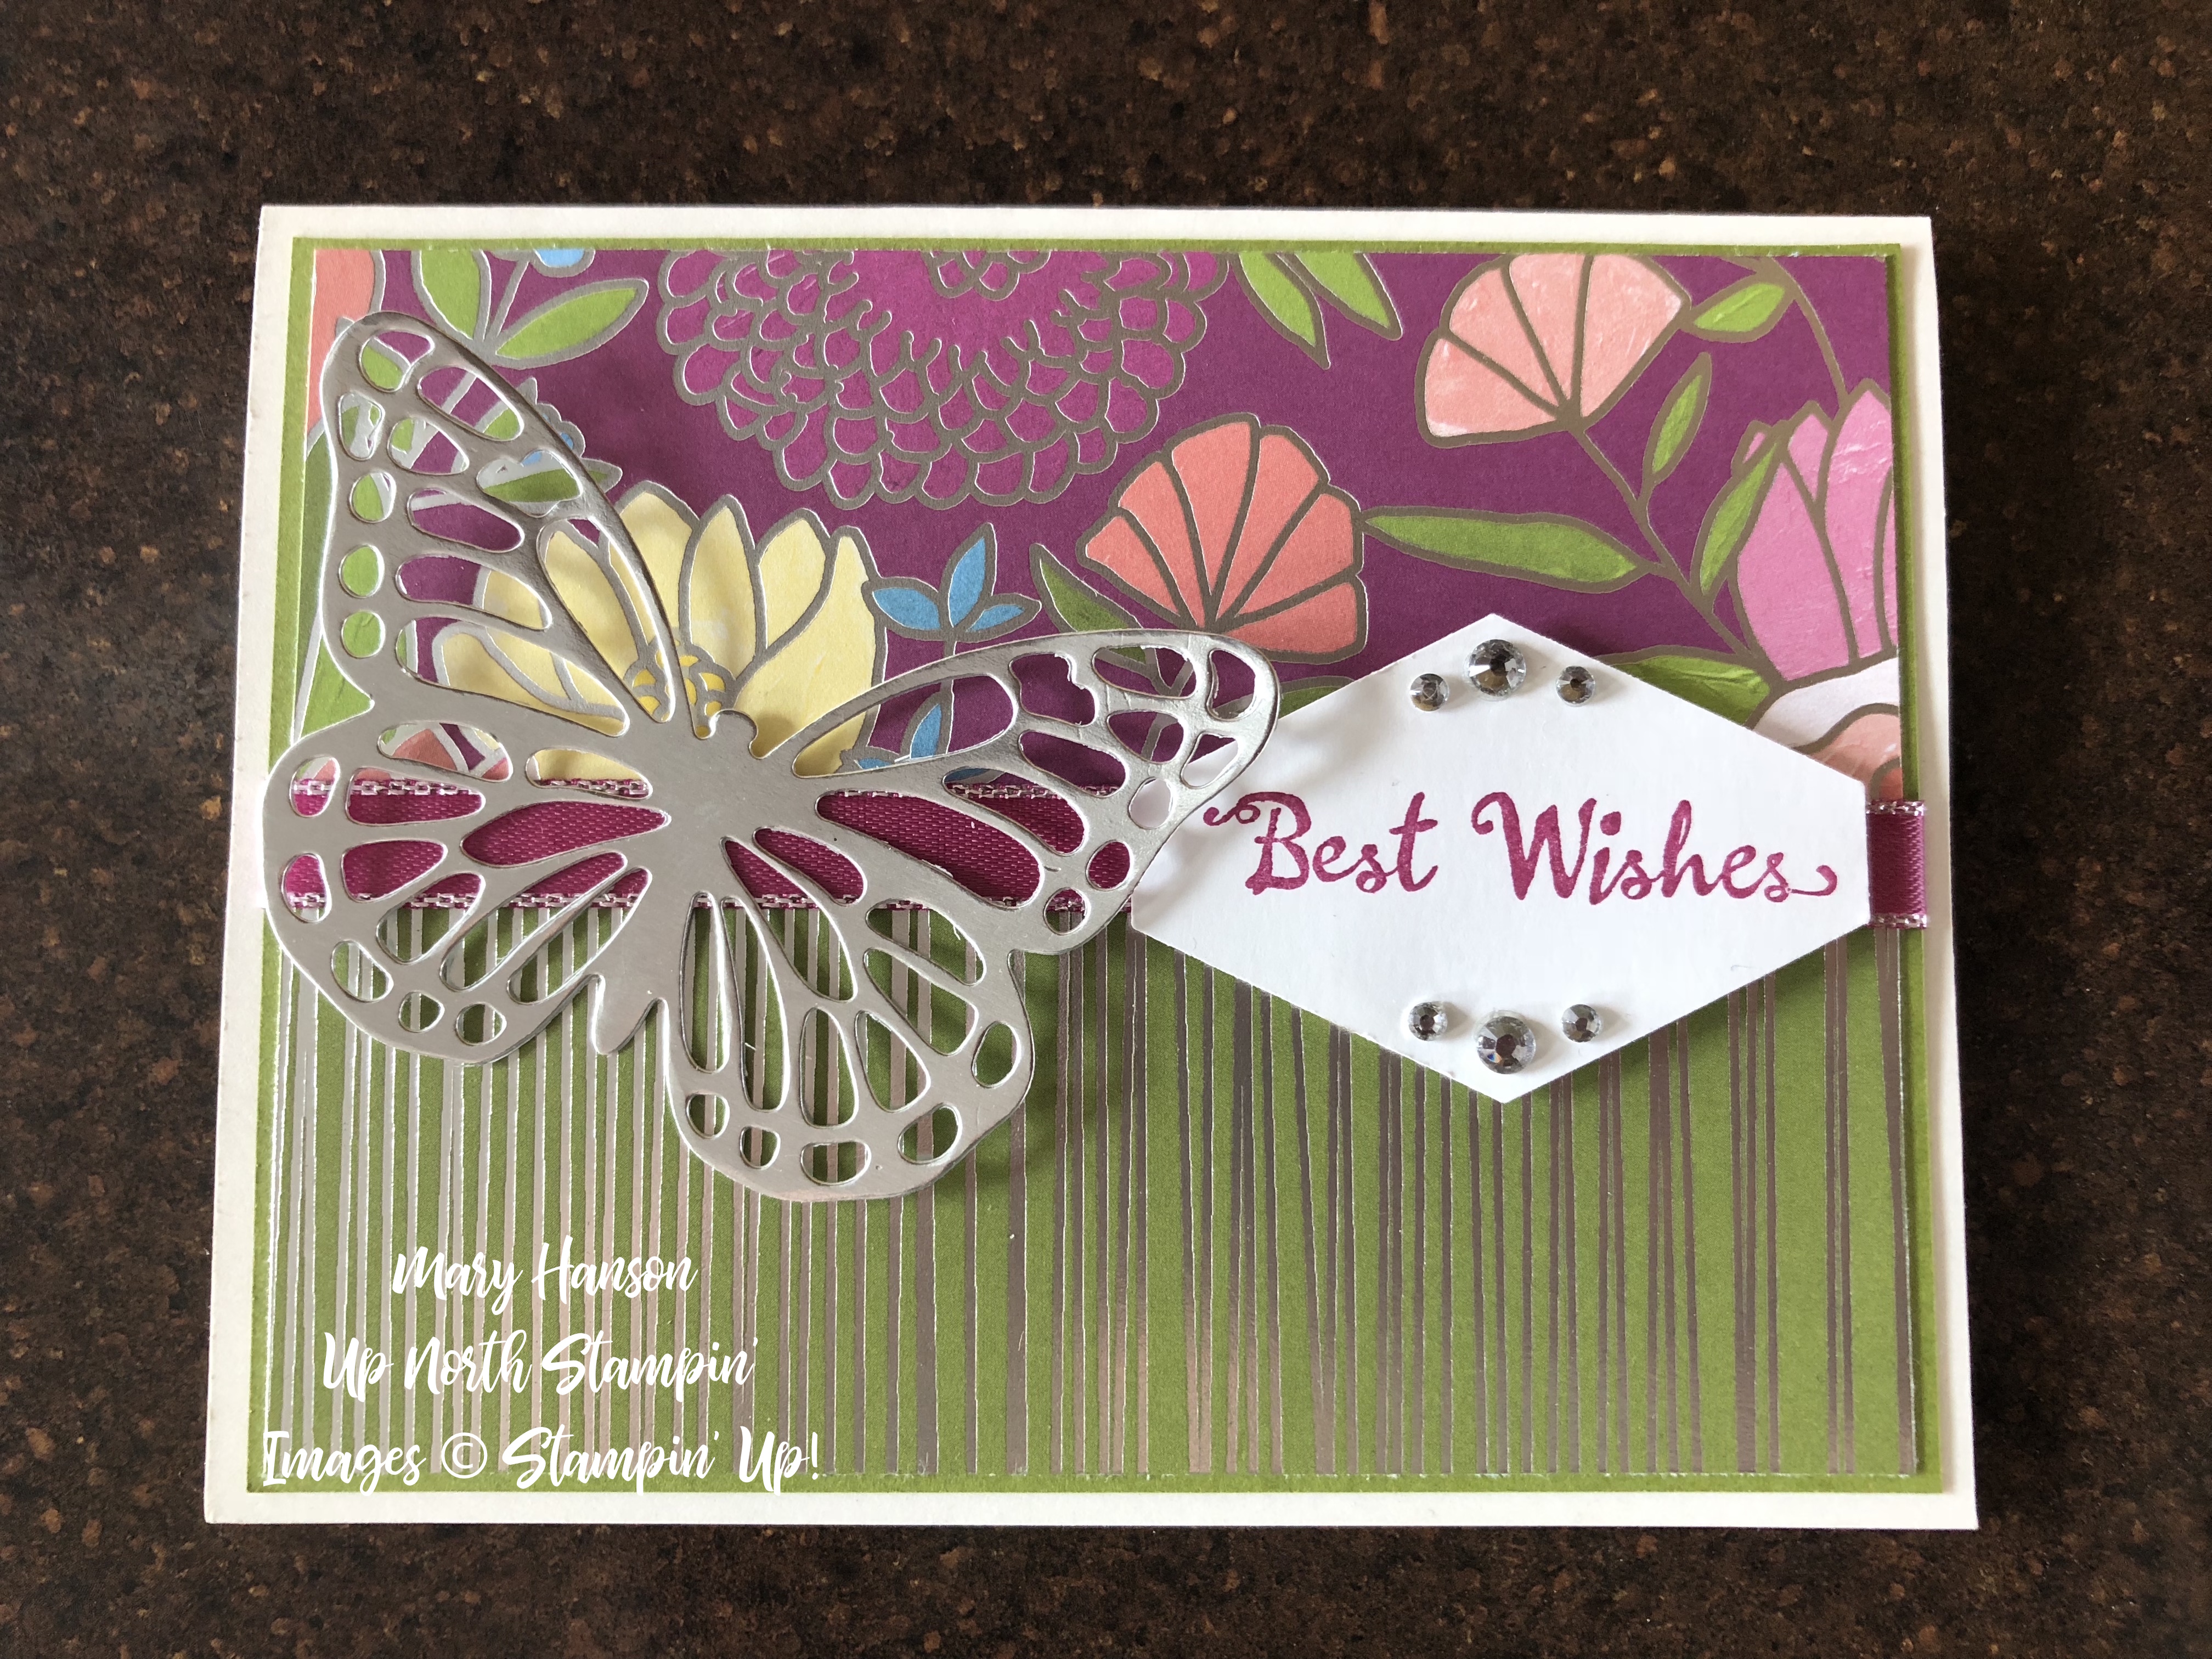
Mary Hanson - Up North Stampin' Palette Paper

And here’s another:

Petal Passion Designer Series Paper - Courage - Mary Hanson - Up North Stampin'


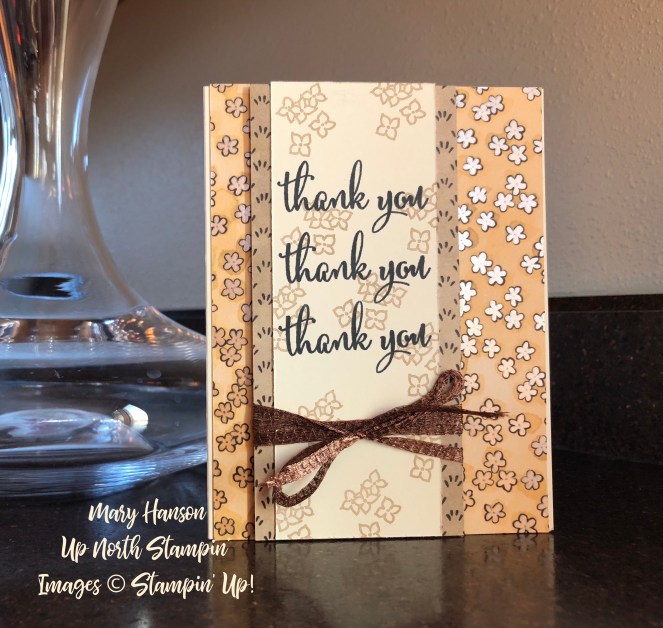
It’s so fun to see what a different background card stock and ribbon will do.  It brings an entirely different feel to it.

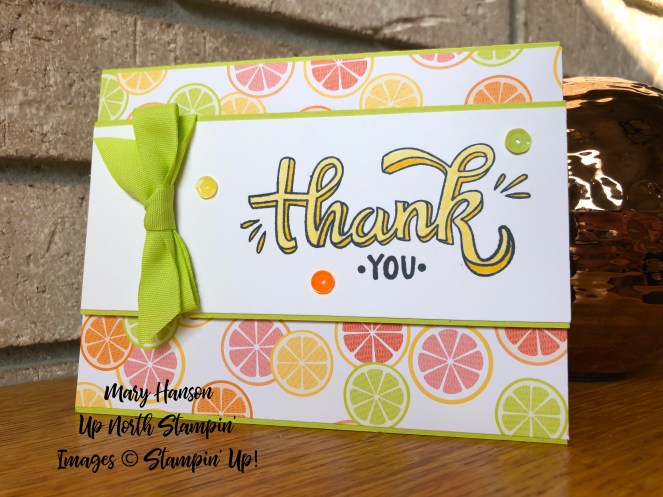
With this one, I only colored some of the paper and left the rest in black and white.

Petal Passion Designer Series Paper - Stampin' Blends - What a Day - Mary Hanson - Up North Stampin'

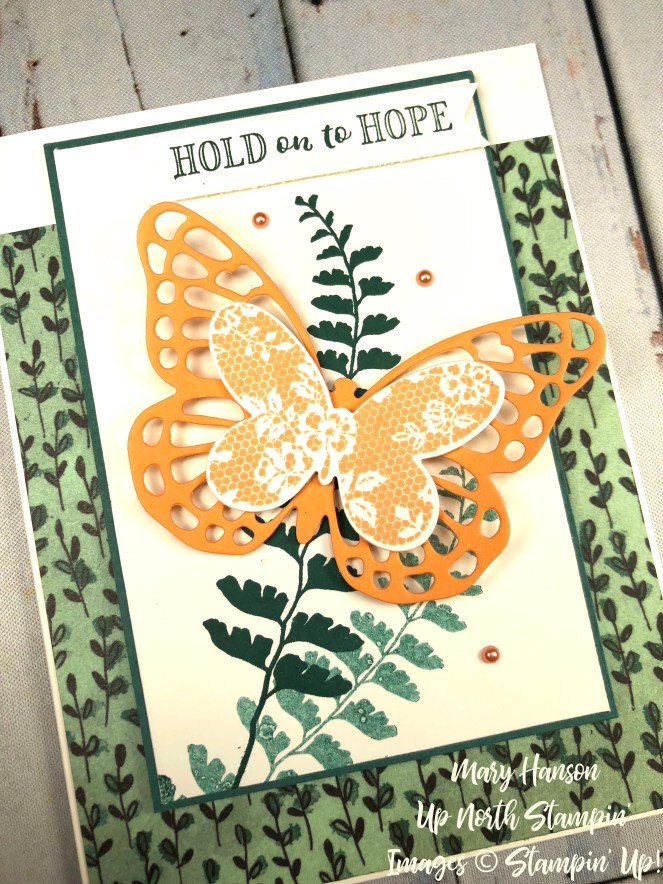
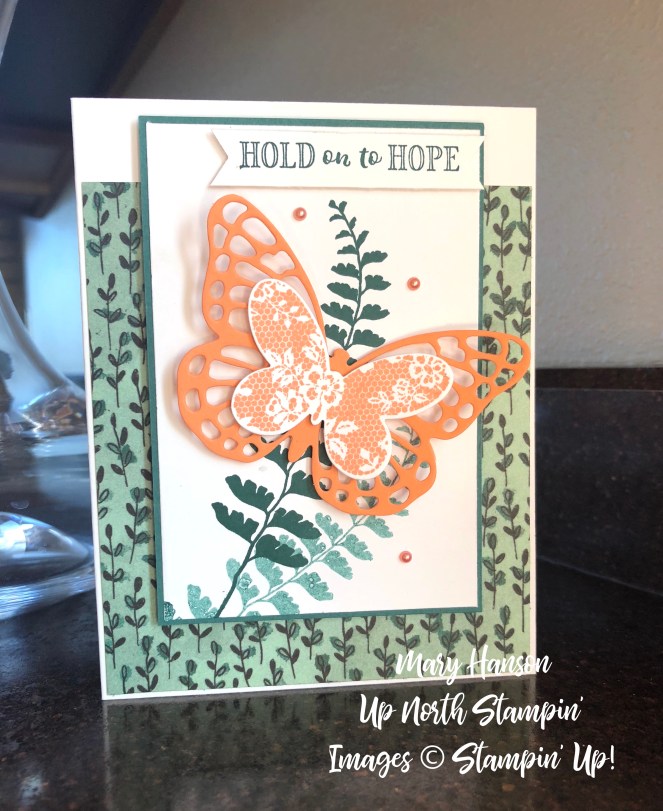
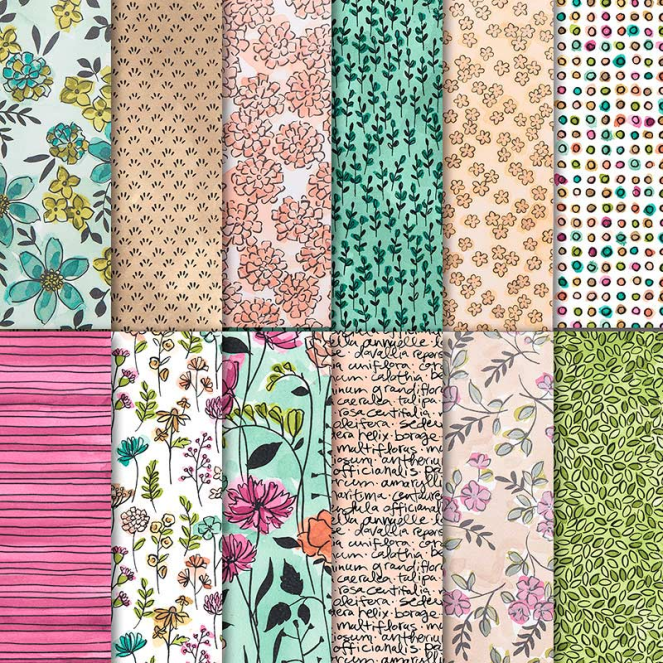
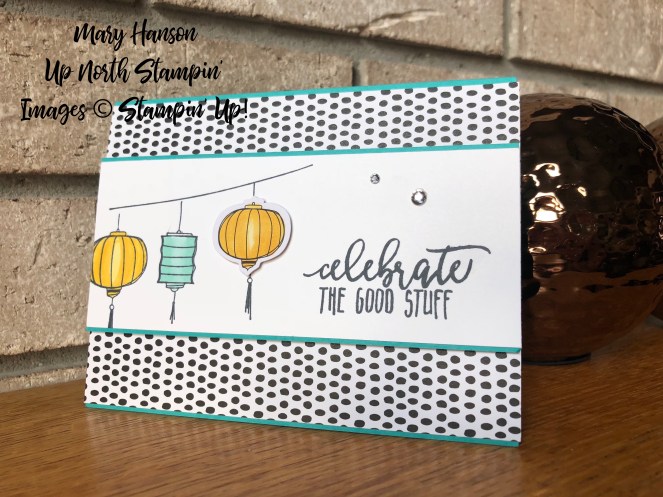
Finally, I made some cards using the black and white Designer Series Paper AS IS!

Petal Palette - Berry Burst - Mary Hanson - Up North Stampin' - Stampin' Up!


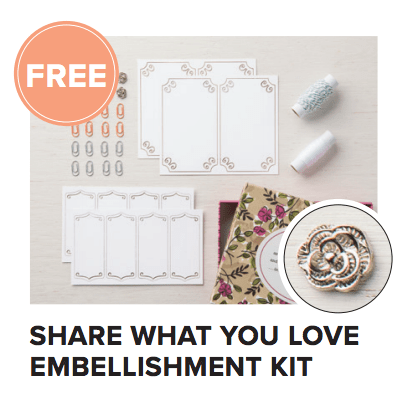
Check out the links at the end of this post, and don’t miss out on the beautiful Petal Passion paper pack, along with the coordinating embellishments and Memories and More pack (only available while stocks last or May 31st) and bundle pricing on the Petal Palette bundle (ends May 21st).

If you shop online with me with an order over $50, don’t forget to use the May Hostess Code ( FZ2DPNTR) for a free gift in June from the brand new catalog! Thanks for stopping by today. I hope you have a fabulous Saturday.

Mary

Retiring Butterfly Basics

I had a lot of fun focusing on a lovely stamp set with coordinating thinlits dies that is soon retiring.  This set is a keeper, and I want to make sure you get your hands on it before it becomes unavailable.

Butterfly Basics - Share What You Love - Grapefruit Grove - Hold On to Hope - Up North Stampin'

Butterfly Basics is a lovely set with a fern and flower stamp, the patterned butterfly stamp, and couple of textured stamps.  The coordinating dies include a large and small intricate butterfly, as well as an outline butterfly.   

The Designer Series Paper comes from the “Share What You Love”: bundle, and is coordinated in this card with the new Grapefruit Grove ink and the classic Tranquil Tide ink.  The sentiment comes from the Hold On To Hope stamp set that is carrying over into the new Annual Catalog.  Shop any of these products by simply clicking below.  DO NOT let Butterfly Basics slip through your fingers, because it is a classic, and it’ll be an expensive set to find later, once it retires!

Butterfly Basics - Table View - Hold on to Hope - Share What you Love - Mary Hanson - Up North Stampin'

Product List

Stepping Up with the May Pals Blog Hop!

Welcome to our Pals Blog Hop, May 2018. This month we’ll be “Stepping Up with Textures or Techniques.” What’s that? Projects that are “stepped up” by using textures or fun techniques. Who knows, maybe both! Join us in the fun while we inspire you to step up your creations.2018-pbh-emeraldenvy - May

You may be starting the hop here or coming from a previous Pal’s blog. Either way, you’ve come to the right place. You’ll find the full line-up below to help you move, or “hop” along from Pal to Pal.

Living in Northern Minnesota, and especially after our recent looooong winter and late spring, you can imagine our delight when the beautiful lilac bushes start to bloom.  Their fragrance literally fills the air!  My card today is in tribute to the lilacs.

Lilac

I’m using two techniques to create ‘extra’ texture today:  a watercolor technique I used on both the bouquet and the white background that combines layers of color to create depth, and an embossed background on which to build the bouquet.

Beautiful Bouquet - Fireplace - Mary Hanson - Up North Stampin'

I started with a card base of Whisper White thick cardstock cut at 4 1/4″ x 11″, folded at 5 1/2″.  I cut a 4 1/8″ x 5 3/8″ panel of basic black cardstock and mounted it on the white card base.  I then took a 5 1/4″ x 4″ panel of Sweet Sugarplum cardstock and embossed it using the Garden Trellis Textured Impressions embossing folder.

On a panel of watercolor paper, I stamped the stems of the bouquet using the single stem from the Beautiful Bouquet Photopolymer bundle using watercolor paper.  This versatile bundle allows you to create all kinds of bouquets, whether it be a monochromatic bunch of lilacs, like me, or a profusion of different colors in a mixed bouquet.

beautiful bouquet

I then stamped some small bunches of flowers in Wisteria Wonder and a couple in Sweet Sugarplum.  I spritzed the bouquet with water to soften the images and let it dry.

watercolor bouquet Aqua Painter

The ‘stepped up’ bouquet was created by cutting out bunches of tiny flowers with two dies from the Beautiful Bouquet bundle.  Once the little bunches were cut out using the Big Shot, I used an aqua painter and first ‘colored’ the tiny flowers with Sweet Sugarplum ink.  Then I came back and created little stripes using the Wisteria Wonder ink.  I went back and forth between the colors, adding depth and color until I got the effect I wanted.

Beautiful Bouquet - The Close - Mary Hanson - Up North Stampin'

I used SNAIL adhesive and then Stampin’ Dimensionals to start ‘building’ up the bouquet to create lots of dimension and texture.   I finished off the card with a sentiment from Beautiful Bouquet and a Garden Green 3/8″ grosgrain ribbon bow, along with some tiny seed pearls.

Beautiful Bouquet - Black background - Up North Stampin' - Mary HansonThanks to Canadian Stamper Sandi MacIver for her inspirational video to help with this watercolor technique. 

Now it’s time to see how the rest of the Pals are Stepping up with Textures or Techniques. Please use the Blog Hop Line-Up below to move from blog to blog. Don’t forget to show us some love by commenting on our creations.

Mark your calendars for June 13, 2018, when we feature projects for Babies, Birthdays and Brides. You’ll probably even see products from Stampin’ Up!s new 2018-2019 Annual Catalog. Don’t miss it!

Blog Hop  Line-up:

  1. Mary Fish at Stampin’ Pretty
  2. Peggy Noe at Pretty Paper Cards
  3. Lisa Ann Bernard at Queen B Creations
  4. Su Mohr at Aromas and Art
  5. Linda Suarez at All Night Stamping
  6. Debbie Mageed at Secrets to Stamping
  7. Stesha Bloodhart at Stampin’ Hoot!
  8. Leah O’Brien at Stamp by the Bay
  9. Jackie Beers at Blue Line Stamping
  10. Beth McCullough at Stamping Mom
  11. Pamela Sadler at Stampin’ Pink Rose
  12. Mary Hanson at Up North Stampin’
  13. Nina King at Ink Paper Sequins
  14. Karen Hallam at Karen’s Stamping Habit
  15. Wendy Klein at Doggone Delightful Stampin’
  16. Jennifer Michalski at Stamping Serenity

Product List

Garden Green 1/4" Grosgrain Ribbon"

Garden Green 1/4″ Grosgrain Ribbon”
[124321]
$4.95

Share What YOU Love! Get your bundle now!

I’m still discovering more beautiful ways to use the “Share What You Love” products available this month!

Share What You Love - Lovely Flower Textured Embossing Folder - Mary Hanson - Up North Stampin'

To create this gorgeous card, I started with a card base of Whisper White cardstock at 11″ x 8 1/2″, folded in half.  I cut a panel of Rich Razzleberry cardstock to 4 1/8″ x 5 3/8″.  I spritzed the paper every so lightly, and then ran that panel through the Big Shot using the brand new Lovely Floral Textured Impressions Embossing Folder. I then affixed it to the Whisper White card base.

I cut a strip of the “Share What You Love” Designer Series Paper to 2 1/2″ x 4 1/8″.  I cut a strip of Old Olive cardstock to 2 5/8″ x 4 1/8″ and adhered the DSP to the Old Olive, and then both to the Rich Razzleberry embossed piece.

Lovey Floral Textured Impressions Embossing Folder - Close Up - Share What You Love Embellishment Kit - Mary Hanson - Up North Stampin'

The sentiment comes from the “Share What You Love” stamp set.  Don’t you love the font?  The little laser-cut tag is one of the little ‘treats’ in the Share What You Love Embellishment kit. It is FREE with two of the bundles you can now order.  So fun!

Screen Shot 2018-05-05 at 8.07.07 PM

I seriously can’t say enough about these beautiful papers!  Their beautiful patterns and colors are only surpassed by the gorgeous pearlized accents.  You really have to see them to believe them!  You could take the same-sized panel of any of these lovely papers and create this card in any number of color combinations.

Share DSP

Here is the lovely stamp set:

Screen Shot 2018-05-05 at 8.11.56 PM

Go HERE to see my post with all the details about each level of “Share What You Love” Bundle.  Below are some more sample projects I have made.

Click HERE to start shopping with me!  Believe me, you will NOT be disappointed by this beautiful line of products!

Product List

“Share What You Love Suite” – Exclusive Bundles of NEW Products available May 1st to 31st only!

The Happy May Day - Share What You Love - Mary Hason - Up North Stampin'

Happy May Day!  Guess what new bundle this May Day card is made from?  We have an early release for you!

So exciting!  I mentioned it last week, but today is the day (May 1) that you can start ordering it HERE now!

This is the ONLY time that you can buy these beautiful products as a bundle with some amazing free things, and the ONLY time that you’ll be able to get the “Statement Of My Heart” stamp set.

Here’s a sneak peek of some of the projects I’ve done with the bundle so far….

Share What You Love - Friend - Copper - Mary Hanson - Up North Stampin'Share What You Love - Beautiful Day - Mary Hanson - Up North Stampin'Share What You Love - Friend - Mary Hanson - Up North Stampin'Share What You Love Thank You - Mary Hanson - Stampin' Up!

Please note the fabulous 24 sheet 12×12″ specialty paper which is SO gorgeous, and available through the “Gotta Have It All” Bundle.  Can you see the pearlization in the card above?

a9e6d-6a00d8341f7d7f53ef0223c847351d200c-pi


See the entire brochure HERE!

And don’t forget, you can get the 5 BRAND NEW In Colors too, with a 10% discount on them!

New In Colors

So what do you get?  Here’s the full rundown on each of the 3 bundles.


Just Getting Started

  • Love What You Do Stamp Set
  • Very Vanilla A4 Cardstock
  • Grapefruit Grove New Ink Pad
  • Old Olive New Ink Pad
  • Clear Block E
  • FREE Very Vanilla Notecard and Envelopes!

A Little More, Please

  • Love What You Do Stamp Set
  • Make a Difference Stamp Set
  • Very Vanilla A4 Cardstock
  • Share What You Love Cardstock Pack including Grapefruit Grove, Mint Macaron, Old Olive, Rich Razzleberry
  • Pearlized Doilies
  • Grapefruit Grove New Ink Pad
  • Rich Razzleberry Velvet Ribbon
  • Share What You Love Artisan Pearls
  • FREE Very Vanilla C6 Envelopes!
  • FREE Share What you Love Embellishment Kit!

Gotta Have It All

  • Love What You Do Stamp Set
  • Make a Difference Stamp Set
  • Very Vanilla A4 Cardstock
  • Share What You Love Cardstock Pack including Grapefruit Grove, Mint Macaron, Old Olive, Rich Razzleberry
  • Pearlized Doilies
  • Share What You Love Speciality DSP  (See above for these beautiful papers!)
  • Grapefruit Grove New Ink Pad
  • Rich Razzleberry Velvet Ribbon
  • Share What You Love Artisan Pearls
  • Lovely Floral Dynamic Textured Impressions Embossing Folder
  • FREE Statement Of My Heart Stamp!
  • FREE Very Vanilla C6 Envelopes!
  • FREE Share What you Love Embellishment Kit

So let’s have a closer look at the three different bundles available, and a closer look at some of the individual products.

Bundle 1, the “Just Getting Started” Bundle (#149524) is $57.00 and includes a FREE pack of Very Vanilla notecards and envelopes.

Find it HERE in the online store

(You can also see close-ups of individual products in the store link)

The Just Getting STarted
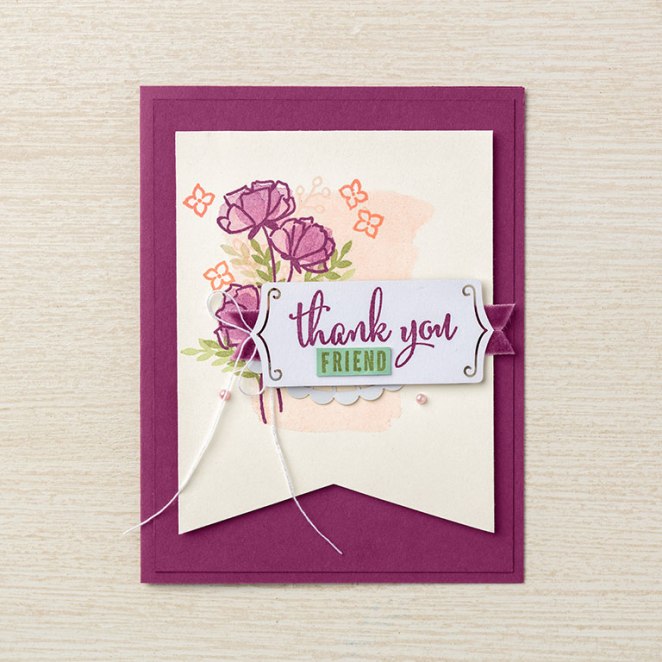
This bundle introduces one of the beautiful new In Colors, Grapefruit Grove. Here is a project made using this bundle.

Peach


Bundle 2, the A Little Bit More, Please Bundle is $91.50) and includes 10 amazing products!, two of which are entirely FREE (the gorgeous embellishment kit and Very Vanilla envelopes.


Find it HERE in the online store

(You can also see close ups of individual products in the store link)


A Little More, Please THE

The extra embellishments and stamp sets introduced in this kits are gorgeous, plus you get the 24 sheets of coordinating cardstock (Grapefruit Grove, Mint Macaron, Old Olive and Rich Razzleberry).

Here is a card made using this bundle:

A little more

Bundle 3 is the Gotta Have it All Bundle which contains 13 beautiful coordinating products. This bundle costs $127.50 and includes three free items!

Find it HERE in the online store.

(You can also see close ups of individual products in the store link)

The gotta Have it all

The beautiful Statement of the Heart Stamp is only available with this last bundle.  Take a closer look at this wonderful message:

04.01.18_SOMH_SHAREWHATYOULOVE_ENG

This bundle introduces the fabulous 24-sheet 12×12″ specialty paper (see above) which is SO gorgeous.  You also get the coordinating embossing folder and additional stamp set in this bundle.

So don’t delay, grab yours now, or even put one in your Starter Kit too!

Use the May Host Code for an additional free gift from the new catalog from me!  FZ2DPNTR

Thanks so much, and please let me know if you need anything from me!

Mary


One Layout Covers It All!

I love it when the thought process is taken right out of stamping, and all I have to do is have fun!  With this layout, all you have to do is grab your favorite Designer Series Paper and a stamp set or two, and you can get all your occasions covered!  Take a look at what I did with the Tutti Frutti DSP:

Tutti Frutti DSP 3 - Colorful Seasons - Mary Hanson - Up North Stampin'Tutti Frutti DSP - Perennial Birthday - Mary Hanson - Up North Stampin'Tutti Frutti DSP 2 - Color Me Happy - Stampin' Blends - Mary Hanson - Up North Stampin'Tutti Frutti DSP 4 - Picture Perfect Birthday - Up North Stampin' - Mary Hanson

Thanks to Susan Itell, fellow stamper, for this great layout idea!  These cards all start with a 5 1/2  x 8 1/2″ card base, scored at 4 1/4″.  Then take a piece of DSP, your choice, and cut it to 5 1/2 x 4 1/8″.  Cut out a white panel (to stamp on) measuring 5 1/2 ” x 2 1/4″.  Then cut a cardstock panel that you will mount the white panel onto, measuring 5 1/2 x 2 3/8″.   That’s the hardest part, and it isn’t even hard!

Your next step is to have fun stamping a sentiment or other objects onto the white cardstock. The first card is a wine glass from Half Full with a sentiment from Colorful Seasons.  The “Happy Birthday” sentiment is from the Perennial Birthday stamp set.   The “Thank You” stamp is from the Color Me Happy stamp set, and the “Celebrate” sentiment is from the Picture Perfect stamp set.  The lanterns are also from the Color Me Happy stamp set, with one lantern punch-out from the Color Me Happy kit.

There’s no doubt that a fool-proof layout will save you time, and a lot of deliberating about WHAT TO MAKE. I hope this layout comes in handy for you as well!

Product List

The Ultimate Bundle!


Get $155 in product plus  FREE shipping all for $99!!  
 
CAN YOU SAY “YES” TO ANY OF THE FOLLOWING:
Do you love stamping and/or paper crafting?
Do you spend $20 a week on your hobby?  Why not get a discount?
Do you plan on placing an order of $99 or more?
Is your wish list a mile long?
Do you want to earn a 20% discount on all your future orders?

QUESTIONS I HAD:

Q: What is the “Ultimate Bundle”

    • A: You pay $99. With this, you get $155 of product of YOUR choosing, $50 of free business materials which all ships for FREE, and FREE access to Stampin Up’s Demonstrator tips, training and tutorials.

Q: What do I need to do to remain “active” and maintain my 20% discount?

    • A: Place $300 in retail sales per quarter (Jan-Mar, Apr-Jun, Jul-Sep, Oct-Dec). This can include your personal orders, as well, and your first quarter is waived, so you can have several months to meet the $300 minimum renewal amount.

Q: Do I have to do parties and “all that?”

    • A: No. There are (2) two types of Demonstrators – Hobby (just enough to support the habit) and Professional (goal-oriented to earn extra money, free product and even trips). Hobbyists make up 97% of Stampin Up Demonstrators! I welcome all types of Demonstrators!

Q: What happens if I don’t meet the minimum?

    • A: Stampin’ Up! gives you 30 extra days to make it. Otherwise, you just go inactive. No penalties. No worries. You become a customer once again, and you still have the option to sign up again in the future.


JOIN THE FUN WITH MY TEAM:

  • I will personally help you with any questions you may have!
  • Technology is amazing – you don’t have to live within driving distance from me. I’m connected with other Demonstrators across the USA!
  • Automatically join my Up North Stampin’ Team!
  • Enjoy all the benefits that come with the Stampin’ Pretty Pals, a community built by Mary Fish, one of the top demonstrators at Stampin Up!
  • Be a part of active online communities (Facebook) where you can earn FREE product!
  • If you so desire, I will help you set and meet your goals. I would love to share this journey with you. And, if you prefer not to renew for another quarter by ordering or selling $300 you can drop with no penalty and easily become one of my customers again, that’s OK! You will have saved some money, met new people, and have been more inspired. Also, you always have the option to sign up again in the future, if you so choose.
  • I WELCOME HOBBY STAMPERS!  YOU’LL FEEL RIGHT AT HOME when you purchase the kit and join my team.
JOIN THE JOURNEY!
 

Pals April Blog Hop: Families First

2018-pbh-combo4
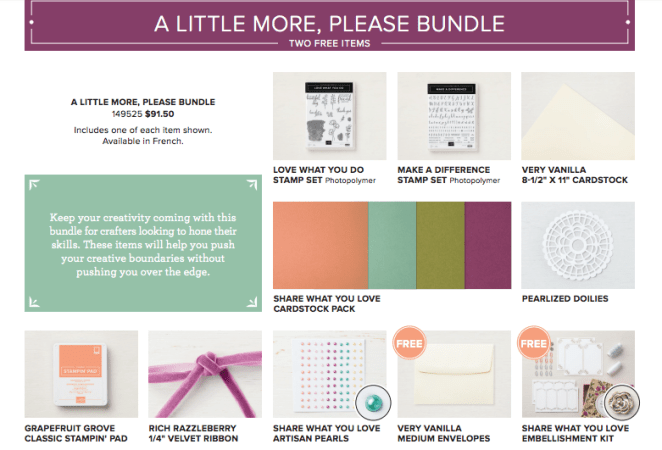
Welcome to the Pals April  2018 Blog Hop. Join us while we put “Families First” in our hop this month. The Stampin’ Pretty Pals will inspire you with family-related projects like Mother’s Day, Father’s Day, Graduation or Family Vacations. You may be just starting or hopped over from another Pal. In either case, you’ll find the line-up toward the end of my post to help you move along.

I have a special graduation card to share with you today! My daughter Abby is graduating from a North Dakota State University this early May, with a major in Biology with an emphasis in Pre-Health.  She’s thinking about becoming a Physician’s Assistant.  We’re so excited to see what her next adventure might be!  This card was designed for her graduation.

Right Picture Perfect Birthday - Graduation - Petal palette Designer Series Paper

North_Dakota_State_Bison
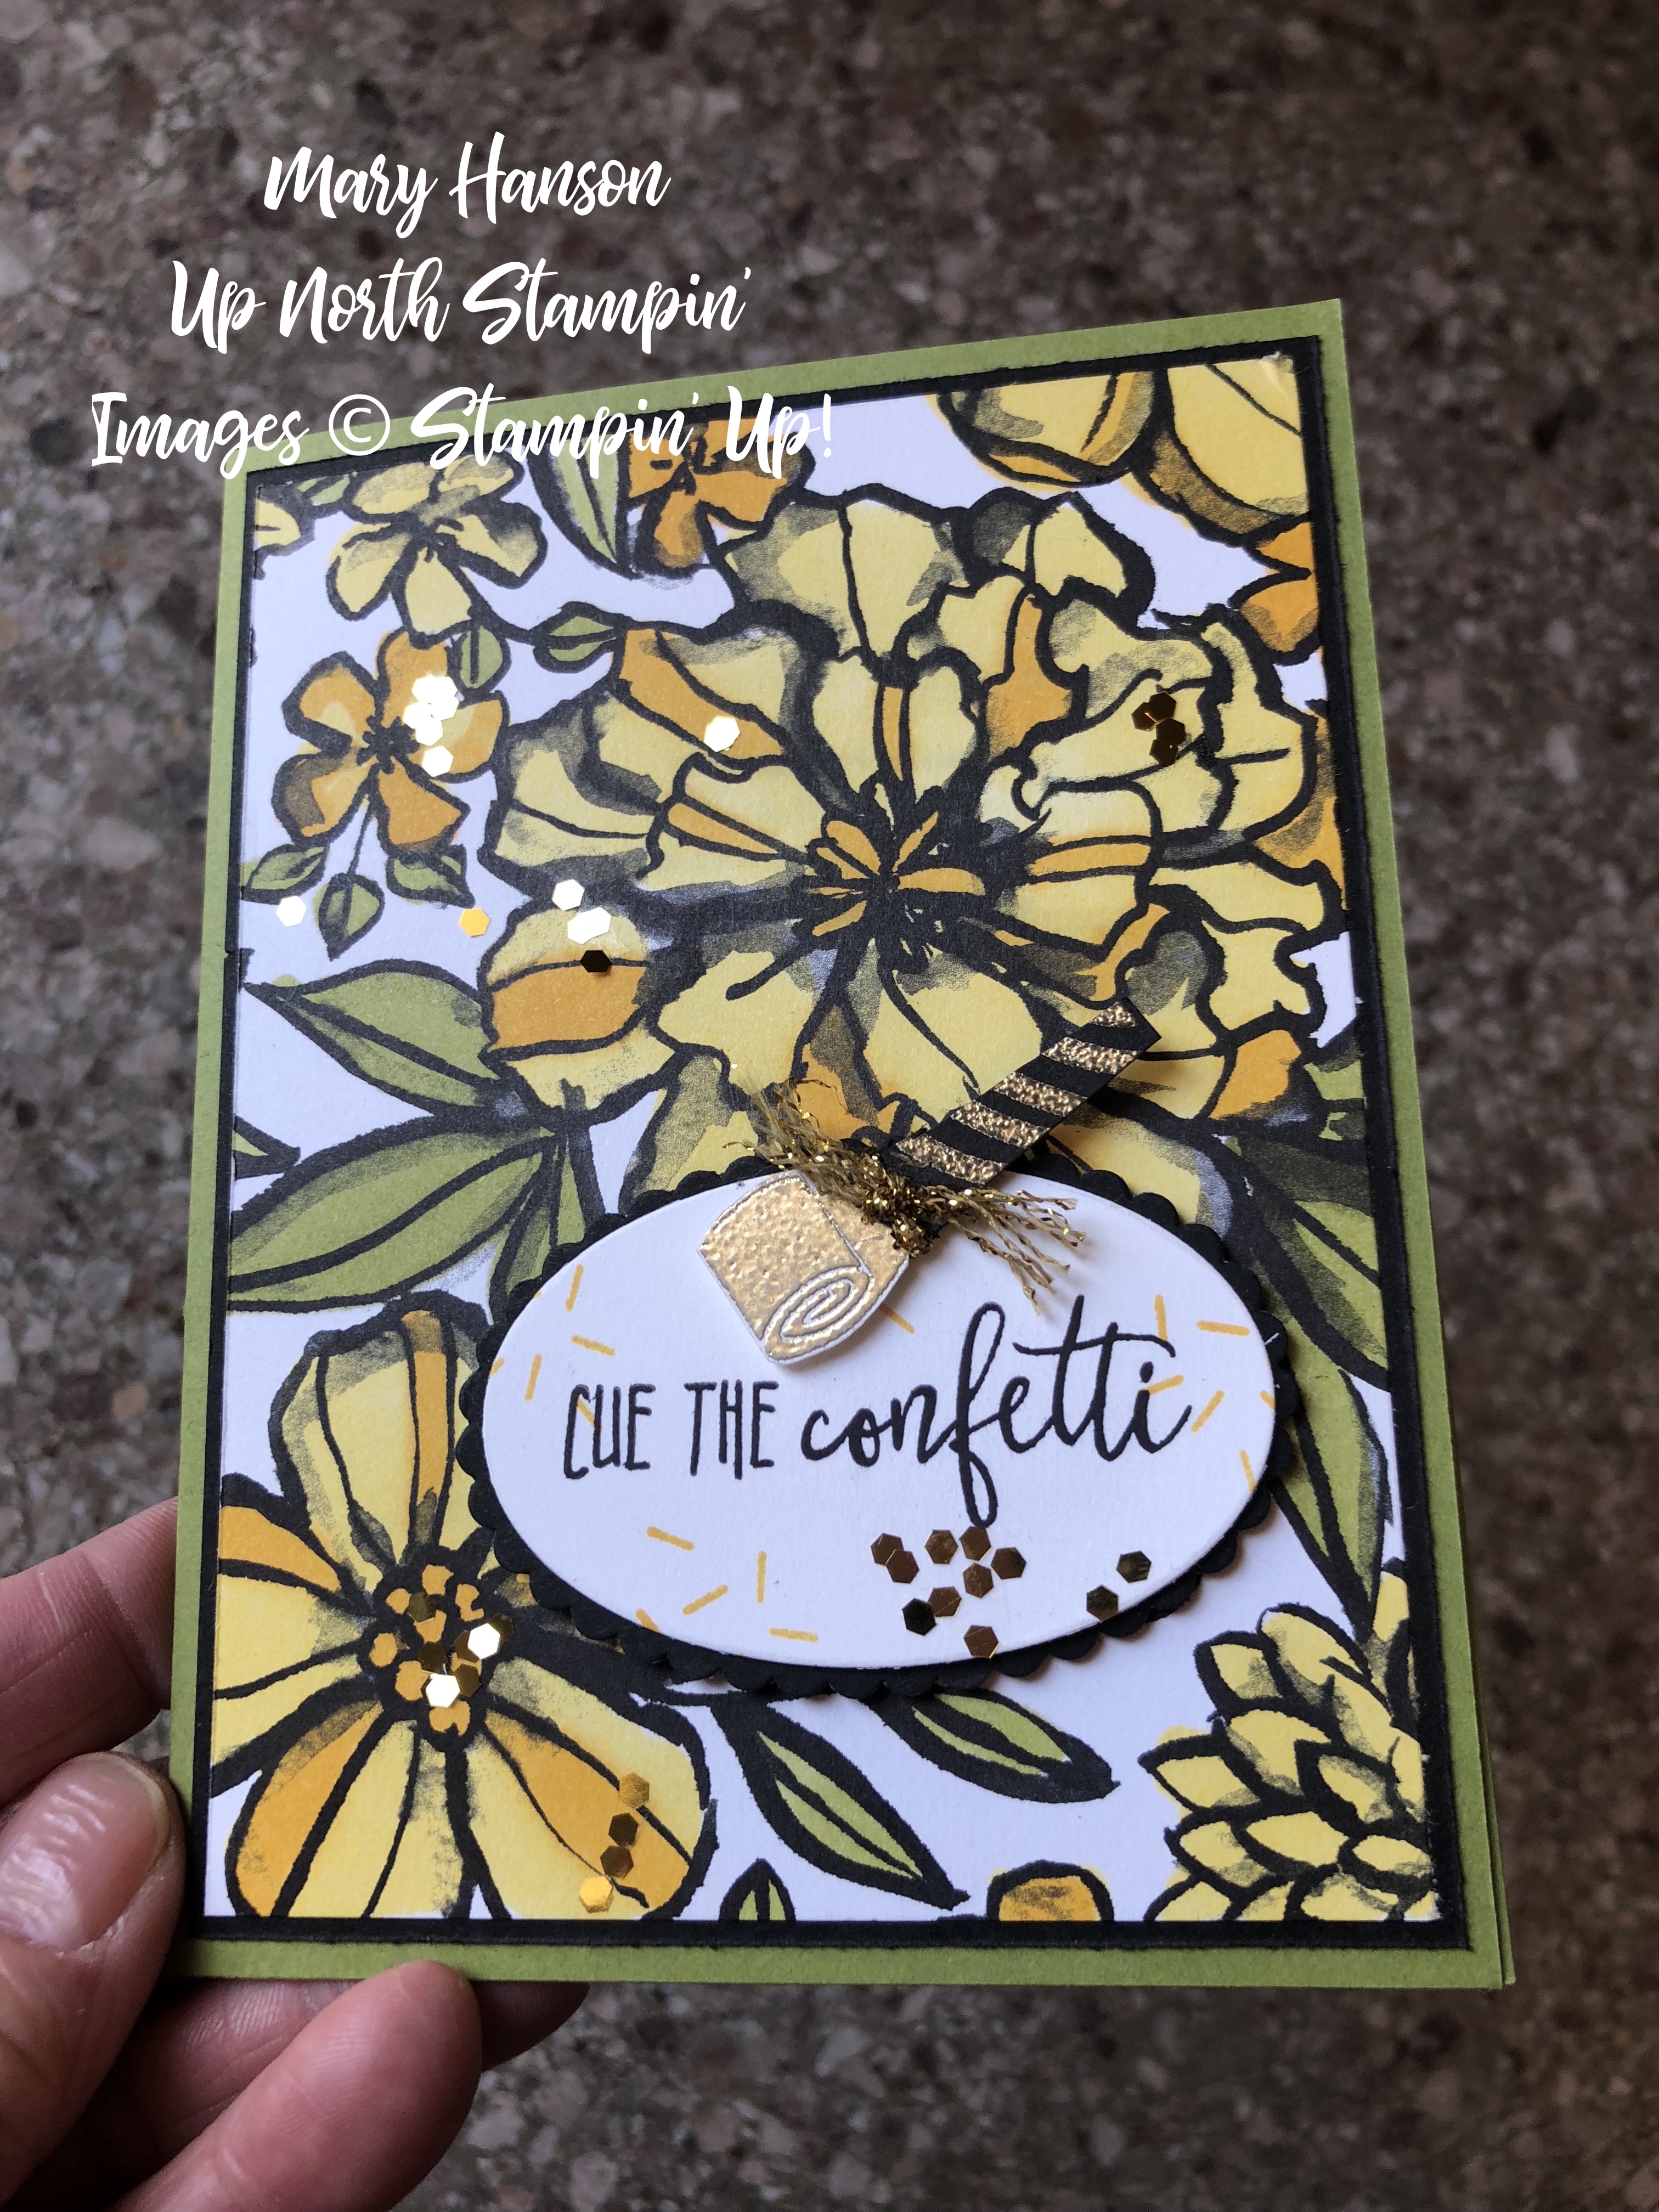
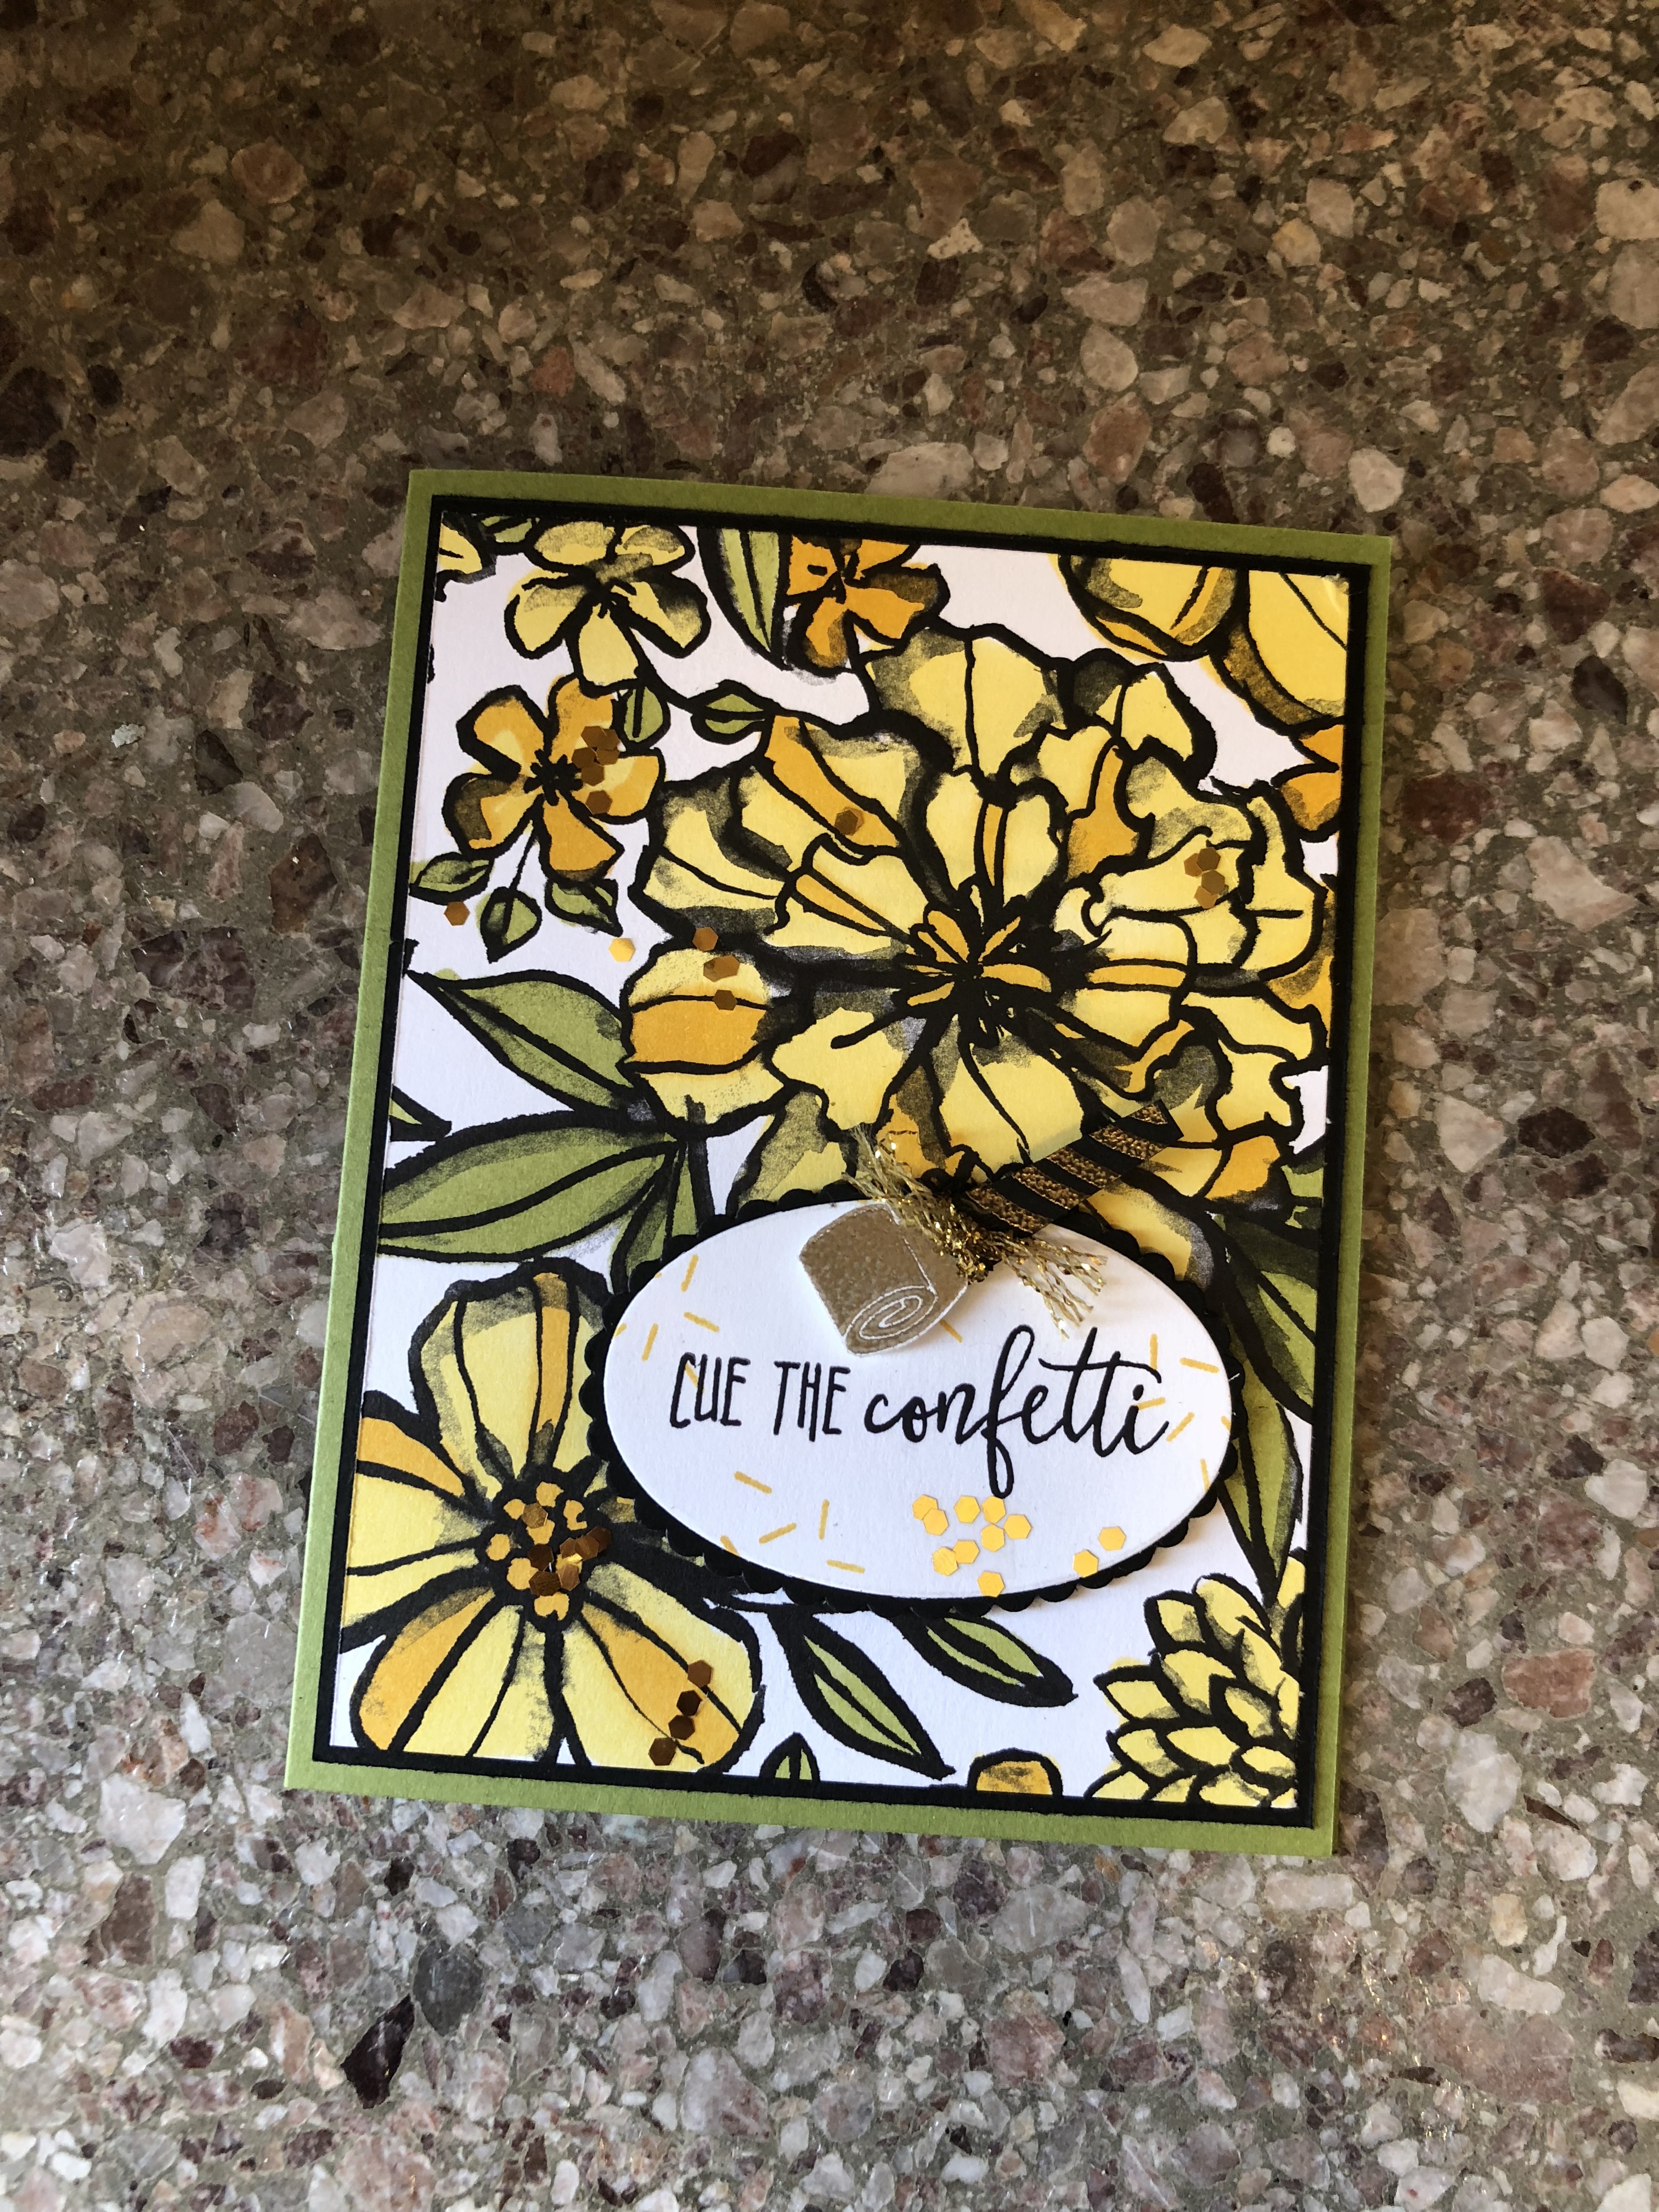
The school colors (Go, Bison!) are Green and Gold, so I used the Stampin’ Blends in Old Olive and Daffodil Delight to color a floral background on a beautiful panel of black and white Petal Passion Designer Series Paper.  The large flower reminds me of a college ‘mum!’  Yes??  I mounted this 3 7/8″ by 5 1/8″ floral panel to a piece of Basic Black cardstock measuring 4″ by 5 1/4″.  Finally, I adhered these to an Old Olive card base measuring 8 1/2″ by 5 1/2,” scored at 4 1/4.”
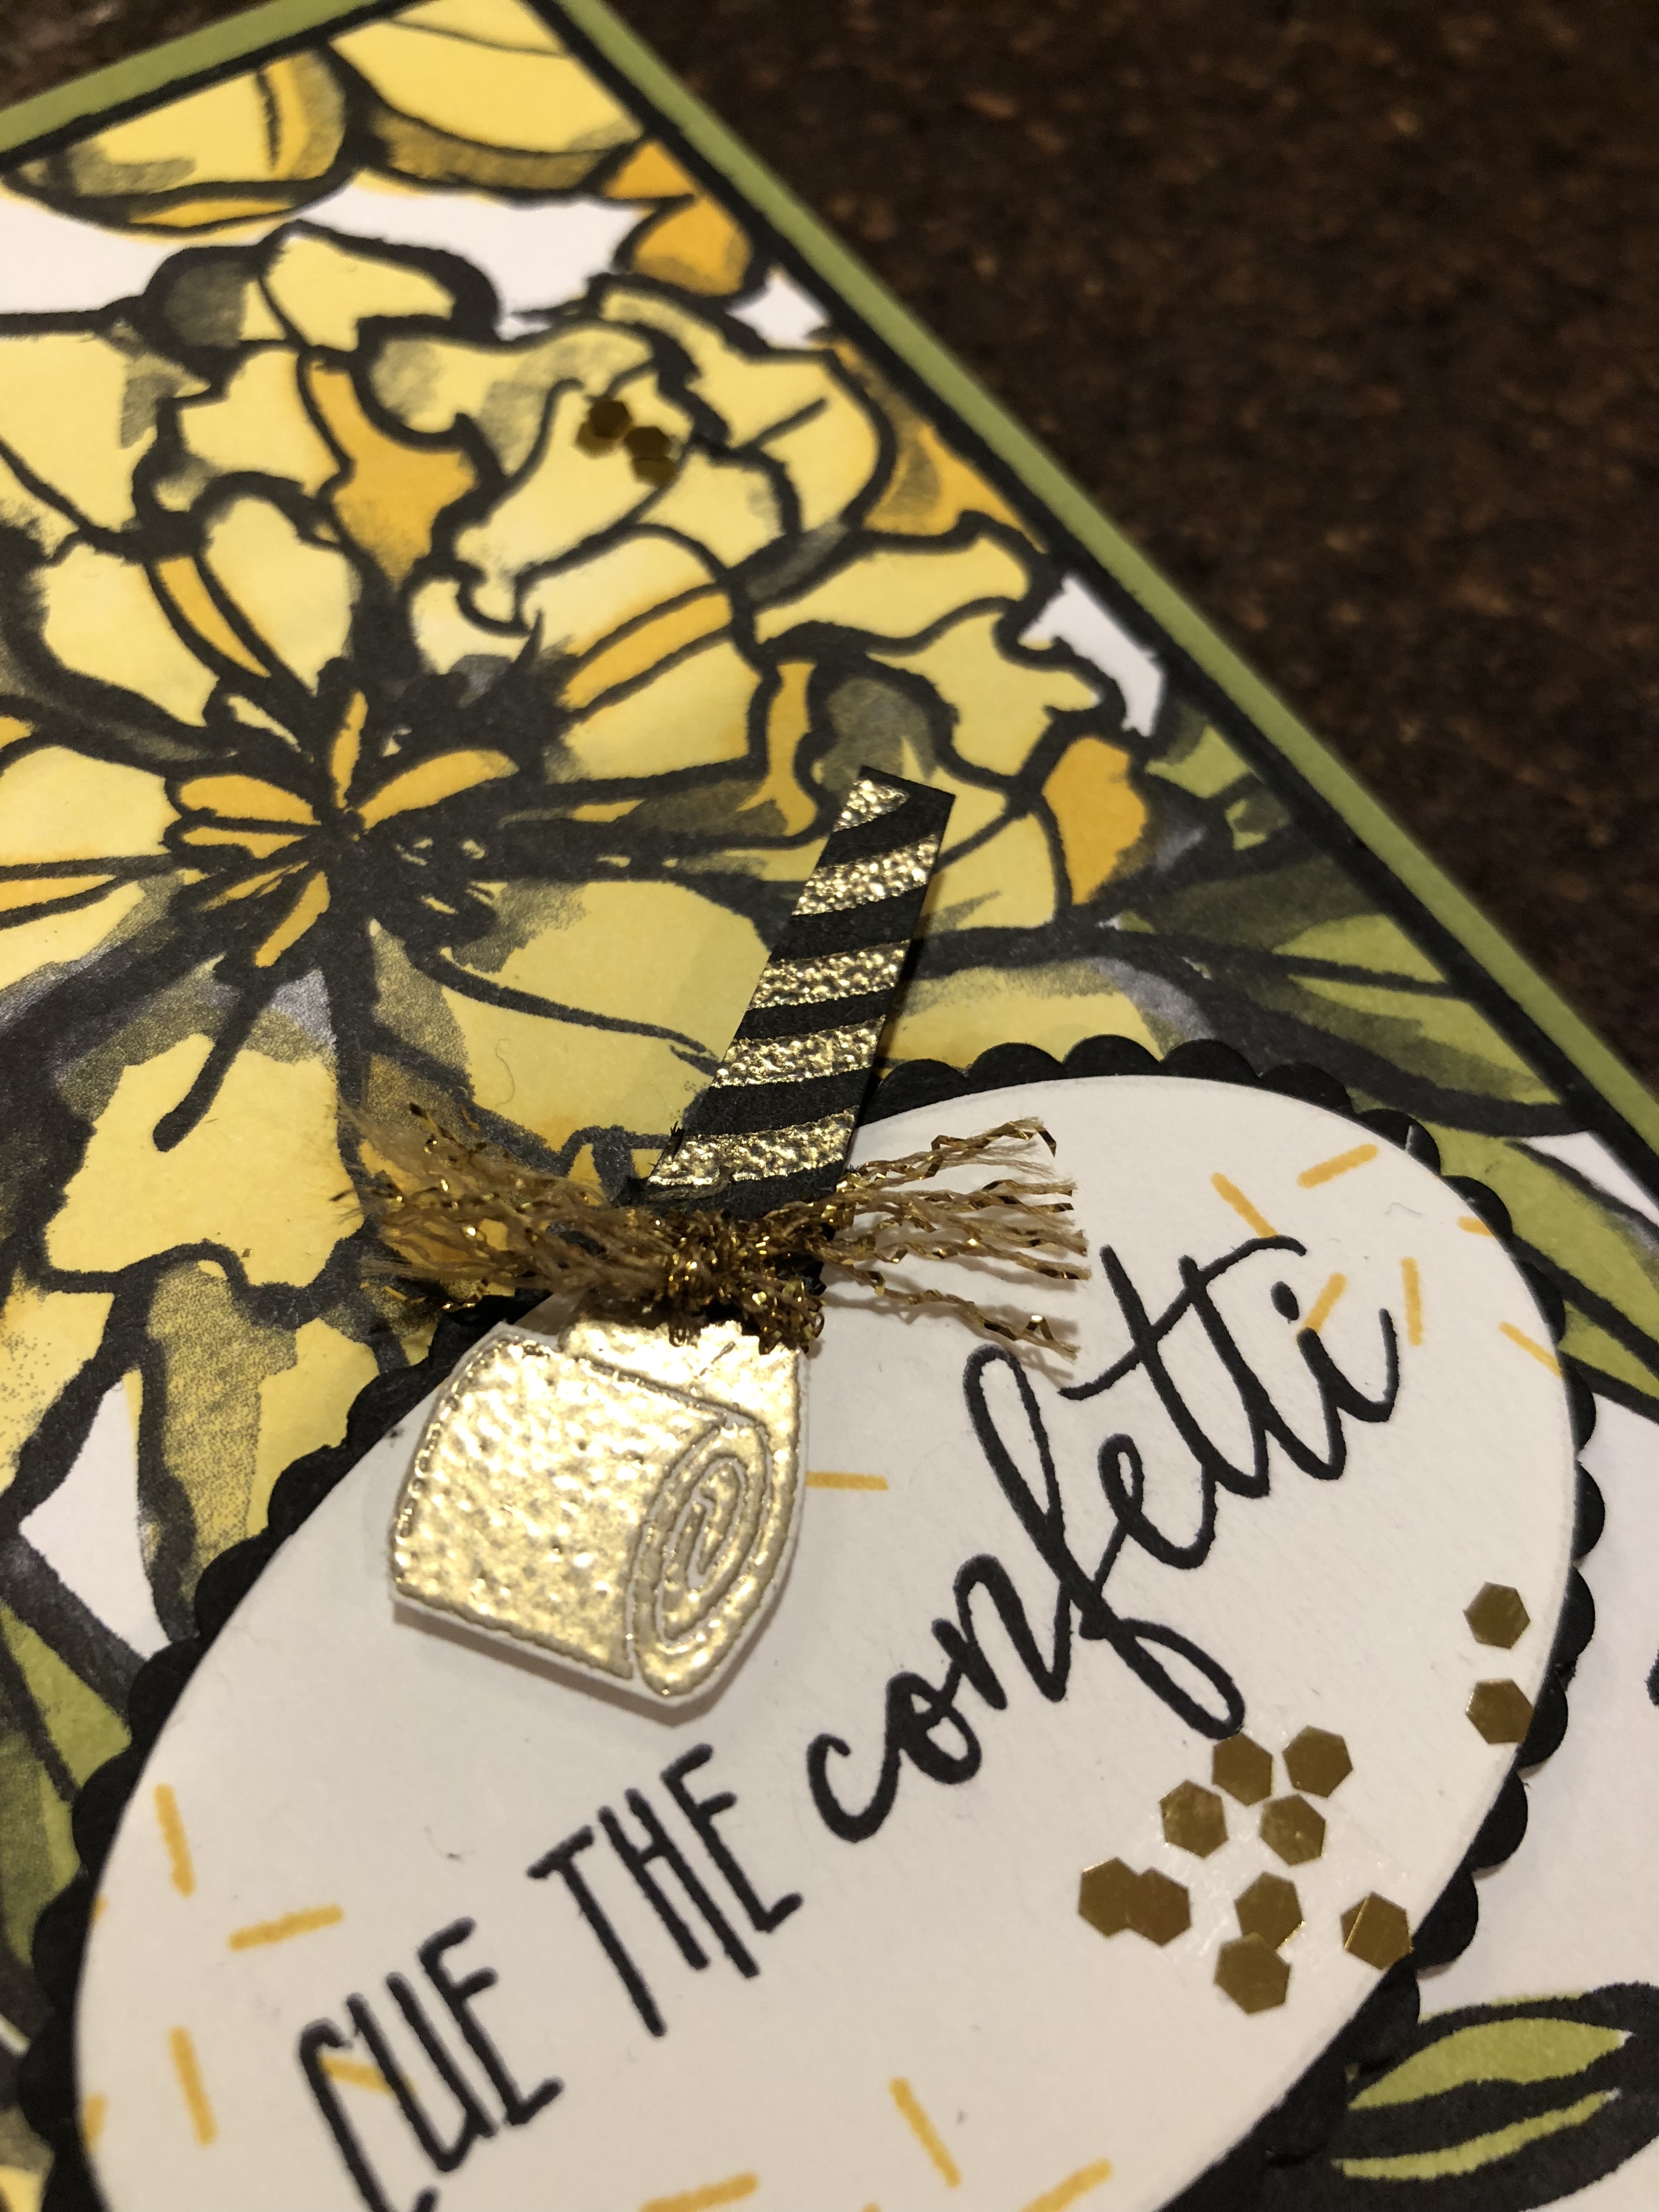
Close Up Angled - Picture Perfect Birthday - Mary Hanson - Up North Stampin'

I created the sentiment using the Layering Ovals Framelits Dies with Whisper White and Basic Black cardstock.  Then I made a party noisemaker by embossing gold stripes on Basic Black cardstock using the Picture Perfect stamp and fussing cutting it.  The ‘head’ part of the noisemaker was made with gold embossing powder on white.  I tied a small gold Mini Tinsel Trim around it and shredded the ends to add a little dimension.  Finally, I added some Gold Glitter Flakes across the card, because my girl likes her sparkles, just like her mama!  It looks beautiful when the sun catches it!

Picture Perfect Birthday Long View - Petal Palette Designer Series Paper - Mary Hanson - Up North Stampin'

The Picture Perfect Birthday stamp set is so great for many of life’s celebrations.  Just look at all those beautiful sentiments in those awesome fonts!  You can get yours now by clicking on the supply photos below, or clicking on the Link above to Go Shopping!

Picture Perfect Stamp SetThank you so much for hopping with the Stampin’ Pretty Pals today. Please take a minute to mark your calendar for our next hop on Wednesday, May 9, 2018, when we all “Step It Up with Textures or Techniques.”  Now hop along using the Blog Hop Line-up below. Don’t forget to leave us a comment. We really like that.

Blog Hop  Line-up:  

  1. Mary Fish at Stampin’ Pretty
  2. Wendy Klein at Doggone Delightful Stampin’
  3. Jennifer Michalski at Stamping Serenity
  4. Pamela Sadler at Stampin Pink Rose
  5. Sara Hicks Stuart at Sentiments by Sara
  6. Beth McCullough at Stamping Mom
  7. Brian King at Stamp with Brian
  8. Karen Hallam at Karen’s Stampin’ Habit!
  9. Nina King at Ink Paper Sequins
  10. Denise Hoepfner at The Mountain Magpie
  11. Su Mohr at Aromas And Art
  12. Mary Hanson at Up North Stampin’
  13. Stesha Bloodhart at Stampin’ Hoot!
  14. Rachael Shedeed at Bluebonnet Stampin
  15. Lisa Ann Bernard at Queen B Creations
  16. Maggie Mata at Maggie Made Cards
  17. Linda Suarez at All Night Stamping

Product List

I am “Green with Envy!”

As the Stampin’ Pals attend OnStage without me, (yes, I’m pouting just a little, even though I did get to attend last year), I took part in the “Green with Envy” Pals Card Swap recently.  Card Swaps are such a fun way to get wonderful creations from other crafters while sharing your won creation with them!  I chose to create a card using the Sweet Soiree Designer Series Papers.

Sweet Soiree Designer Series Paper - Petal Palette - Butterfly Thinlits - Silver Foil - Mary Hanson - Up North Stampin' .jpeg

Honestly, what is NOT to love about these beautiful papers teeming with silver foil accents?

Sweet Soiree DSP

They’re GORGEOUS in person, really.  I used two of the paper designs and mounted on a card base of Old Olive card stock.  Before adhering, I wrapped a length of the Berry Burst 3/8′ Metallic Edge Ribbon around the middle of the card.  I stamped a sentiment from the Petal Palette Stamp Set onto Whisper White cardstock and punched it out with the Tailored Tag Punch.  I popped that onto the card with Dimensionals, and decorated with some Basic Rhinestones — you can’t have enough bling!  I adhered a silver foil butterfly I cut out using the Butterflies Thinlits Dies, and that was it!

Sweet Soiree Designer Series Paper - Butterflies Thinlits Dies - Up North Stampin' - Mary Hanson

So even though I was “Green with Envy,” I DID get the opportunity to swap cards with many talented papercrafters!  Thanks, Pals!
Product List

Sweet Soiree Embellishment Kit!

Looking for a quick and festive card idea?  Look no further than our new Sweet Soiree Embellishment Kit from the Occasions Catalog.  Check out these cards made using this kit!

Sweet Soiree Embellishment Kit - Picture Perfect Birthday - Up North Stampin' - Mary Hanson

Sweet Soiree Embellishment Kit - Mary Hanson - Up North Stampin' -- Picture Perfect Birthday

The cards are made from the Sweet Soiree Designer Series Papers — beautiful spring colors with silver foil accents:

Sweet Soiree Papers

Once I built my card base, I made a bouquet on an oval die cut with the Sweet Soiree Embellishment Kit.  All the paper embellishments punch out — easy peasy!  Look at all the fun accents you get with this kit:

Sweet Soiree Embellishment Kit

Click on the products below to start shopping, or just click on the link at the top of the page, and let the Sweet Soiree Embellishments do the work for you!

Check out my video on the Sweet Soiree Embellishment Kit!

Product List

Glue Dots

$5.25