 Welcome to the Pals’ Blog Hop! We’re so glad you’re here because we made some great projects for our Retirement Fun Fold Party – showcasing our favorite products from the Holiday Catalog that will be leaving us forever. You may be starting the hop here or coming from a previous Pal’s blog. Either way, you’ve come to the right place. You’ll find the full line-up below to help you move, or “hop” along from Pal to Pal.
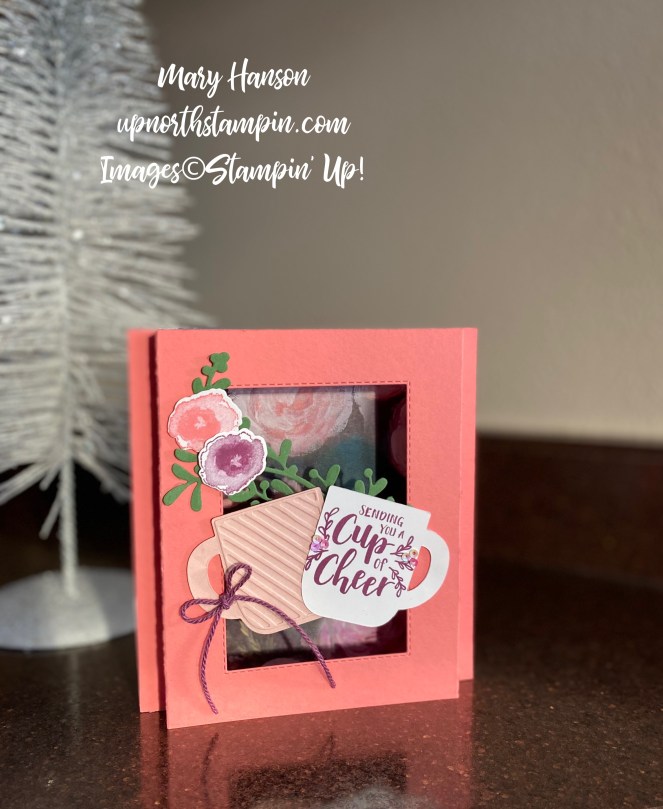
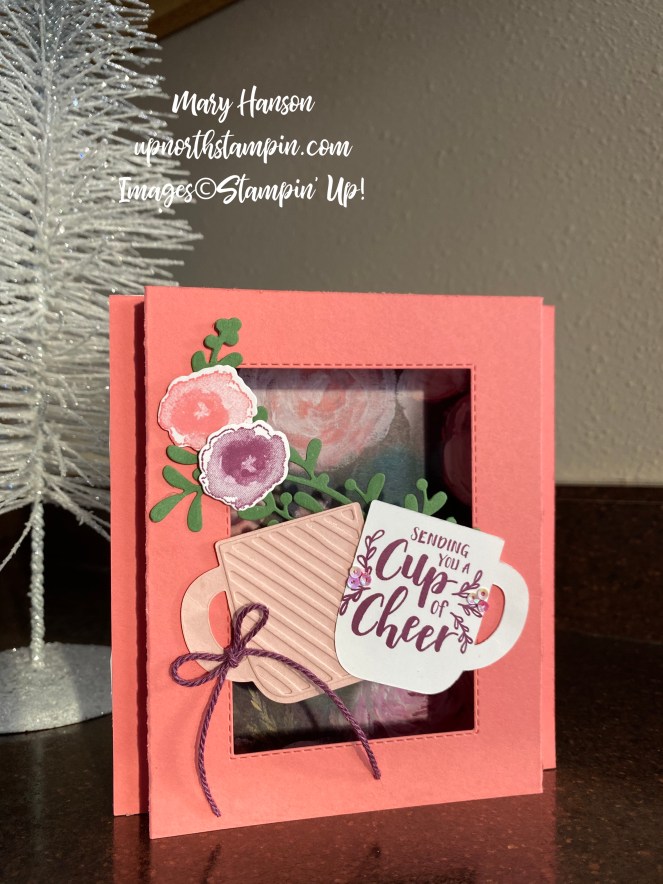
Today, I chose to feature the holiday bundle “Cup of Christmas” with a fun fold called the Shadow Box card. Since it is retiring, I wanted to show the versatility of this bundle; this card shows how the bundle can be used for a ‘get-well’ card or ‘thinking of you’ card as well as for the holidays.
I actually got the video pattern for this fun fold from Marsha Denning. Her video tutorial can be found HERE. Thank you, Marsha!
According to her directions, I took two panels of cardstock and cut them at 6 1/4″ by 5 1/2. I then scored on the 6 1/2″ side at 1/2″ and 1″ on both ends. I folded the scores in and out like an accordion. I then took the top panel of cardstock and used the Rectangle Stitched Dies to make a rectangle cut in the middle of the panel to create my shadowbox. This was the framelit I used:

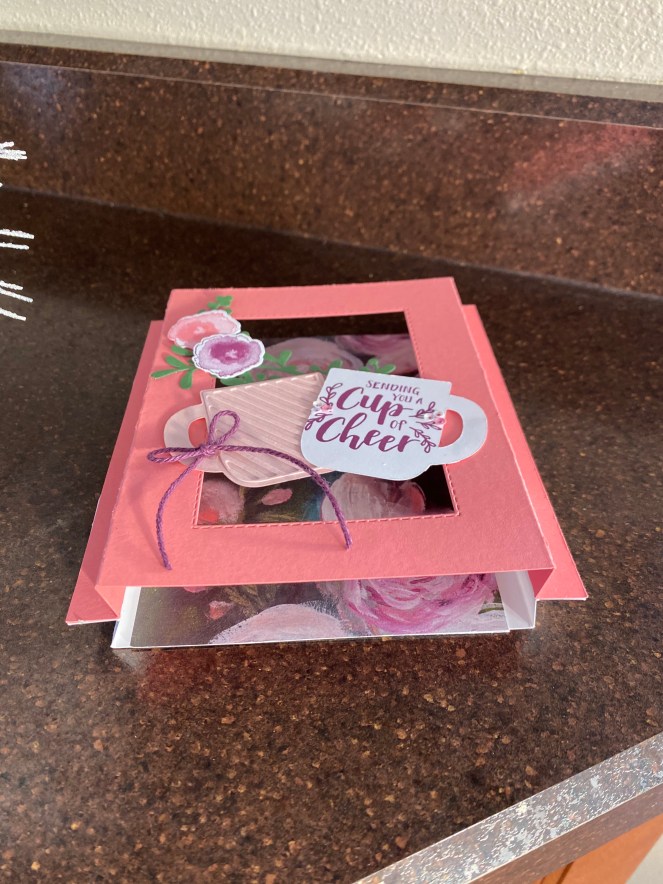
When put together, these two panels make an ‘accordian-style’ shadowbox frame that becomes your card. Before putting the two halves together, I put a panel of Perennial Essence and adhered it to the bottom panel. I then adhered the two halves of the card together. The video makes it much easier to understand, believe me! Here’s what it looks like from the bottom.
Time for some die cutting! I cut out two cups from the Cup of Christmas bundle, one in Whisper White and one in Petal Pink, and added some fun diagonal pattern with the diagonal die from the same color. You can put your cups together in any combination you’d like! I also cut out the leaf die in Garden Green from the Christmas Layers Dies.
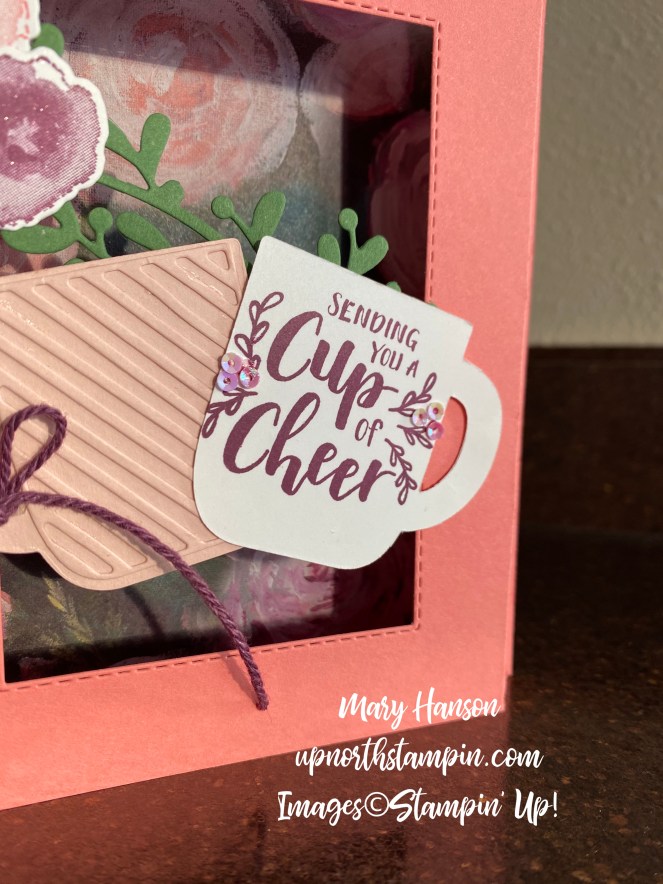
Then I did some stamping! On the white cup, I stamped a sentiment from the Cup of Christmas stamp set in Rich Razzleberry, and then added some fun small sequins. This stamp set has many fabulous sentiments, depending upon your occasion, don’t you agree?
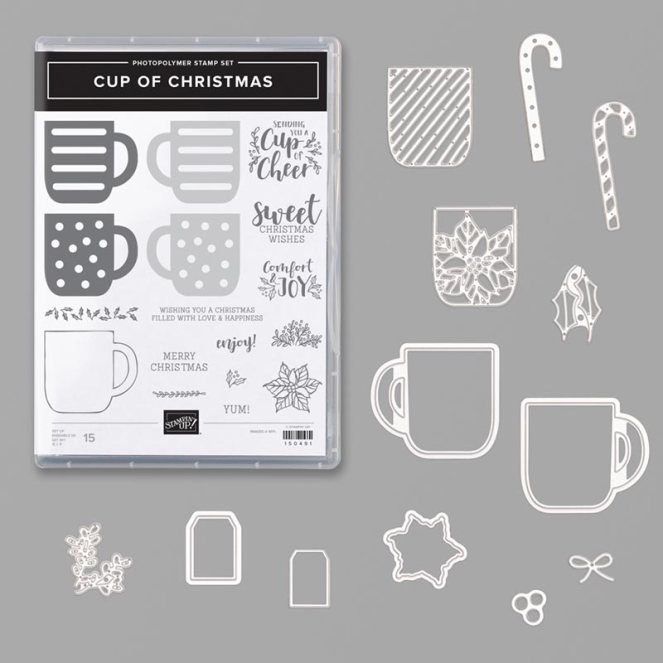
I also stamped some flowers from the First Frost stamp set in Petal Pink and Rich Razzleberry and then cut them out with my die cutter.
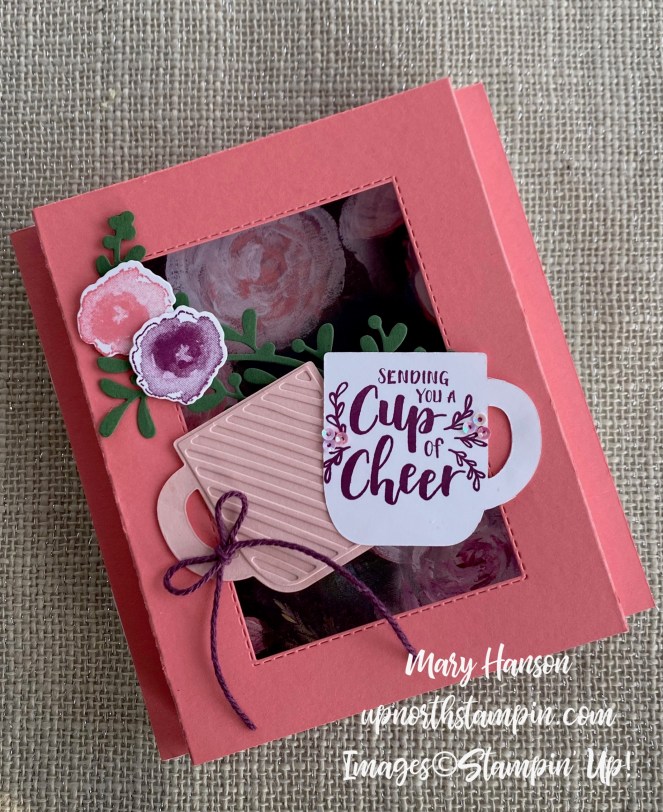
To put it all together, I adhered the leaf die to one side of the frame. Next I adhered the two cups at their ends, and then attached them to the outside frame of the card over the leaf die. I added the die cut flowers. A bow with some baker’s twine, and I was done! Remember, when folded flat, this card fits an A2 envelope, so it’s a piece of cake to send in the mail!
I hope you enjoyed seeing a softer, more feminine version of a project made with the fabulous (and RETIRING!) Cup of Christmas Bundle. Get yours NOW!! The products I used to make this card can be found at the end of this post.
More inspiration awaits! Use the Blog Hop Line-up below to visit the rest of this month’s Design Team. My fellow Pals are excited to show you what they’ve created! Don’t forget to show us some love by commenting on our creations. Mark your calendars for Wednesday, January 8th, for our Time to Sale-A-Brate blog hop when our Design Team showcase projects using brand new products from the new mini catalog and Sale-A-Bration brochure. Don’t miss the fun!
Pals Blog Hop Line-Up
- Mary Fish at Stampin’ Pretty
- Jackie Beers at Blue Line Stamping
- Lisa Ann Bernard at Queen B Creations
- Beth McCullough at Stamping Mom
- Katy McGloin at Just Fun Stamping
- Stesha Bloodhart at Stampin’ Hoot!
- Jeanie Stark at Just Stampin’
- Su Mohr at Aromas And Art
- Debra Simonis at Deb’s Stampin’ Grounds
- Lynn Kolcun at Avery’s Owlery
- Peggy Noe at Pretty Paper Cards
- Jen Roque at Stamp Camp with Jen
- Mary Hanson at Up North Stampin’
- Karen Hallam at Karen’s Stamping Habit
- Tricia Chuba at ButterDish Designs
- Wendy Klein at Doggone Delightful Stampin’
Product List
|
|
|
|
|
|
Elegant Eggplant Solid Baker’s Twine
[141685]
$3.00
|
|||
|
|
|
|
|
")


Love this card!
LikeLike
I absolutely LOVE this card! I hope you won’t mind, but I am going to recreate it as best i can for my January club card swap. It takes some work but is so worth it! Thanks for sharing your talent!
LikeLike
So glad you liked it! Thank you for your kind comments!
LikeLike
Very pretty. You perfected that 3D look. 🙂
LikeLike
Beautiful card! I love the colors you chose, thanks for sharing!
LikeLike
Love this shadow box card! I haven’t made one in a while but I think you have gotten me to do one again soon. Your choice of floral papers for the background is perfect! Happy Holidays to you and your family!
LikeLike
You know… it really is the card design that makes or breaks a fun fold! This is the prettiest Shadow Box card I have seen! Well done, Pal!
LikeLike
Fabulous card, Mary! The depth you created is amazing!
LikeLike