Welcome to the Stampin’ Pretty Pals’ Blog Hop!
This month, the Pals have been busy creating cozy, frosty, whimsical card ideas and paper crafts for our Winter Wonderland theme — using our favorite Stampin’ Up! goodies. Each project brings a different twist, and that’s what makes the hop feel like a stroll through a creative winter village. If you’re looking for inspiration (or maybe a reason to stay inside with your craft supplies), this hop is for you!
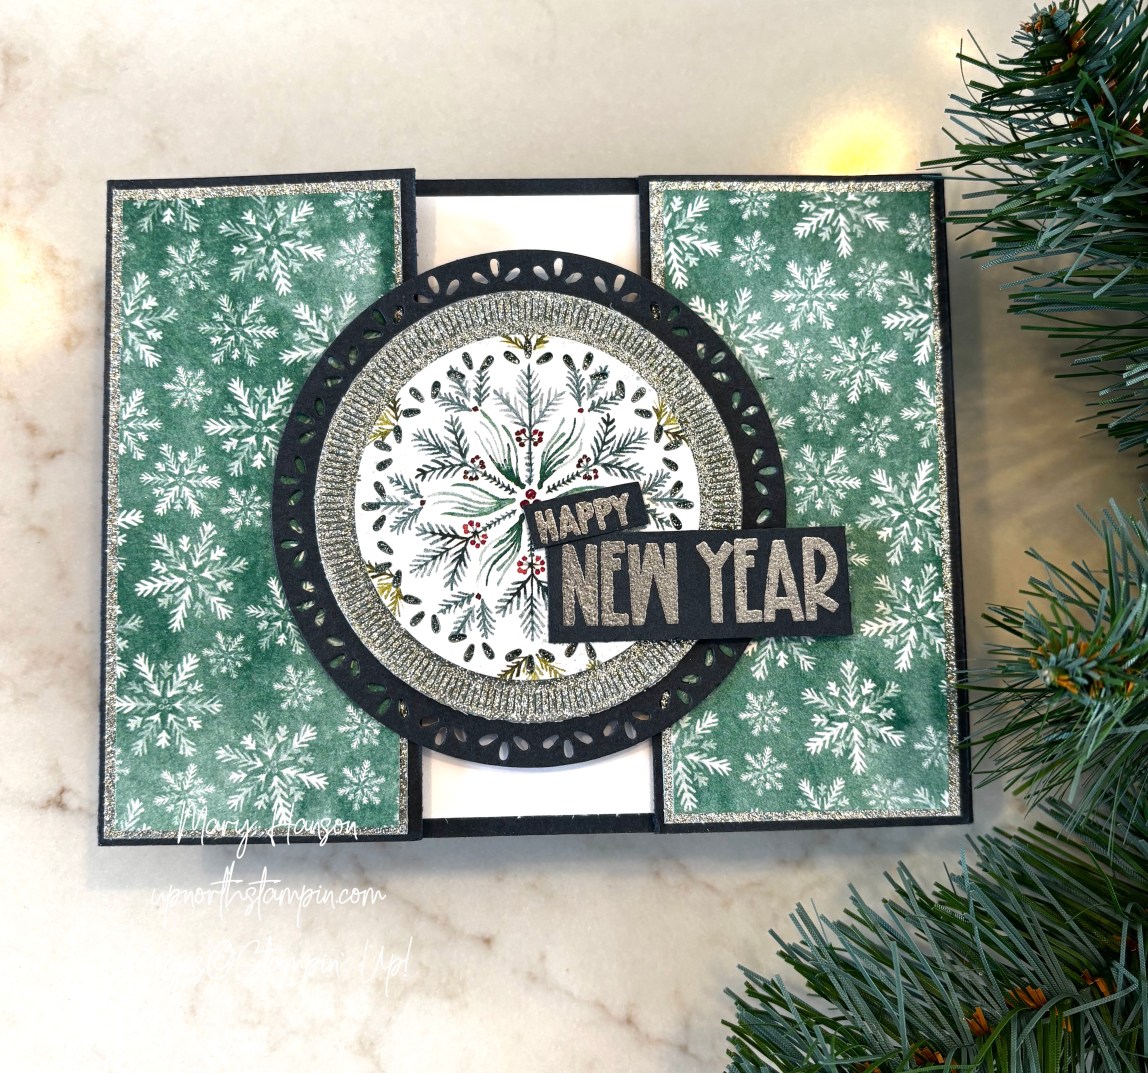
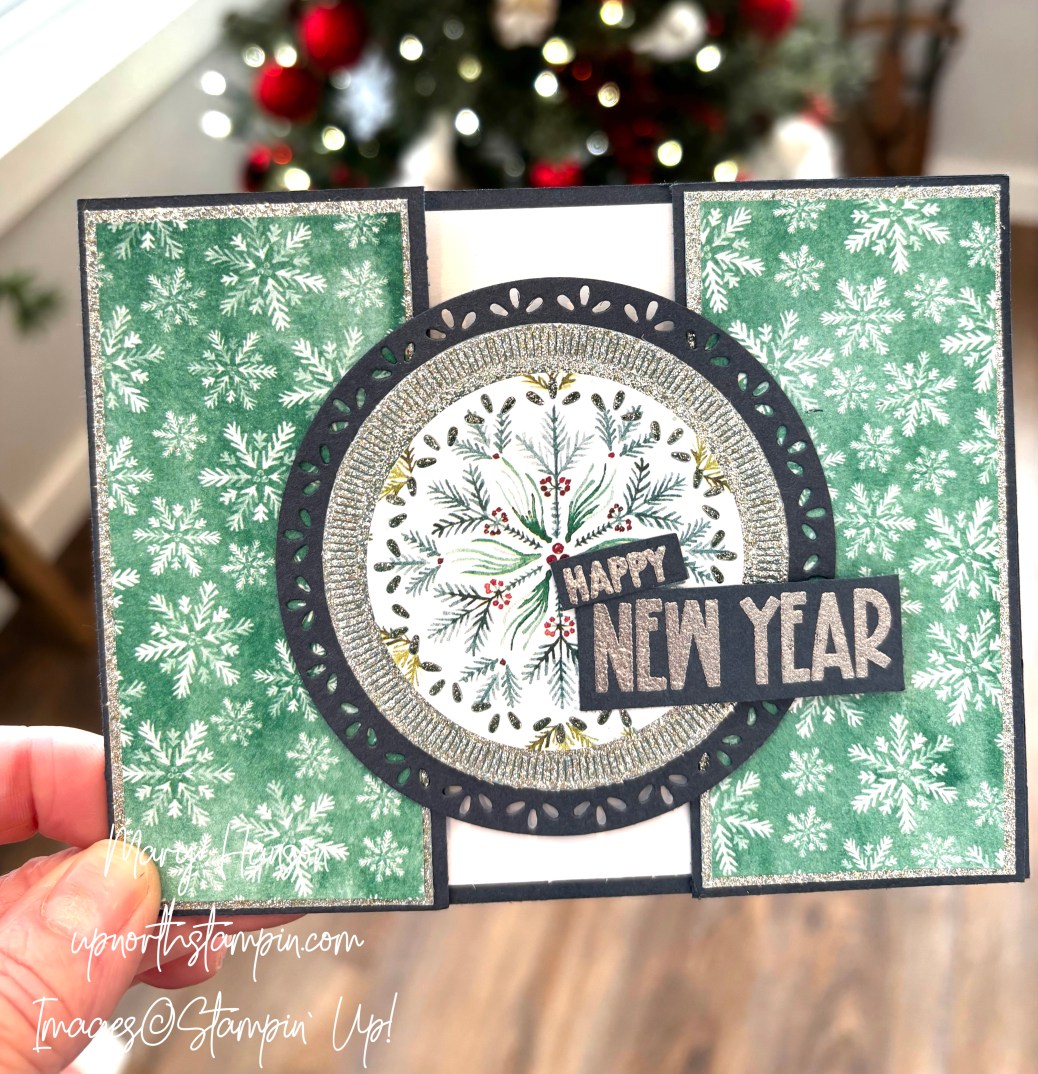
I always think of New Year’s Eve as a sparkly affair, so I decided to create a New Year’s card full of snowflakes and sparkles!
Here are your materials and measurements:
- Secret Sea Cardstock
- 4 1/4 x 7 1/2″; score on the long side at 5 1/2″
- Two pieces of 2” x 4 ¼”
- Scrap for die cutting
● Peaceful Garden 12 x 12″ Glimmer Cardstock
- Two pieces of 1 ⅞” x 4 ⅛”
- Scrap for die cutting
● Basic White Cardstock cut at 4” x 5 ¼
● Elegant Pines Snowflakes Designer Series Paper: Two pieces cut at 1 ¾” x 4”
Instructions
1. Fold the Secret Sea cardstock along the score lines to form the card base.
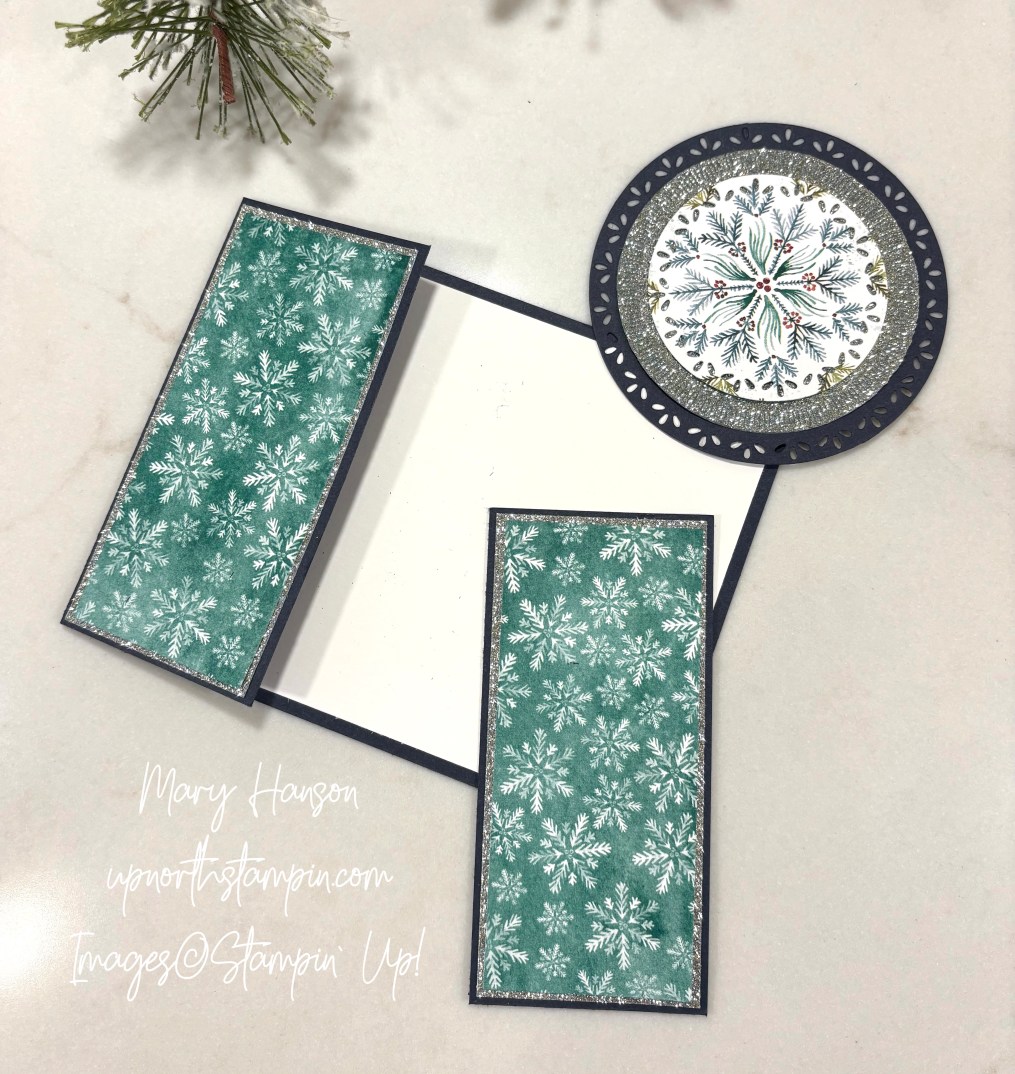
2. Layer the Elegant Pines Designer Series Paper onto the Peaceful Garden Glimmer cardstock pieces. Attach the glimmer cardstock to the front side panel of the card base and to the separate Secret Sea cardstock piece. (See photo below)
3. Cut three layers of circles out using the Spotlight on Nature Dies. I used Secret Sea cardstock, then the silver glimmer paper, then a snowflake pattern from the Elegant Pines DSP. Adhere the circles together.
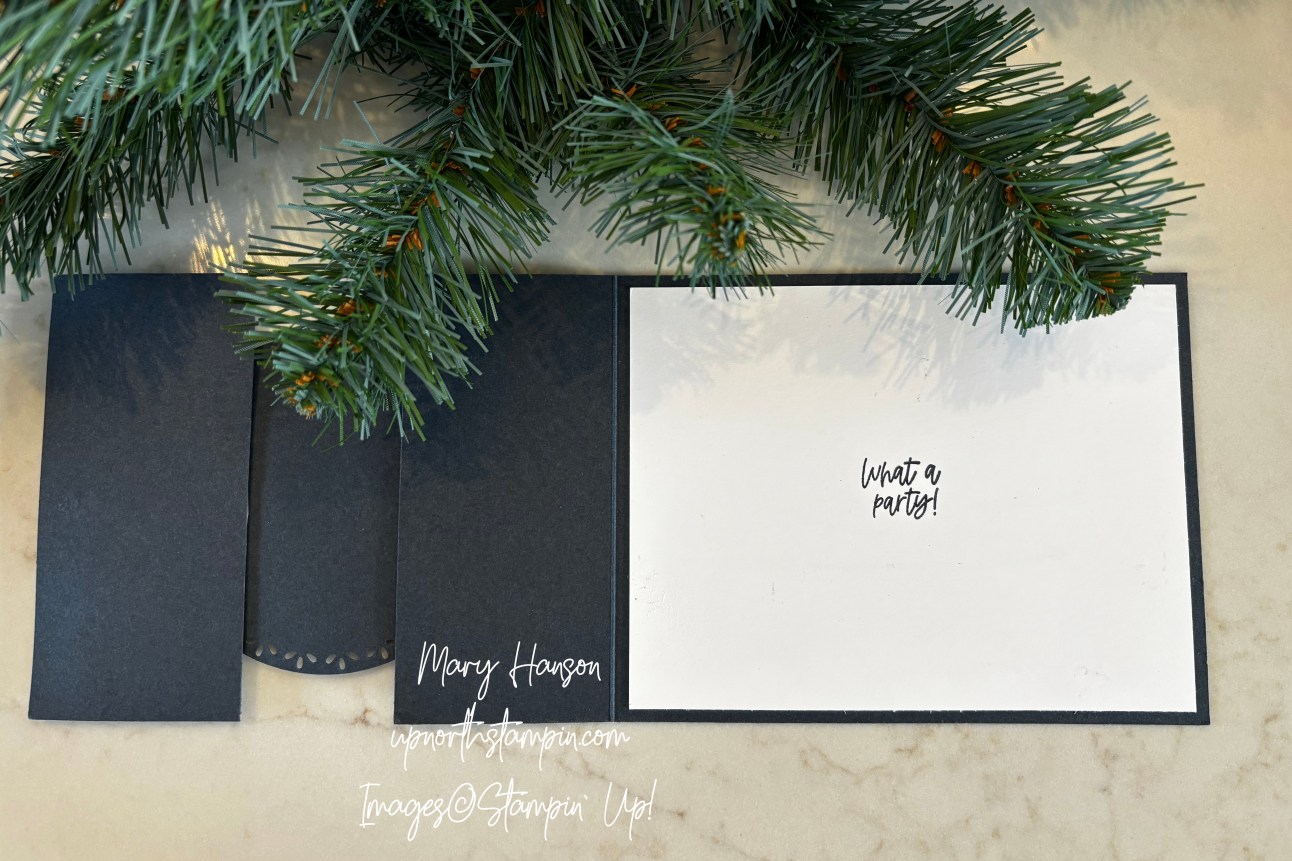
4. Adhere the Basic White panel to the inside of the card. Now you have your separate elements of this card.
5. Stamp the sentiment from the new Reason to Celebrate stamp set, available soon, on a scrap piece of Secret Sea cardstock using Versamark ink. Heat emboss using Silver Embossing Power, and then cut around it using snips. Note: This stamp set is going to be SO popular — I just love the sentiments and the fonts!
6. Adhere the sentiment onto the circle piece. Line up the separate Secret Sea cardstock piece with the right side of the card base. Add adhesive to the both sides of the circled sentiment cluster and attach to the separate Secret Sea panel. Remember to only use adhesive on the outsides of the circle back so nothing shows when you open up the card. I used Tear n Tape to make sure it’s secure.
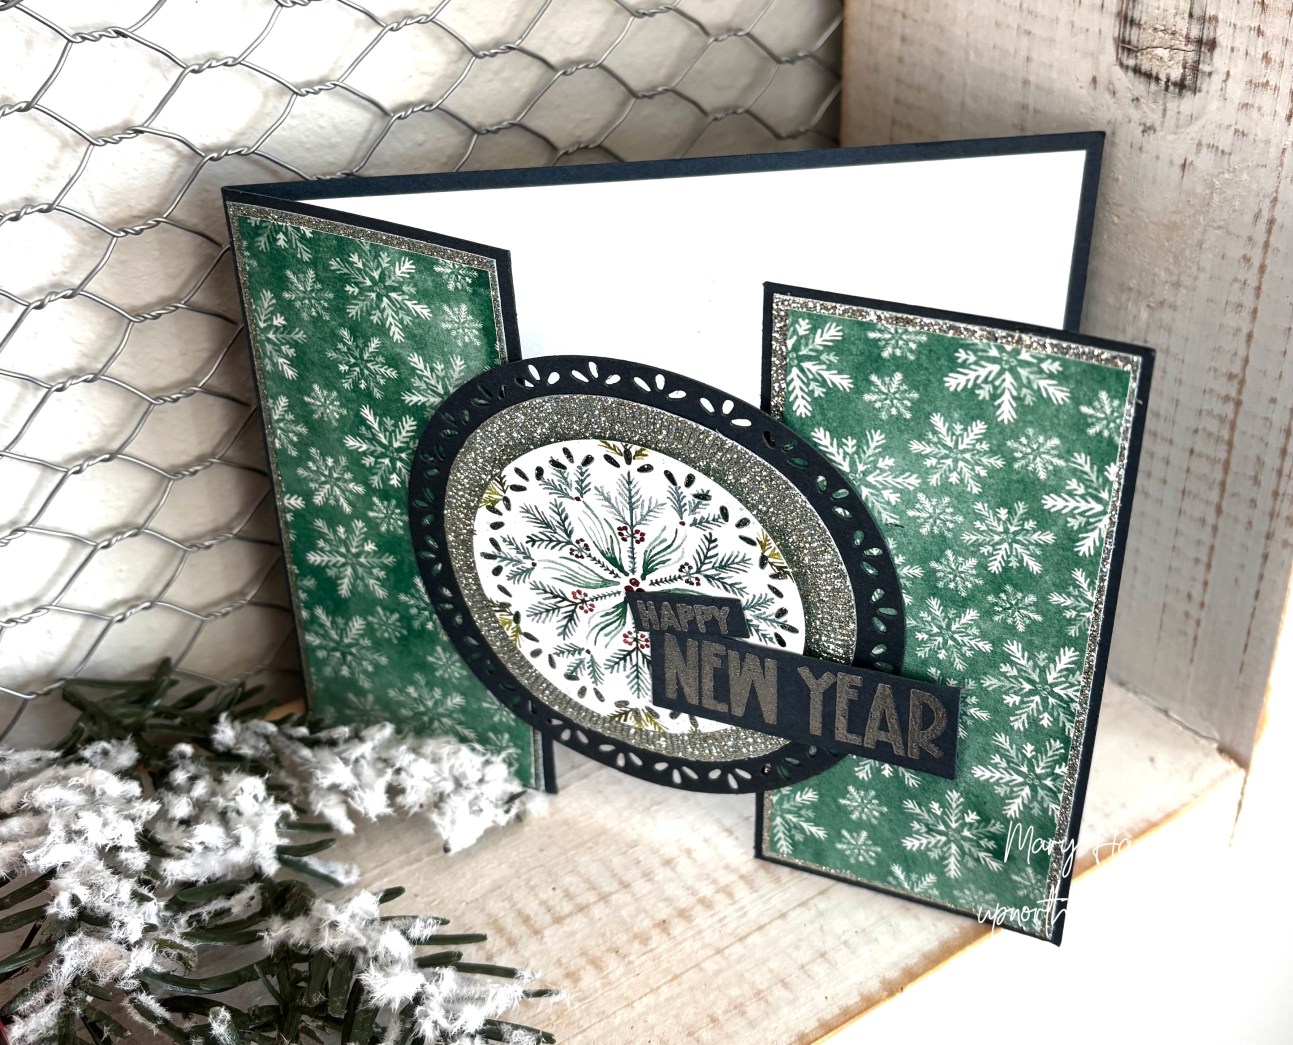
7. Stamp the inside of the card, making sure to get the words in the middle of the panel if you don’t want them to show from the front.
You are done! I hope you liked my shimmer, wintery New Year’s card! Keep the inspiration going! Follow the lineup below to hop through each blog and enjoy every beautifully frosty idea. And stick around — next month we’re creating for the “Something New” theme, and you won’t want to miss it!

Stampin’ Pretty Pals Blog Hop
- Mary Fish at Stampin’ Pretty
- Sue Jackson at Just Peachy Stamping
- Stesha Bloodhart at Stampin’ Hoot
- Mary Hanson at Up North Stampin’
- Debbie Mageed at Secrets to Stamping
- Su Mohr at Aromas And Art
- Windy Ellard at Windy’s Wonderful Creations
- Peggy Noe at Pretty Paper Cards
- Rae Burnet at Wild West Paper Arts
- Beth McCullough at Stamping Mom
- Lisa Ann Bernard at Queen B Creations
- Karen Hallam at Karen’s Stamping Habit
- Tricia Chuba at ButterDish Designs
![Spotlight On Nature Dies [ 163580 ]](https://assets1.tamsnetwork.com/images/EC042017NF/163580s.jpg "Spotlight On Nature Dies [ 163580 ]") | ||
![Secret Sea 8 1/2" X 11" Cardstock [ 165624 ]](https://assets1.tamsnetwork.com/images/EC042017NF/165624s.jpg "Secret Sea 8 1/2\" X 11\" Cardstock [ 165624 ]") | ![Basic White 8 1/2" X 11" Cardstock [ 166780 ]](https://assets1.tamsnetwork.com/images/EC042017NF/166780s.jpg "Basic White 8 1/2\" X 11\" Cardstock [ 166780 ]") | |
![Heat Tool (Us And Canada) [ 129053 ]](https://assets1.tamsnetwork.com/images/EC042017NF/129053s.jpg "Heat Tool (Us And Canada) [ 129053 ]") | ![Silver Stampin' Emboss Powder [ 109131 ]](https://assets1.tamsnetwork.com/images/EC042017NF/109131s.jpg "Silver Stampin' Emboss Powder [ 109131 ]") | ![Versamark Pad [ 102283 ]](https://assets1.tamsnetwork.com/images/EC042017NF/102283s.jpg "Versamark Pad [ 102283 ]") |
![Elegant Pine Snowflakes 12" X 12" (30.5 X 30.5 Cm) Designer Series Paper [ 166066 ]](https://assets1.tamsnetwork.com/images/EC042017NF/166066s.jpg "Elegant Pine Snowflakes 12\" X 12\" (30.5 X 30.5 Cm) Designer Series Paper [ 166066 ]")
![Peaceful Garden 12" X 12" (30.5 X 30.5 Cm) Glimmer Paper [ 165929 ]](https://assets1.tamsnetwork.com/images/EC042017NF/165929s.jpg "Peaceful Garden 12\" X 12\" (30.5 X 30.5 Cm) Glimmer Paper [ 165929 ]")
![Secret Sea Classic Stampin' Pad [ 165285 ]](https://assets1.tamsnetwork.com/images/EC042017NF/165285s.jpg "Secret Sea Classic Stampin' Pad [ 165285 ]")
Remember, you can go online to see all the products, and their coordinating suite items. SHOP the new Mini Catalog Products HERE!
Not only is there a mini catalog to shop, there are new gorgeous products found ONLY on the Stampin’ Up! website. SHOP the new Onlines Exclusives HERE!
And be sure to join my private Facebook Group — the Up North Stampin’ Gang! We post, we share, and just have a lot of fun! Go here and request to join: https://www.facebook.com/groups/199783410436824
Happy Stamping! Mary

So pretty and very elegant! I love it! The fun fold is one of my favorites and I like that you did it in “landscape.” Thanks for joining the blog hop this month! It’s been a great year of hops. Happy Holidays!
LikeLike
Beautiful card and colors! Love the New Years sentiment! Windy
LikeLike
Sparkling beauty, Mary!
LikeLike
Fun card for the New Year, Mary! Great idea!
LikeLike
Such a fun and festive fun fold card, Mary! Thanks for sharing.
LikeLike