Wednesday is THE day! Here are two great reasons to make a Stampin’ Up! order on Wednesday, September 18:
1. Surprise! It’s time for FREE SHIPPING!
On September 18, you can shop and save on all qualifying orders of $75 or more. What a great way to stock up on all your favorite products from the catalog, Online Exclusives, kits, and more!
Free shipping is for one day only, so spread the word and help your customers get ready for this limited-time offer! Visit the promotion page to learn more and share the great news.
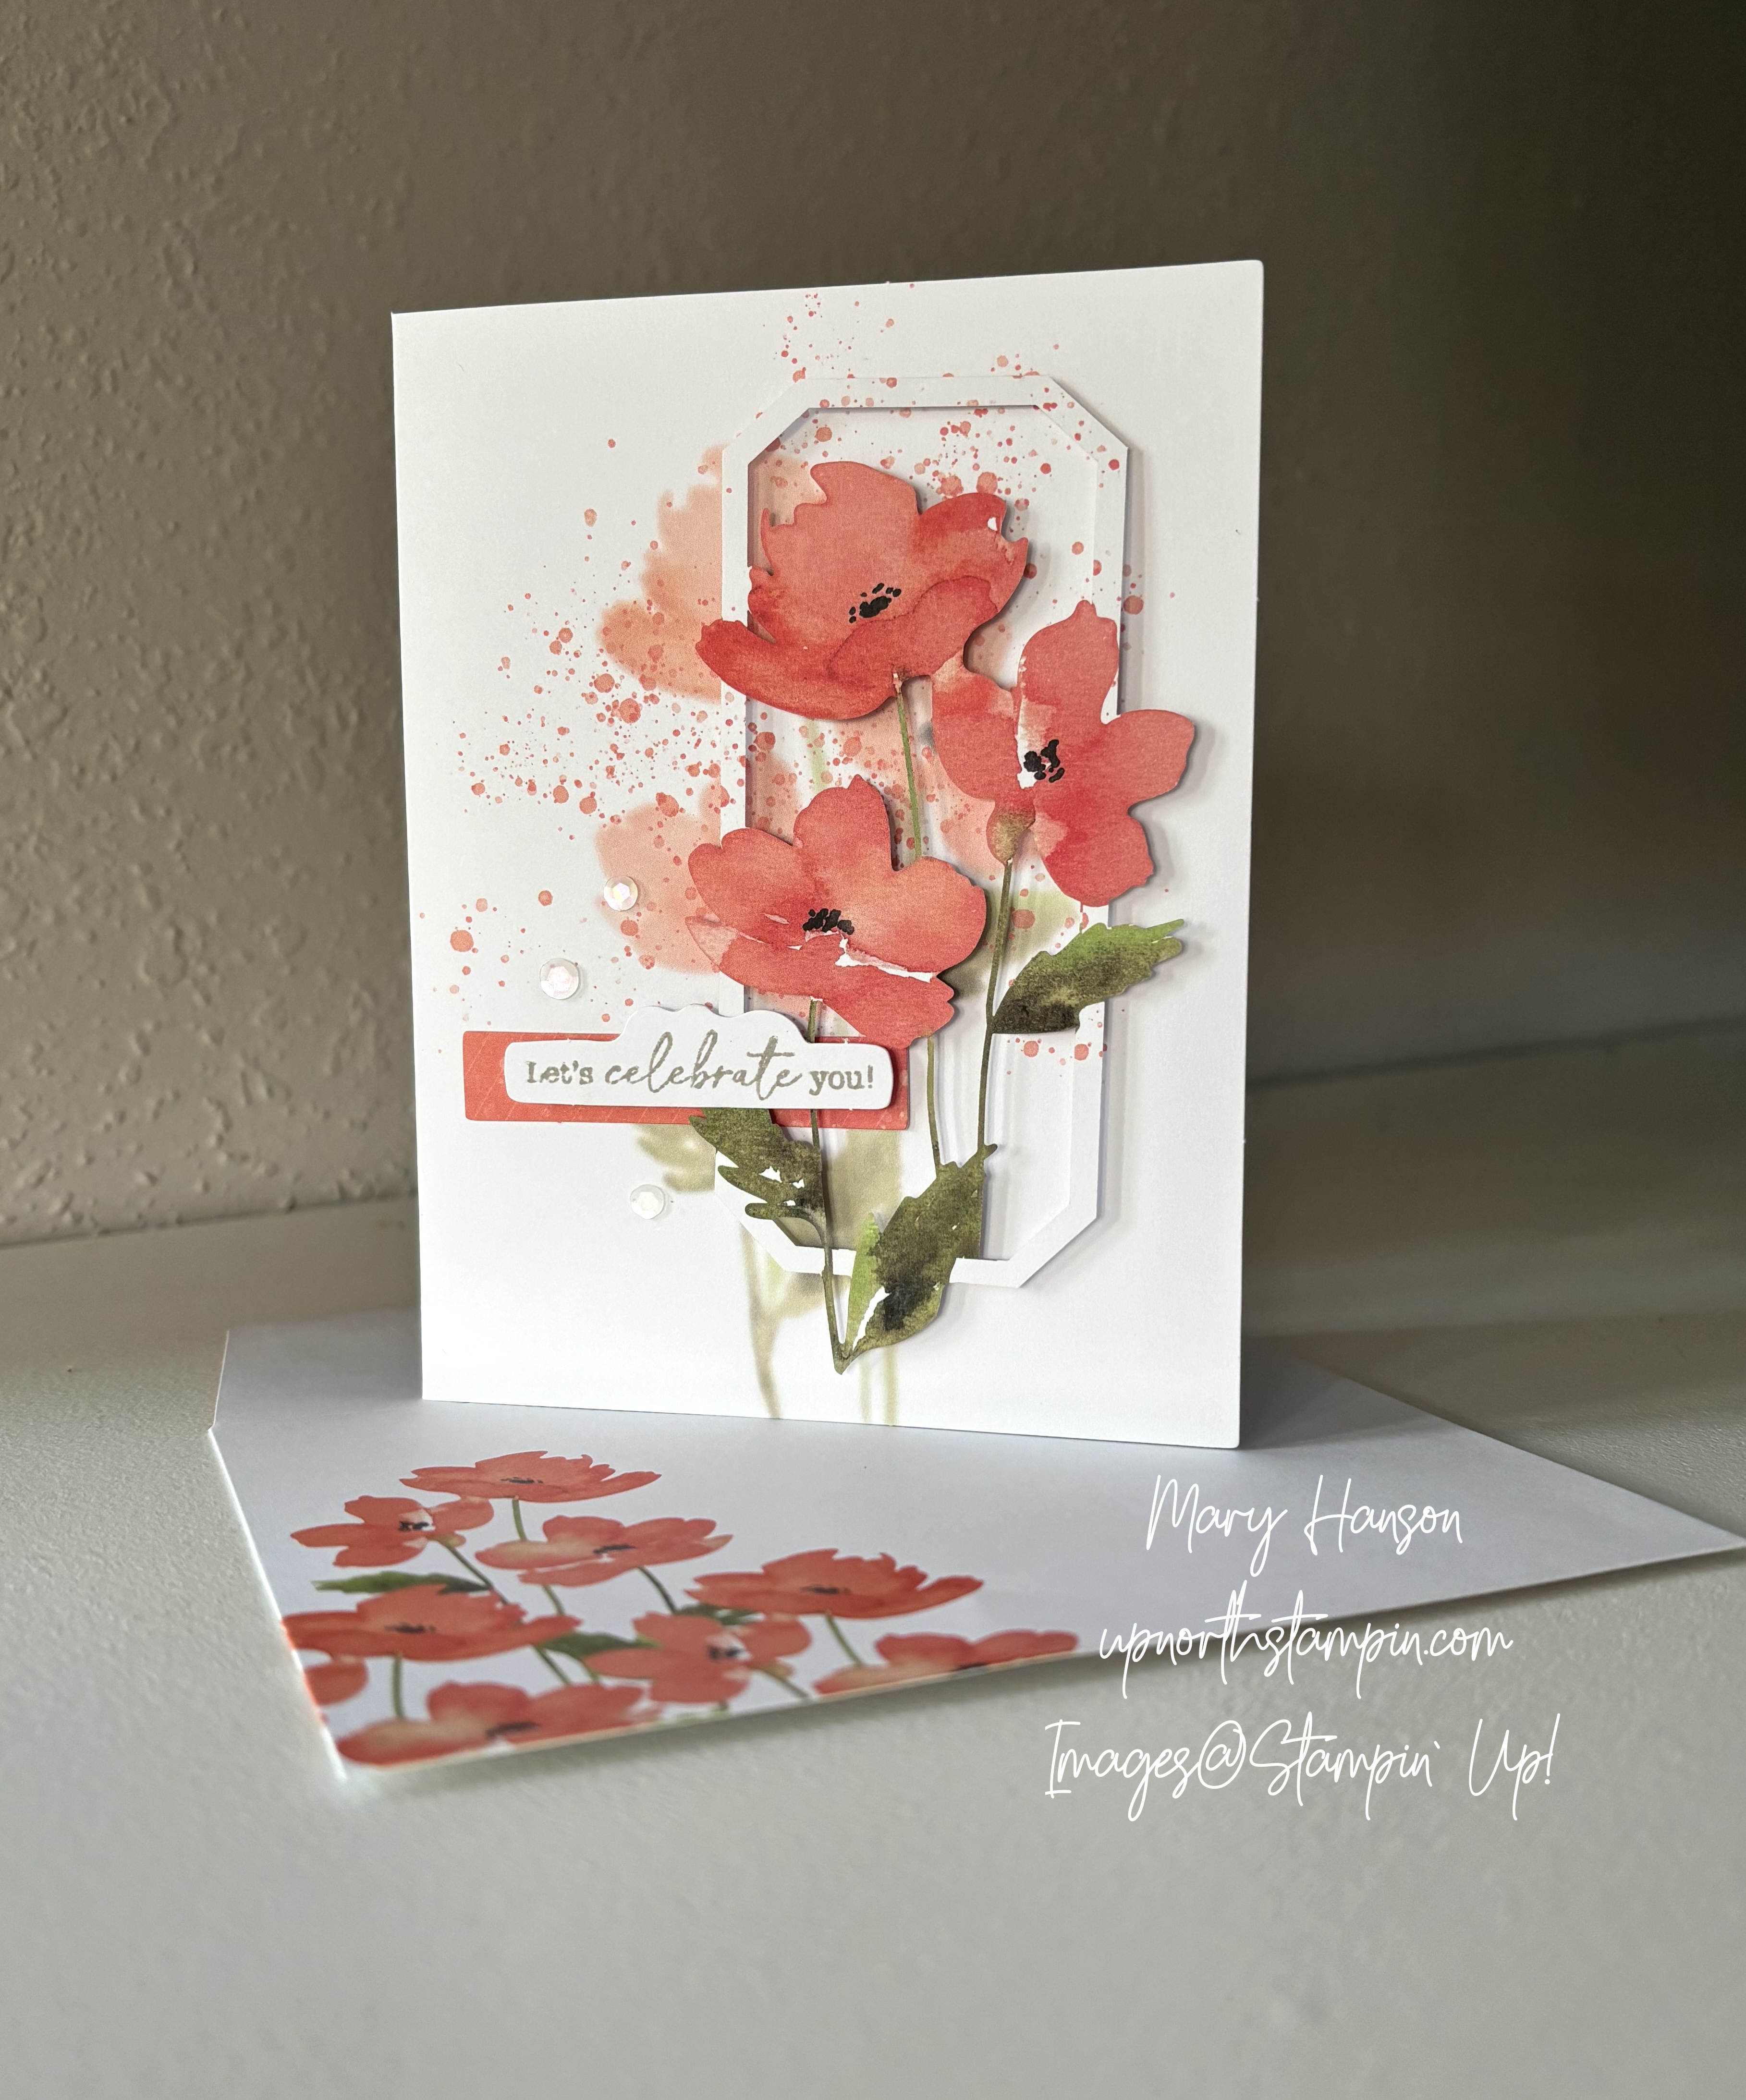
2. With your free shipping, it’s time to order from the new Holiday Mini Catalog, just out from Stampin’ Up! In the next weeks, I’ll be featuring projects I’ve created from these beautiful products, complete with directions and measurements.
The holiday season is the perfect time to gather together and make handmade gifts, tags, and cards for those you love most! And our new September–December 2024 Mini Catalog is full of festive products and creative opportunities for every kind of crafter. From Autumn to Christmas, birthdays to anniversaries, and all your celebrations in between and throughout the year—this catalog is the perfect way to share the joy of creativity. So, what are you waiting for? It’s time to get crafting!
In addition, go online to see new holiday kits and scrapbooking products, BRAND NEW!
Be sure to use this Host Code for SEPTEMBER if you make an online order of $50 or more. You will receive (from me) a free gift of embellishments!
SEPTEMBER Host Code: ZE3A9KNA
Note: This host code is not for club members.
Please let me know if you have any questions. And be sure to join my Up North Stampin’ Gang Facebook page. We are having SO much fun over there! We post, we share, and just enjoy life! Here’s the link to request to join: https://www.facebook.com/groups/199783410436824
Welcome to the Stampin’ Pretty Pals’ Blog Hop! This month, the theme is “All Creatures Great and Small.” We hope to inspire you with our creations today! You will find the lineup at the end of my post to help you “hop” along from Pal to Pal.
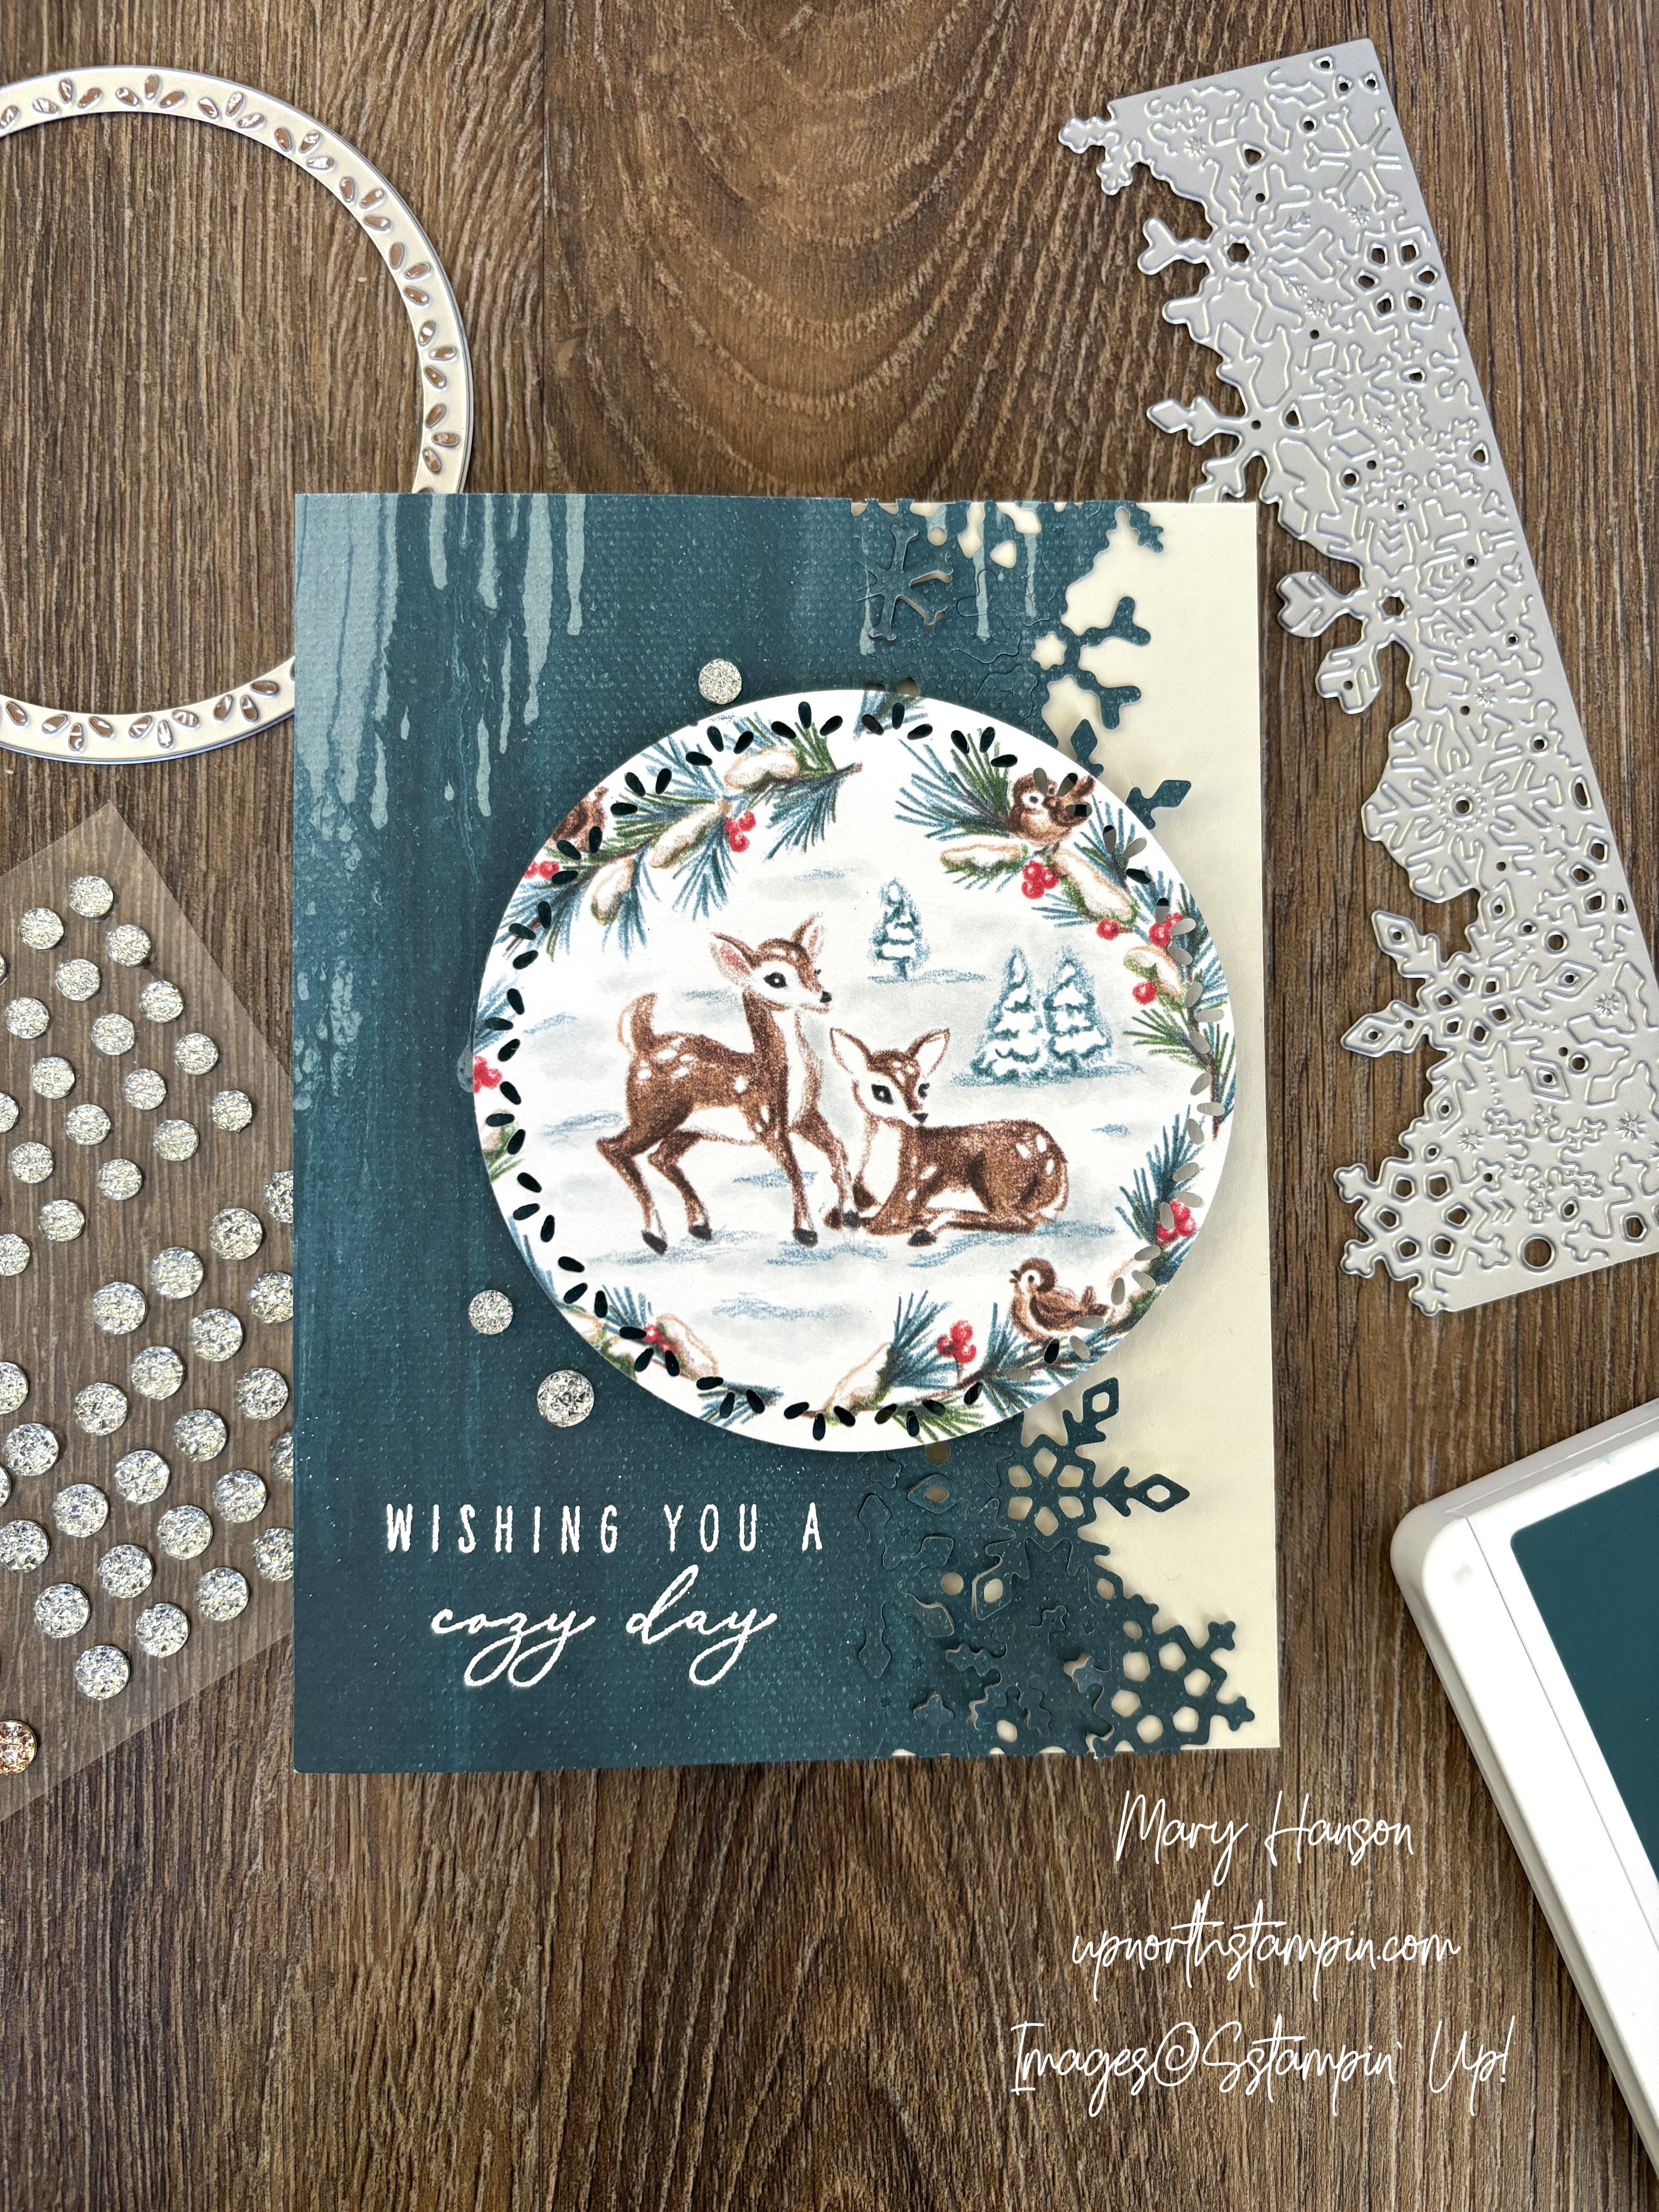
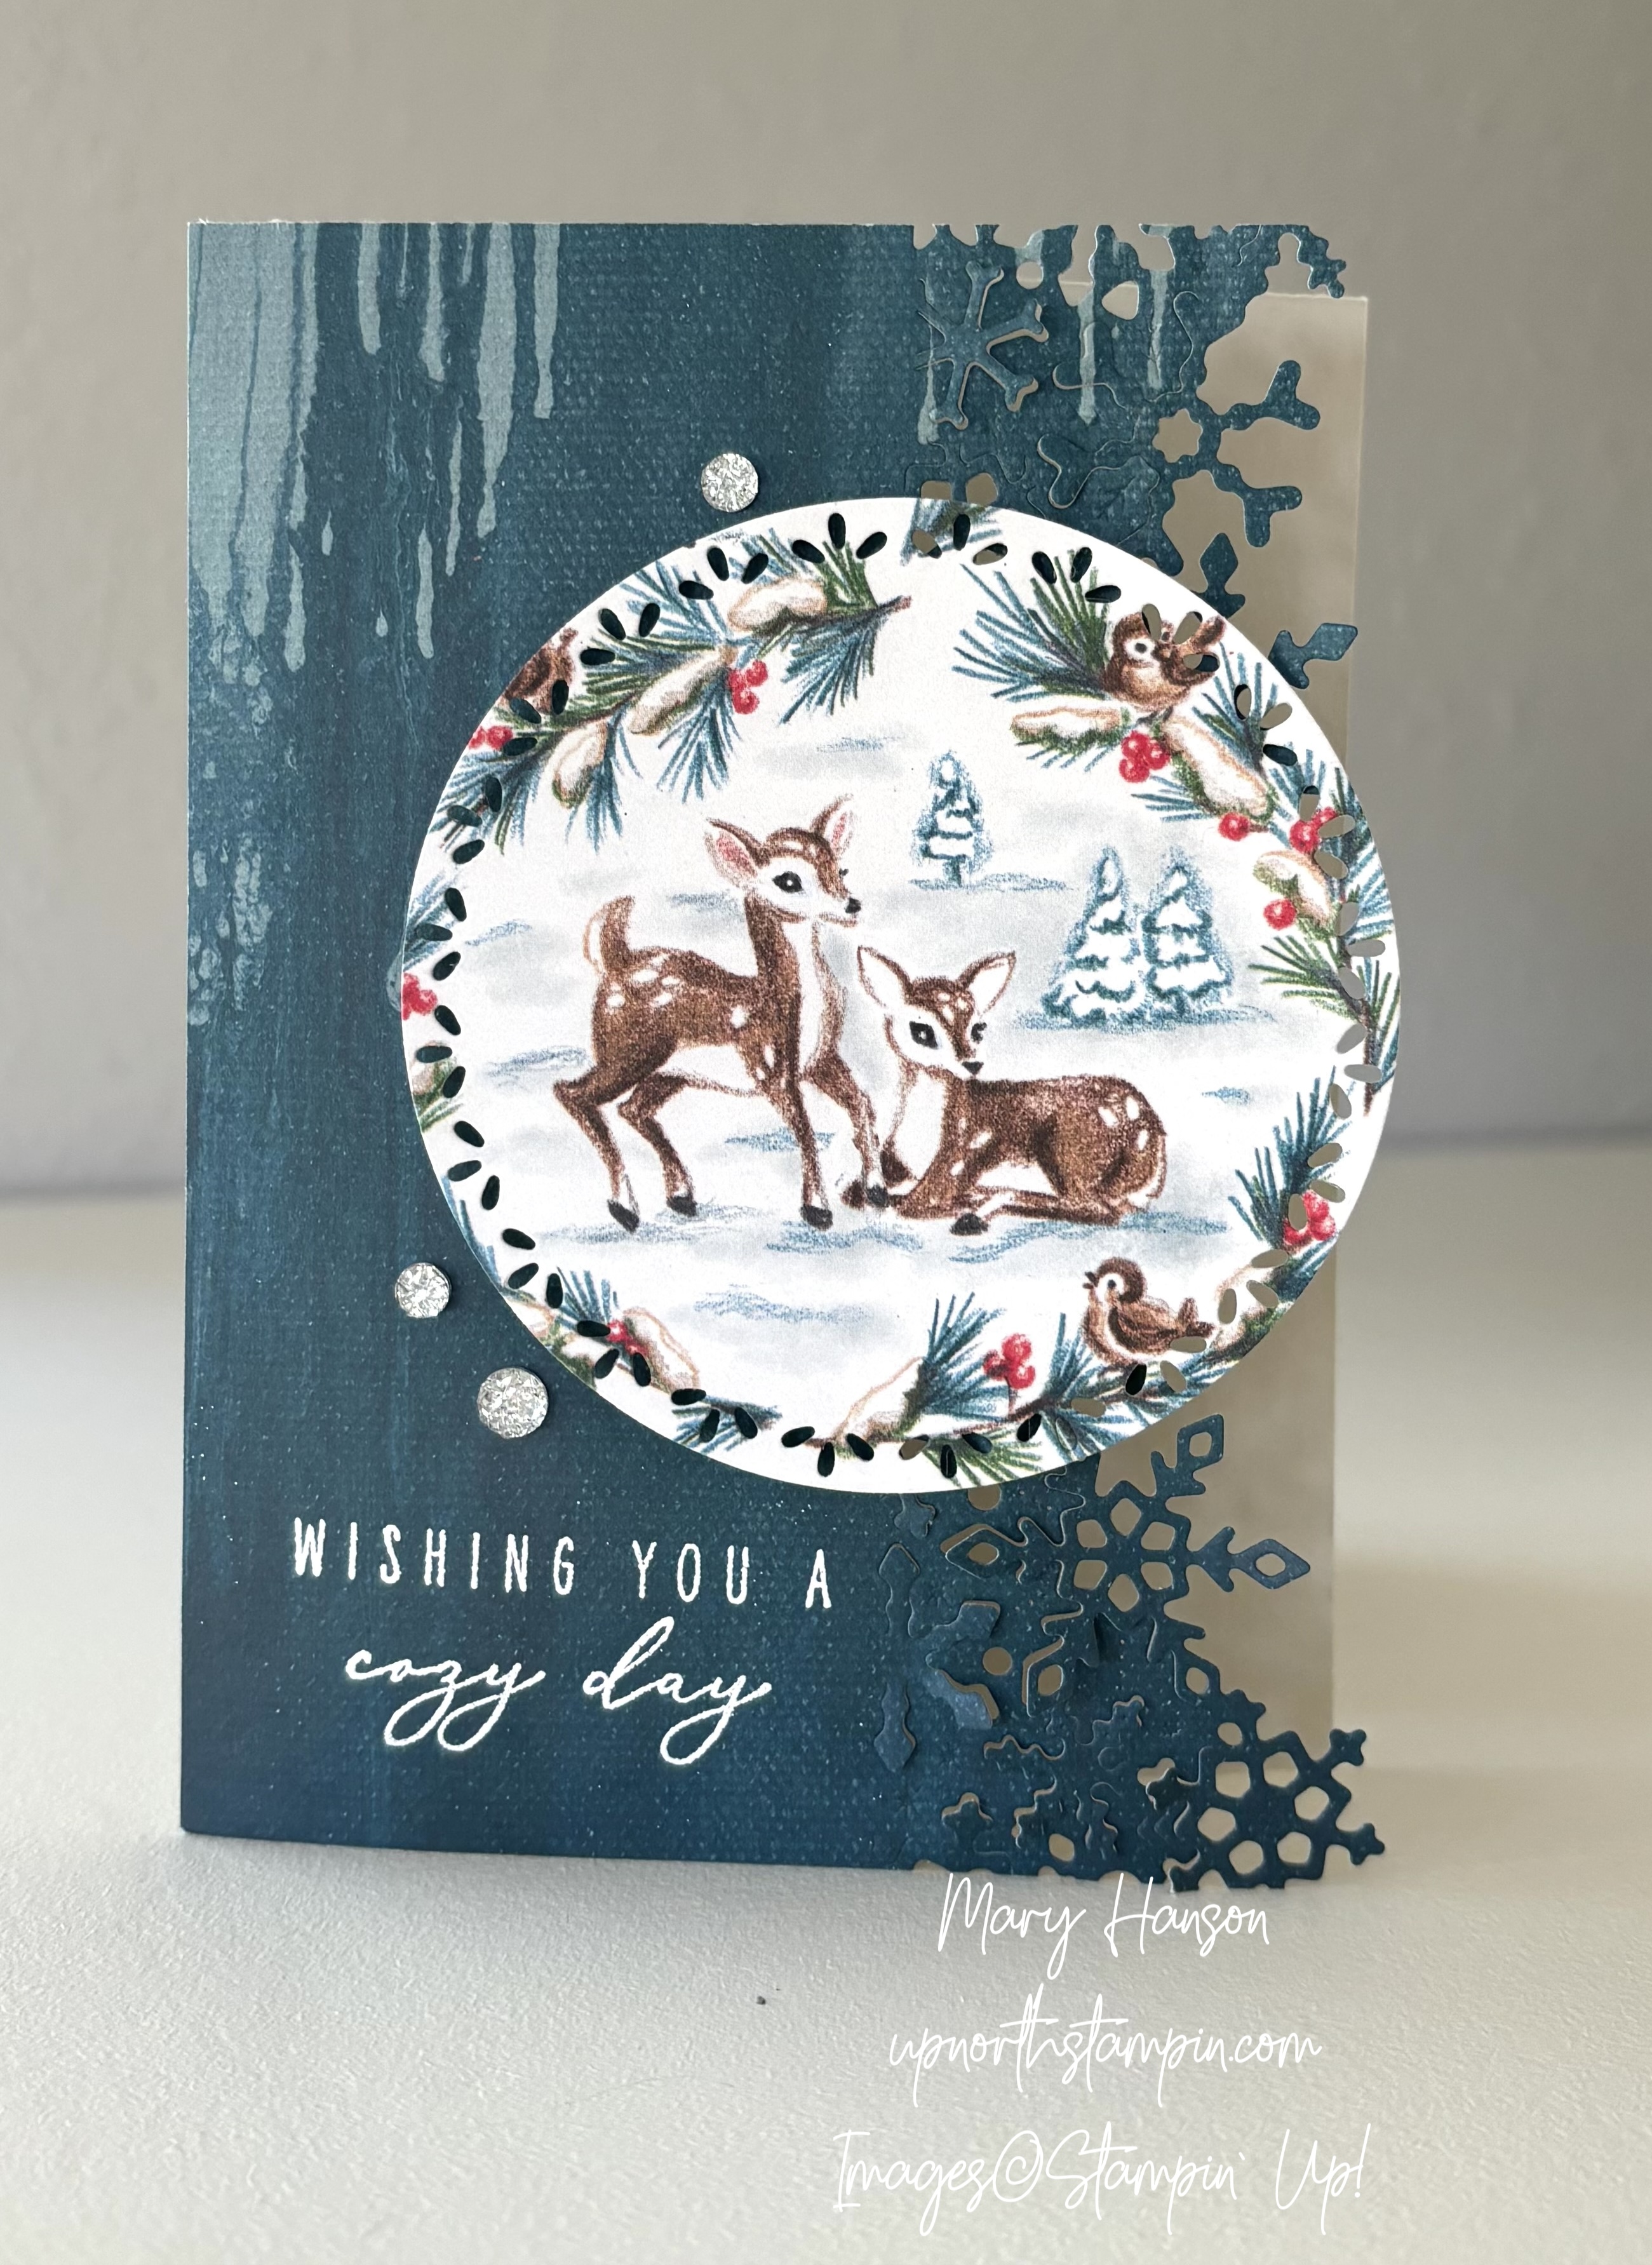
I love the pretty little deer found on one design of the “Sentimental Christmas” Designer Series Papers. All of these papers, and especially this design, remind me of holidays gone by, and evoke feelings of sentimentality, to be sure. I used the Frozen Edges bundle to create two cards using these sweet deer. Here’s the first:
Directions:
Start by cutting a card base, in Basic Beige cardstock to 8 1/2″ by 5 1/2″, scored at 4 1/4″ on the 8 1/2″ side.
Cut a circle using the Sentimental Christmas DSP and a circle die from the Spotlight on Nature dies. Center it so you have the cute little deer scene in the middle of the circle. My two samples (one is found below) use two different-sized circle dies.
Cut a panel of the Season of Elegance DSP using the BACK side of the gold foil panel, at 4 1/4″ by 5 1/2.” Then use the snowflake edged die from the Frozen Edges Dies to cut along the right side of the panel. For my two cards, I used the Pretty Peacock and Cherry Cobbler pieces.
Adhere the cut snowflake panel to the front of the card so it lines up on the the left corners, bottom and top. One cool thing about the dies is that not all the snowflakes are cut out of this intricate die. Some are partially cut out, so they can be bent slightly and create a cool 3D effect. It’s fun to leave the right side of the card ‘un-stuck’ so it sticks up a bit.
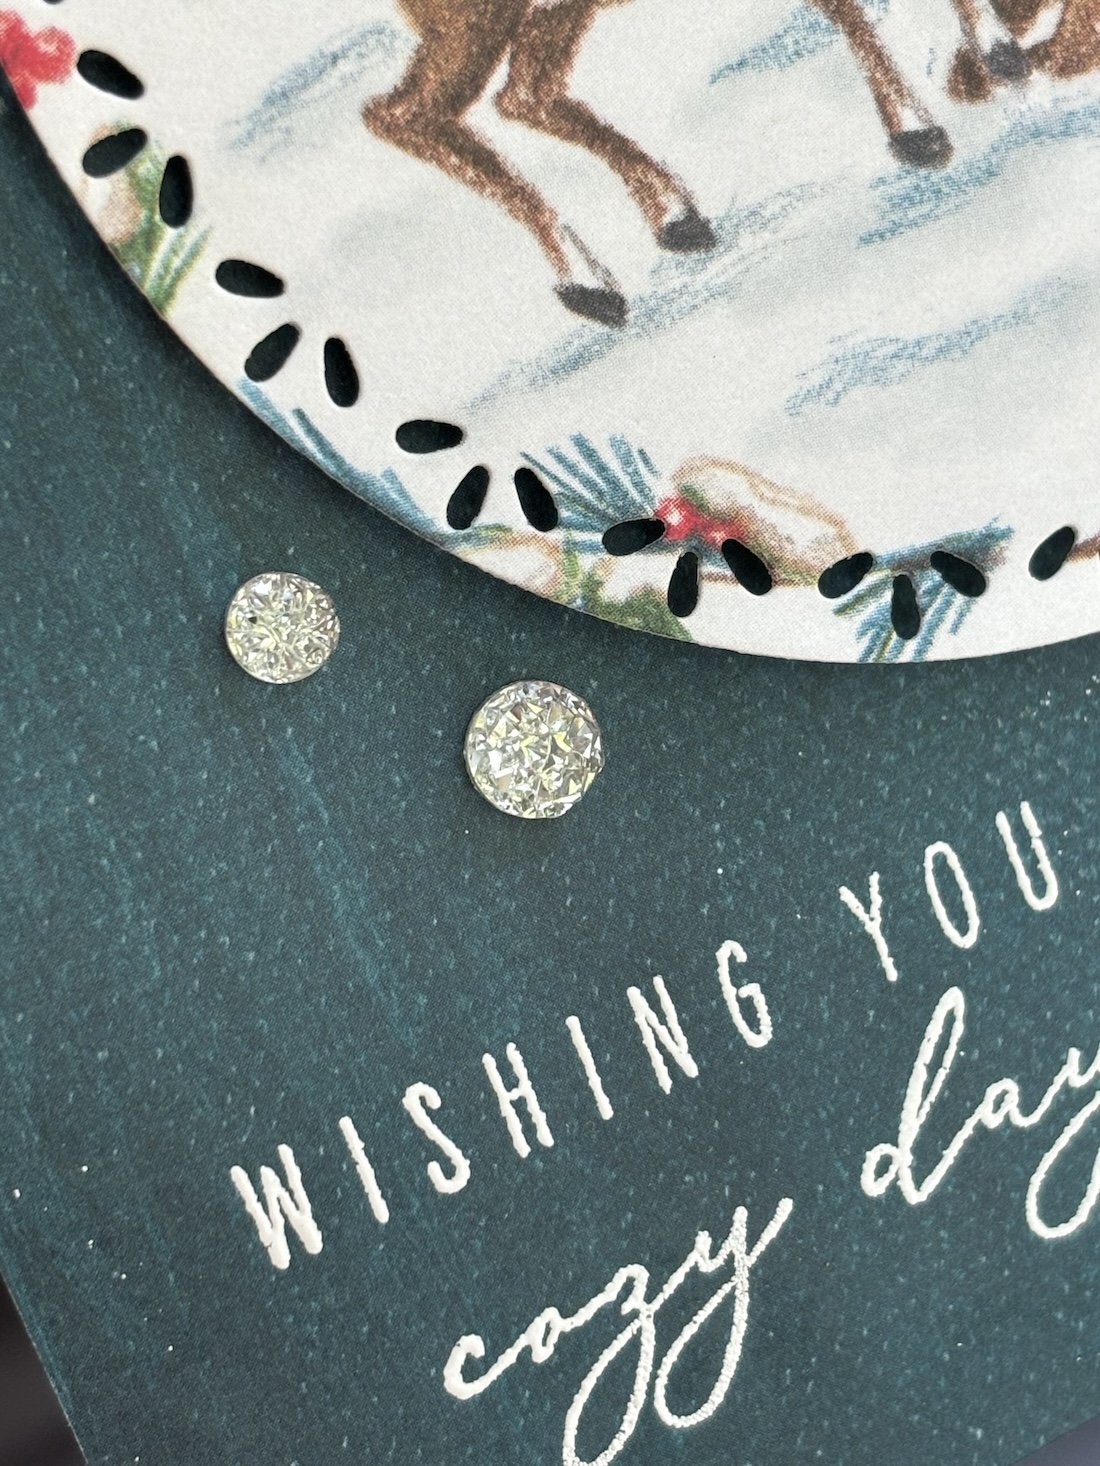
Heat emboss a sentiment from the Frozen Edges stamp set onto the card front at the bottom using White Embossing powder. Then adhere the deer circle to the card front with Stampin’ Dimensionals. Use the beautiful Drusy Adhesive-Backed Embellishments to add a finishing touch of bling to your card. They are scrumptious and sparkly!
For the card below, I varied it by cutting 2 inches away from the top side of the card base before overlaying the Pretty Peacock snowflake panel. Notice how the snowflakes now stand on their own on the front, adding even more texture and 3D effect!
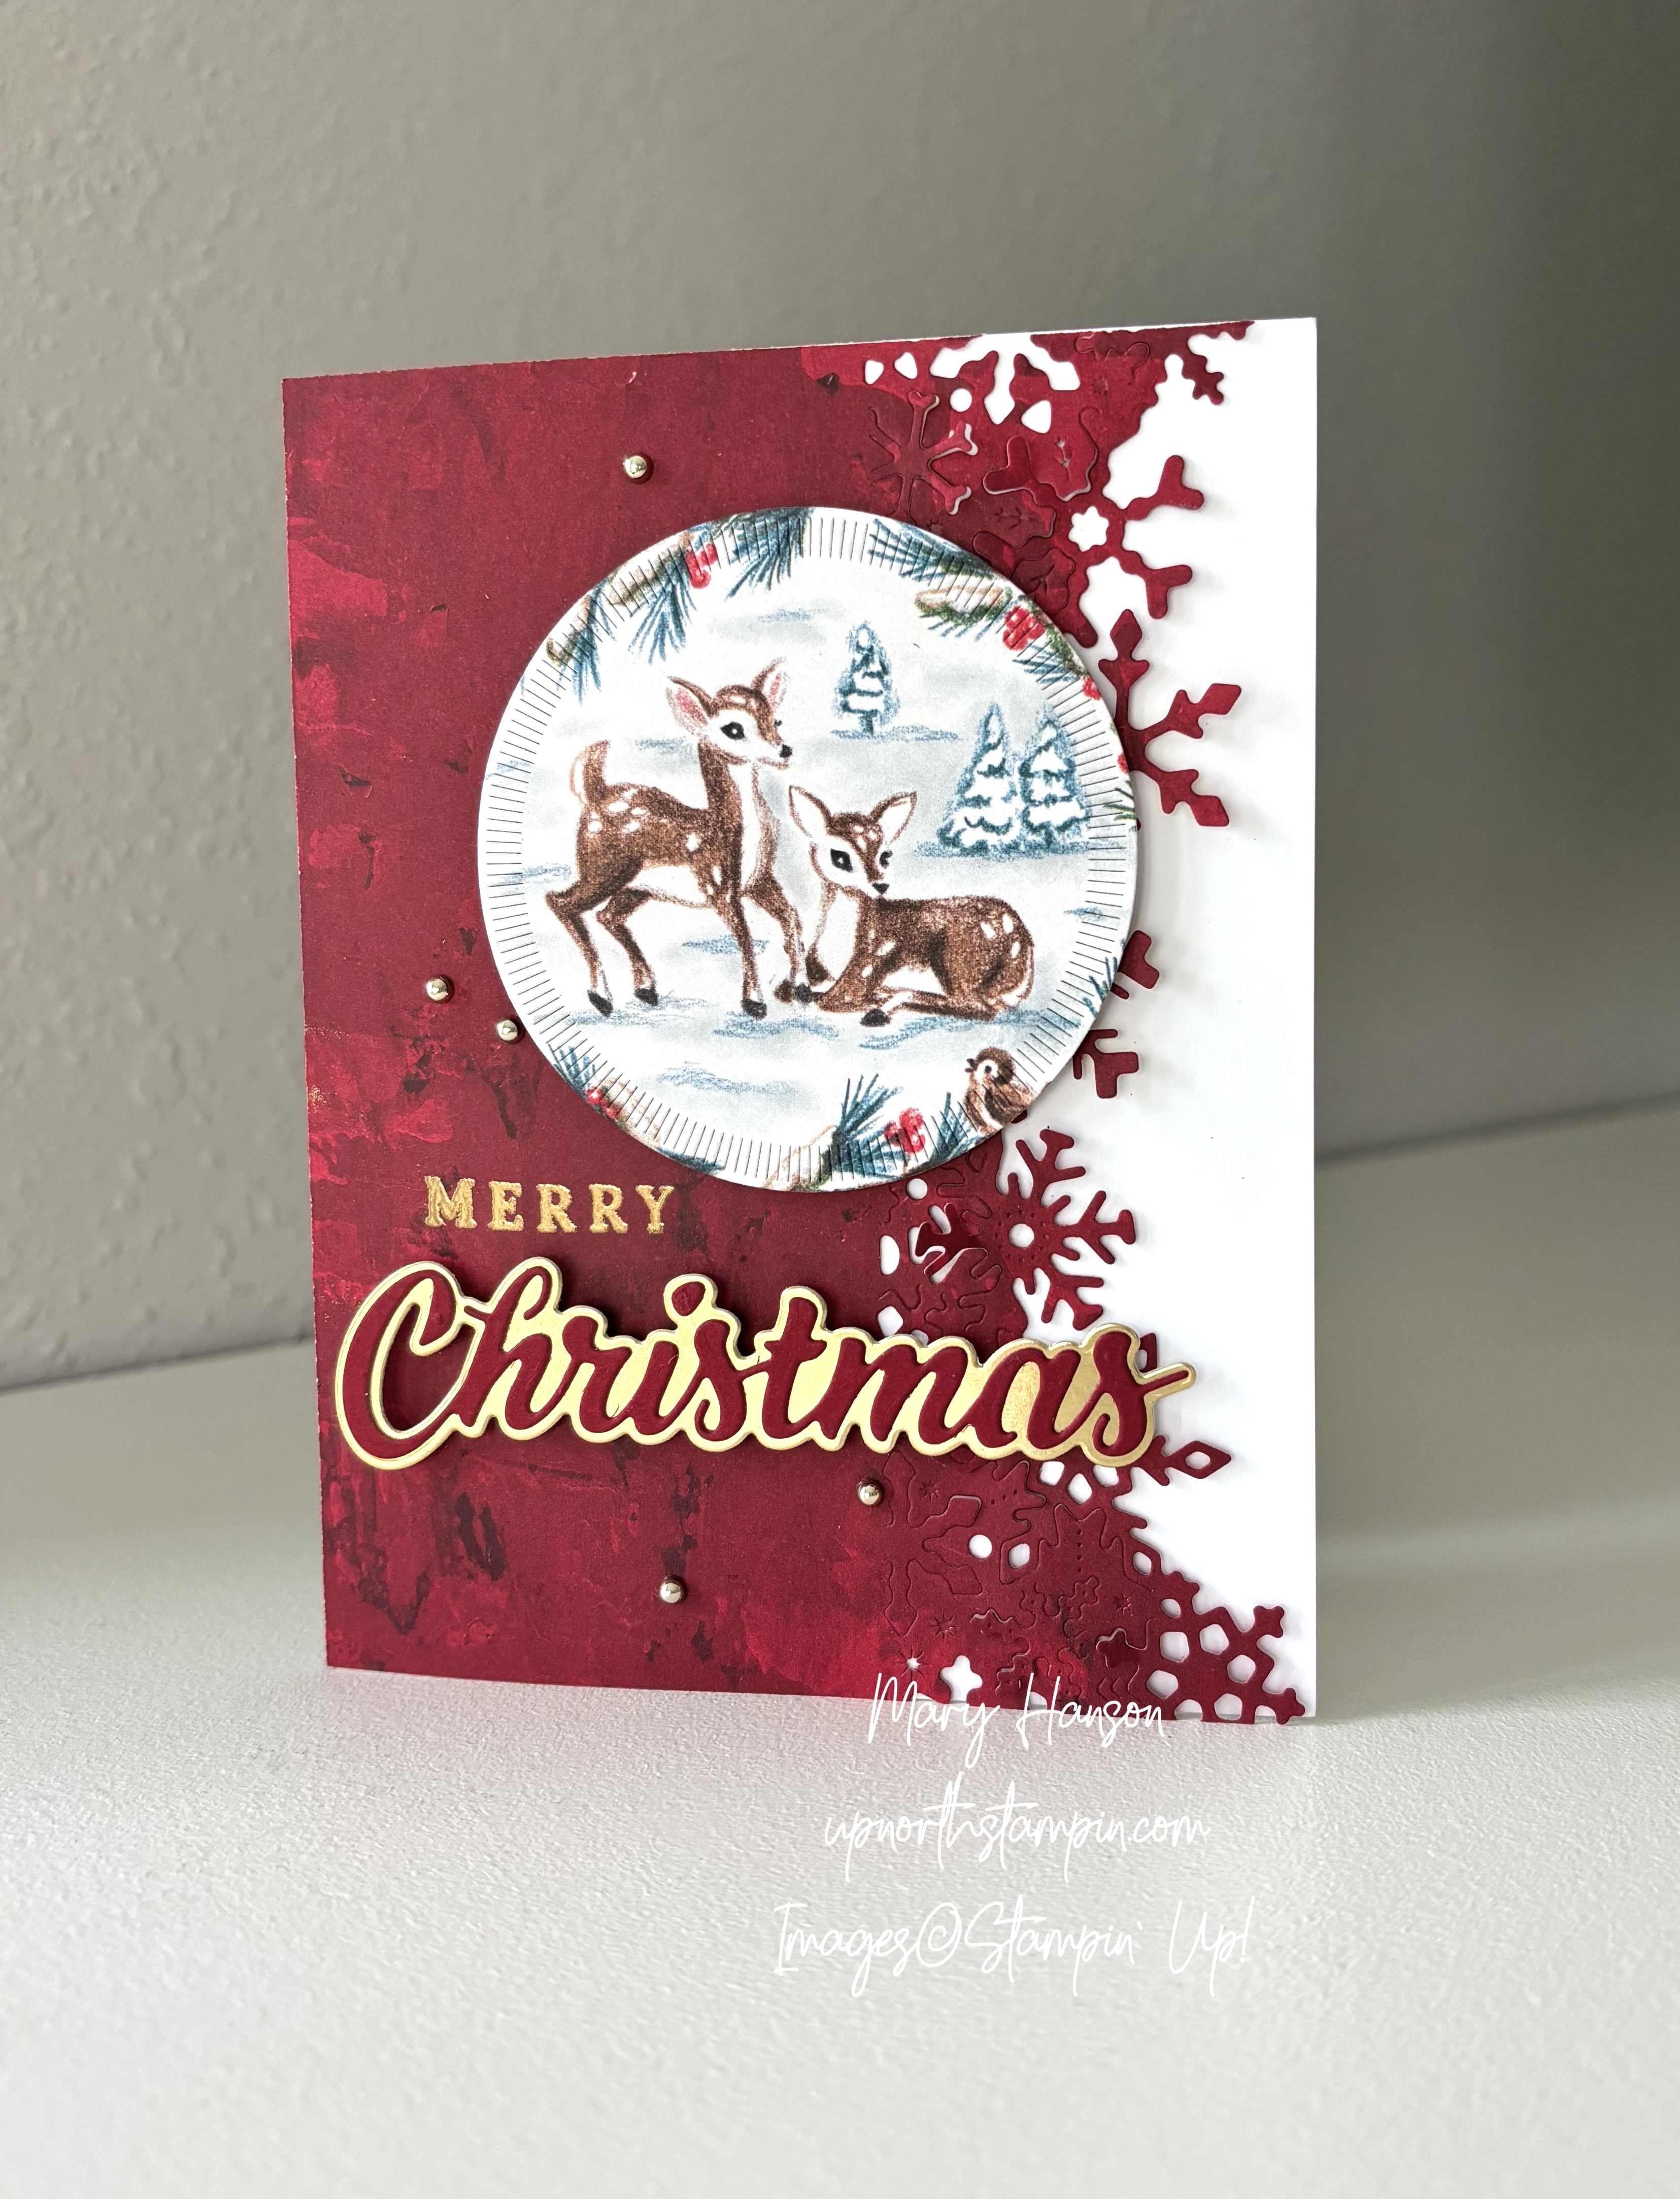
The next card uses a Basic White card base and the Cherry Cobbler panel from the Seasons of Elegance DSP. I used the larger ‘Christmas’ die and Cherry Cobbler cardstock and Gold Foil papers, along with a gold embossed “MERRY” to create the sentiment.
Which do you like better? I hope you can enjoy experimenting with your own color combinations using these wonderful bundles from the new Mini Catalog! There’s more inspiration to show you, so use the lineup below to visit the rest of the Design Team. We hope you will come back for our next blog hop next month, when our theme will be “Orange Theory.”
Be sure to use this Host Code for SEPTEMBER if you make an online order of $50 or more. You will receive (from me) a free gift of embellishments!
SEPTEMBER Host Code: ZE3A9KNA
Note: This host code is not for club members.
Please let me know if you have any questions. And be sure to join my Up North Stampin’ Gang Facebook page. We are having SO much fun over there! We post, we share, and just enjoy life! Here’s the link to request to join: https://www.facebook.com/groups/199783410436824
September 4 is a big day at Stampin’ Up! We’ve got a beautiful new Mini Catalog, full of holiday and general products. (Yes, I’ve already got lots of faves!) Please let me know if you need a catalog; I have extras, and I’d love to get a free one in your hands.
CLICK HERE to see the online PDF of this sweet catalog. I can’t wait to hear about your favorites!
In addition, Stampin’ Up! has added a new line of scrapbooking products for customers to enjoy. So awesome!
And some of the products even coordinate with product in the new Mini Catalog! CLICK HERE to see the new Scrapbooking brochure! ALL of these scrapbooking products can be found online right HERE!
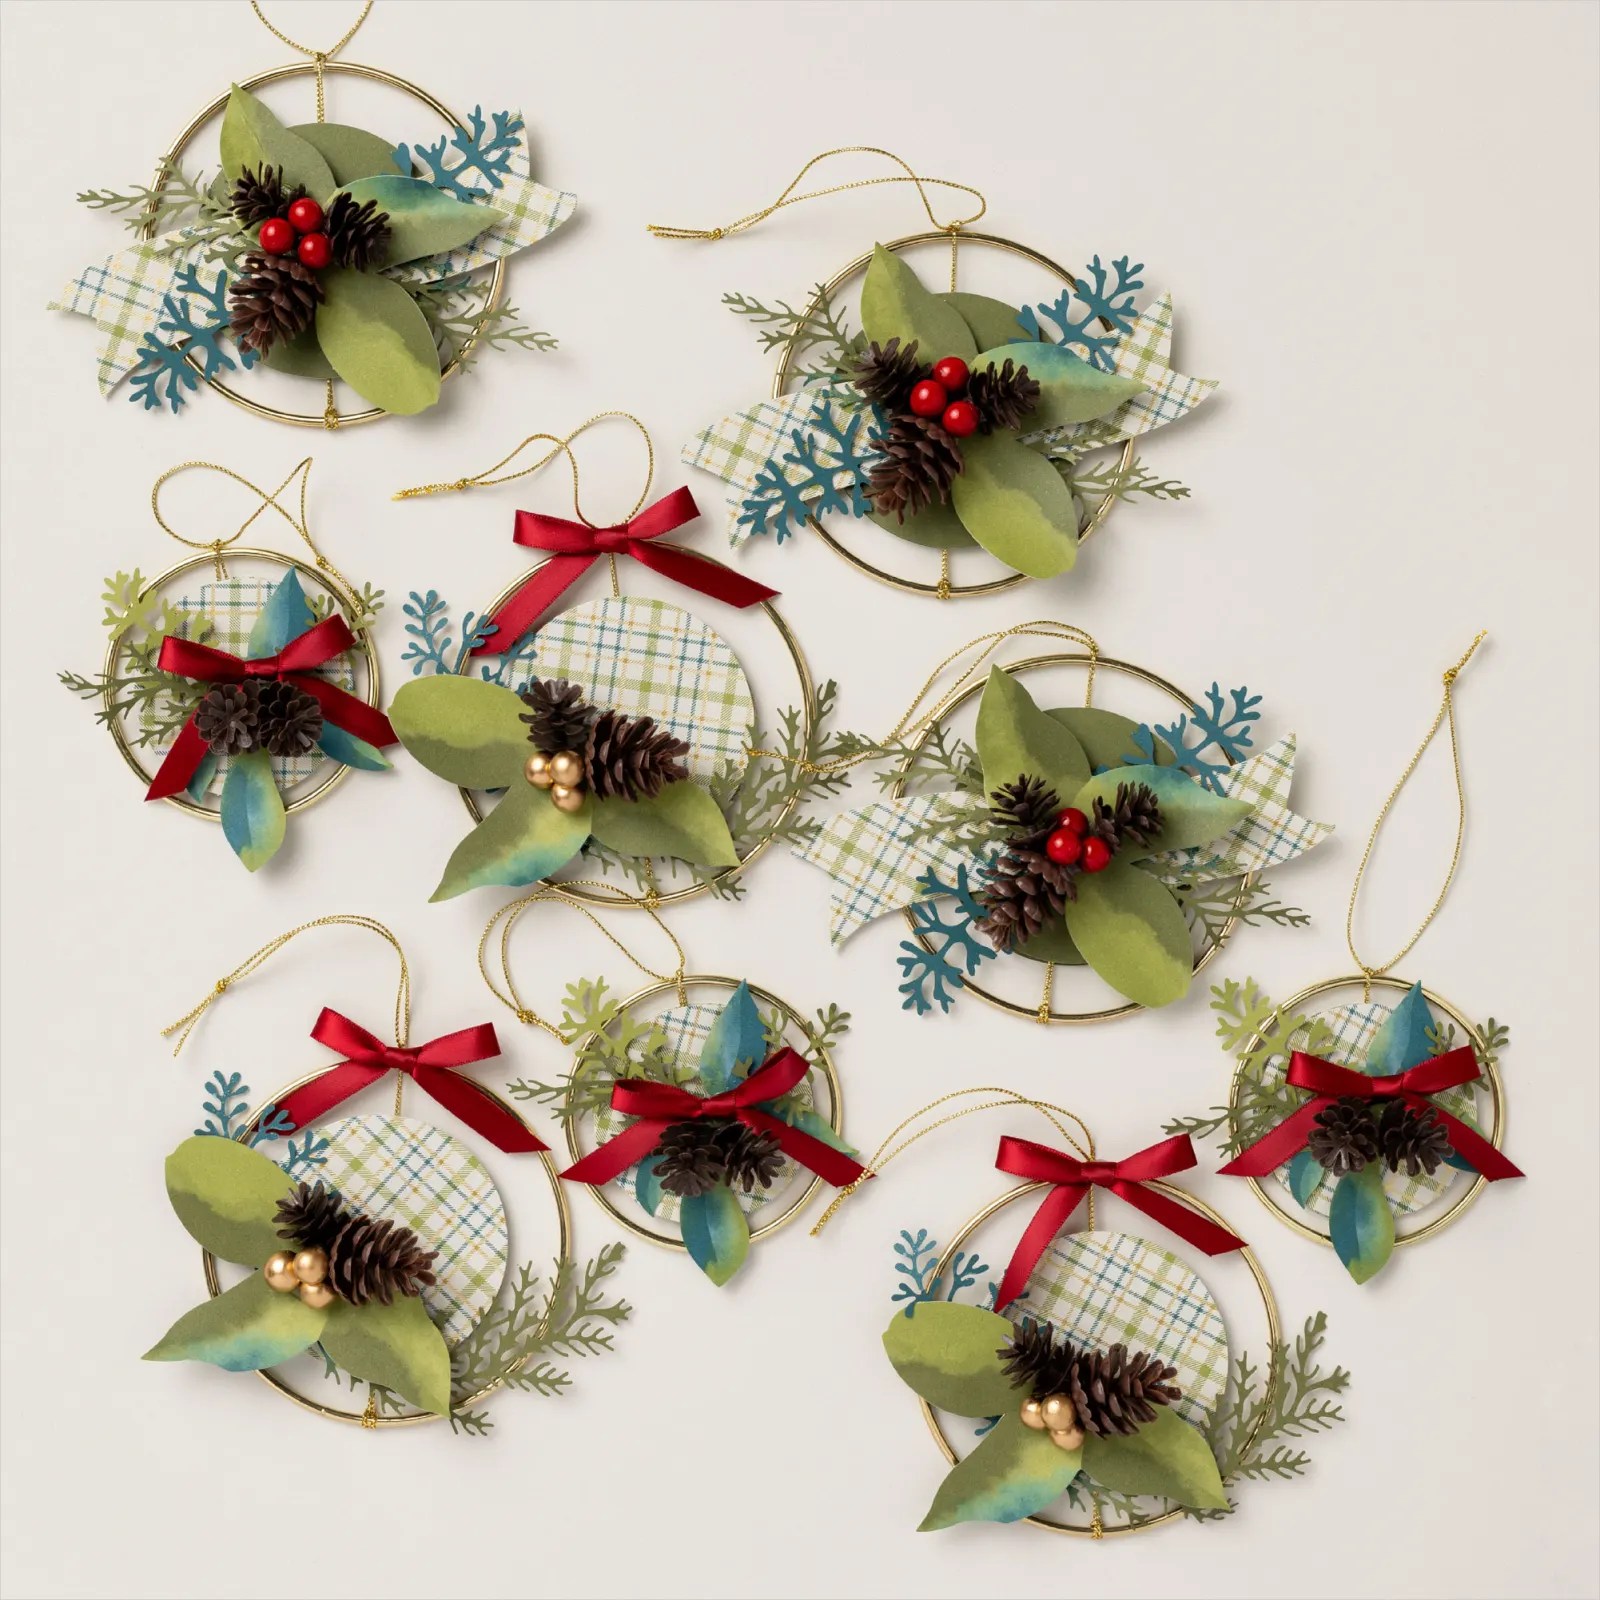
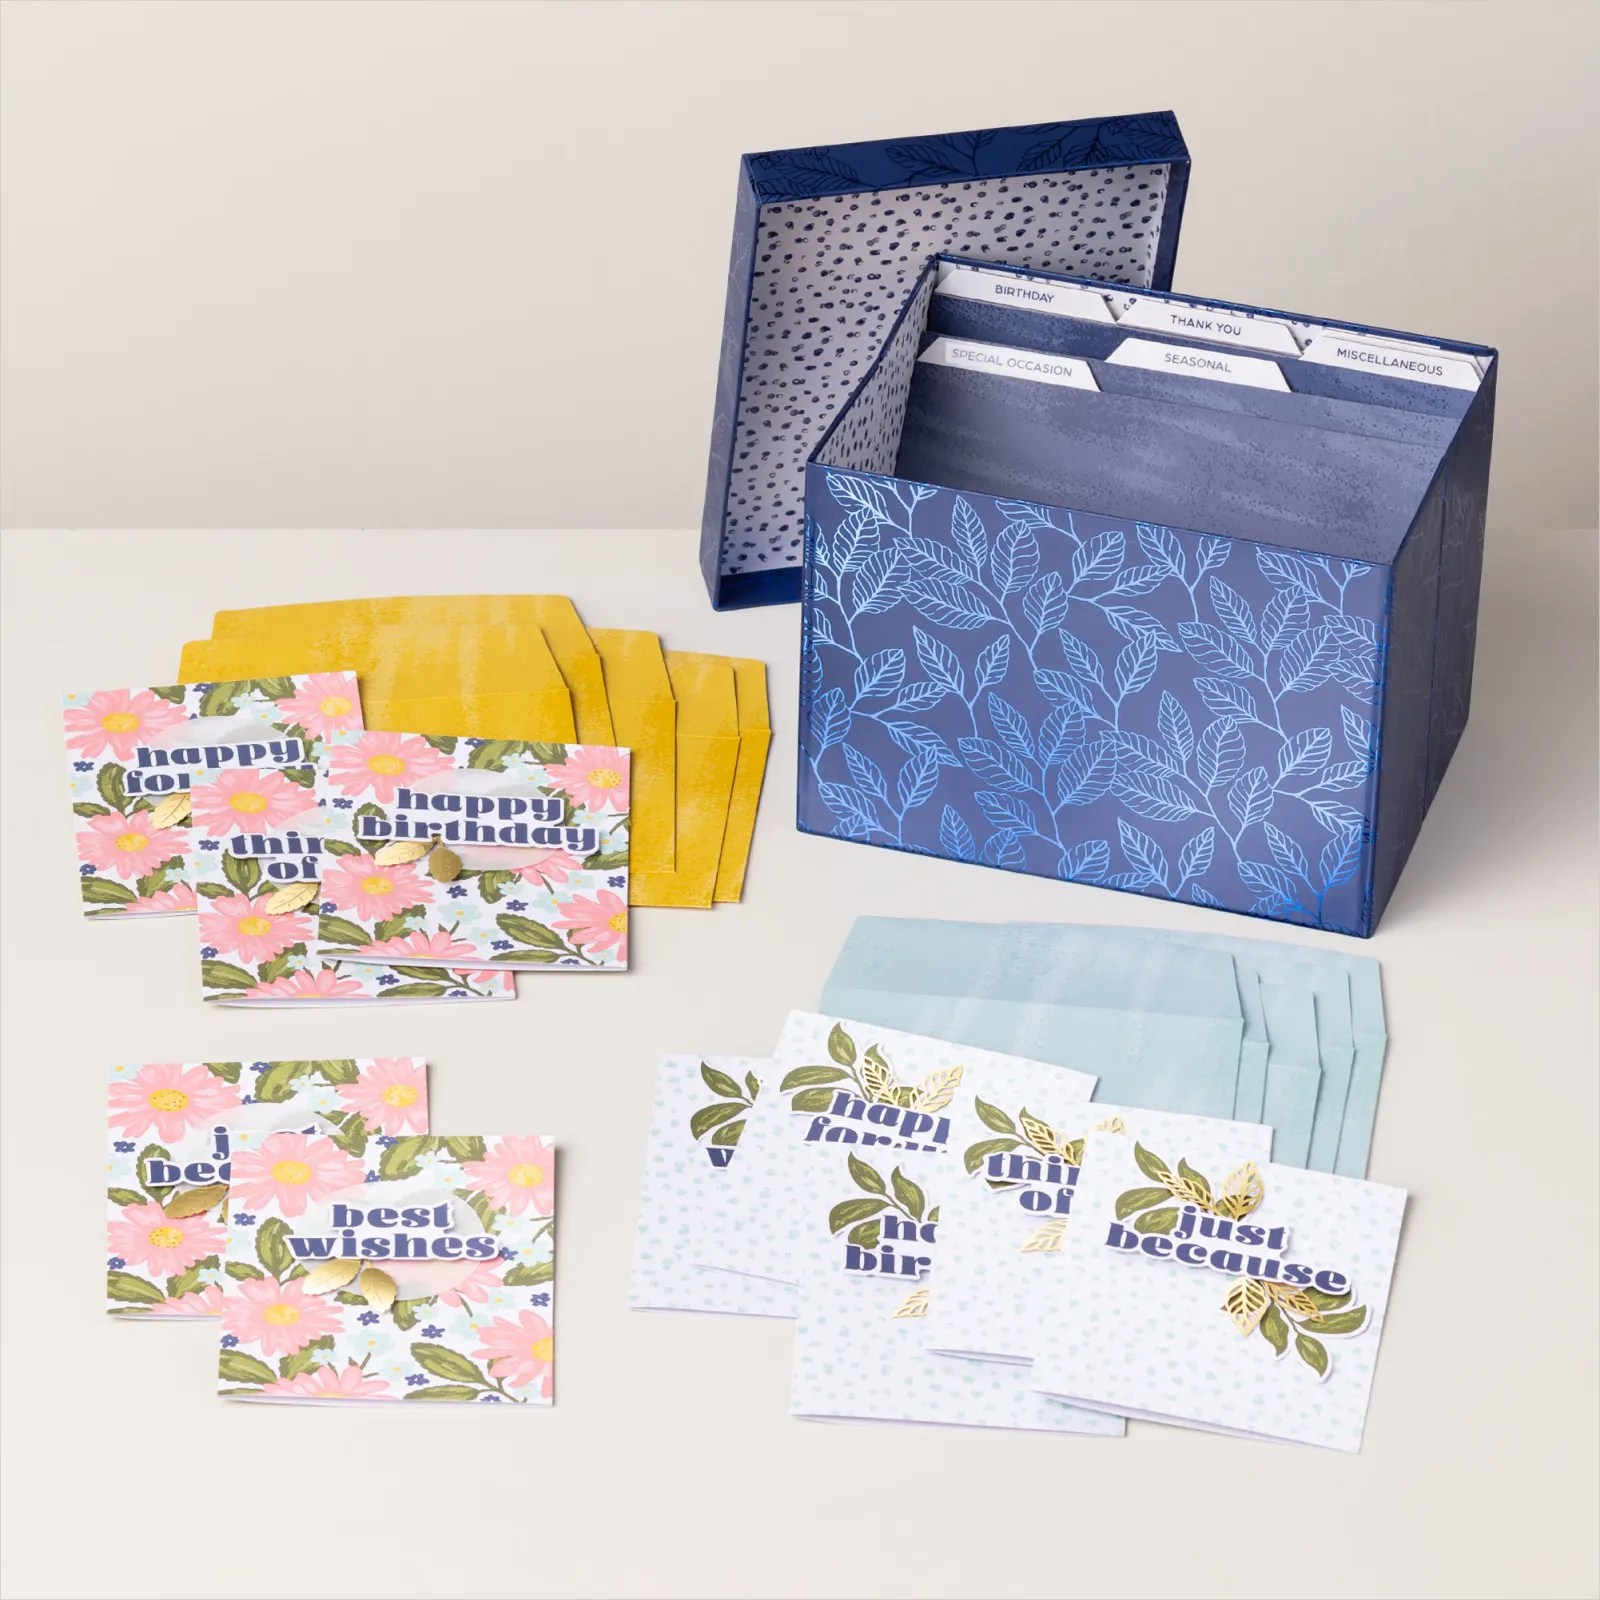
Finally, two new All-Inclusive kits are available starting today, including this darling Christmas Ornaments Kit and a sweet Card Keeper Kit that makes 10 cards! Go HERE to shop the entire Kits Collection!
Be sure to use this Host Code for AUGUST if you make an online order of $50 or more. You will receive (from me) a free gift of embellishments!
AUGUST Host Code: ZE3A9KNA
Note: This host code is not for club members.
Please let me know if you have any questions. And be sure to join my Up North Stampin’ Gang Facebook page. We are having SO much fun over there! We post, we share, and just enjoy life! Here’s the link to request to join: https://www.facebook.com/groups/199783410436824
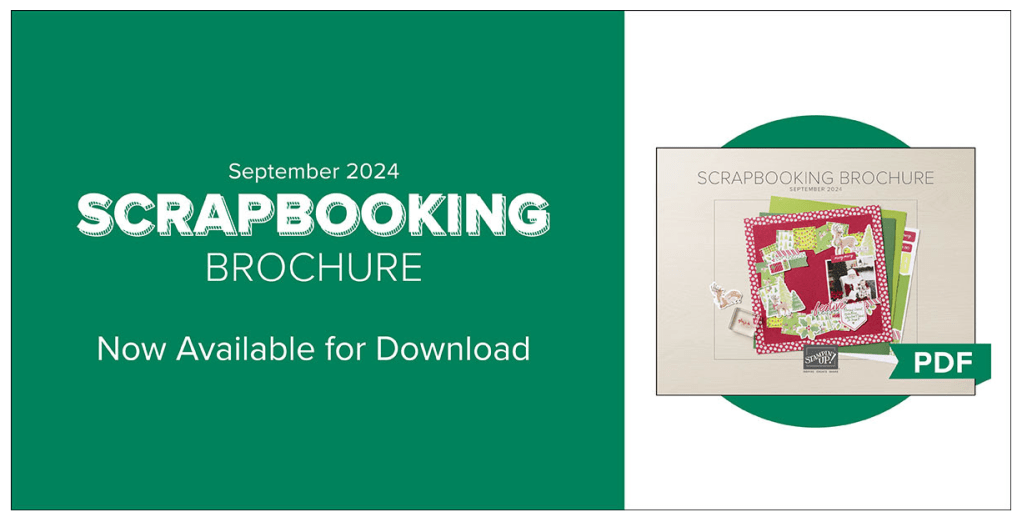
Did you hear? We have a new companion scrapbooking brochure to the September–December 2024 Mini Catalog! That’s right! We are excited to introduce the September 2024 Scrapbooking Brochure.
Starting with the products in the September 2024 Scrapbooking Brochure, we are opening that availability up to EVERYONE! Scrapbooking is another way to meaningfully craft. Preserving memories in a scrapbook album not only keeps your memories recorded and safe, it’s also a great way to share your memories with family and friends! The potential to strengthen relationships through scrapbooking is just one of the many reasons that makes us so excited for this new scrapbooking brochure.
As mentioned above, this is a companion brochure to the September–December 2024 Mini Catalog, meaning products in the brochure beautifully complement and coordinate with some mini catalog products. You’ll also find exciting new product lines like *spoiler alert* Two-Tone Cardstock in Stampin’ Up! colors! But let’s not give it all away here—download the digital brochure to get a firsthand look at all the new products.
This is a digital-only scrapbooking brochure, full of scrapbooking essentials and exciting new products. So you won’t find these products in a catalog. As a companion brochure to the September–December 2024 Mini Catalog, the products inside coordinate with products from the mini catalog (and some online only products, too!). The Workshop Kits and some new product releases *hint* Two-Tone Cardstock *hint* will add variety and inspiration to your holiday crafts this year!
Products will be available like the current Online Exclusive releases, meaning that some products will be reordered when inventory is low, and others will only be available while supplies last.
Catch this fun video about all the fun scrapbooking to come!
Have fun shopping the new scrapbooking products beginning September 4!! And order early to ensure the best selection!
September Host Code: ZE3A9KNA
Note: This host code is not for club members.
Please let me know if you have any questions. And be sure to join my Up North Stampin’ Gang Facebook page. We are having SO much fun over there! We post, we share, and just enjoy life! Here’s the link to request to join: https://www.facebook.com/groups/199783410436824
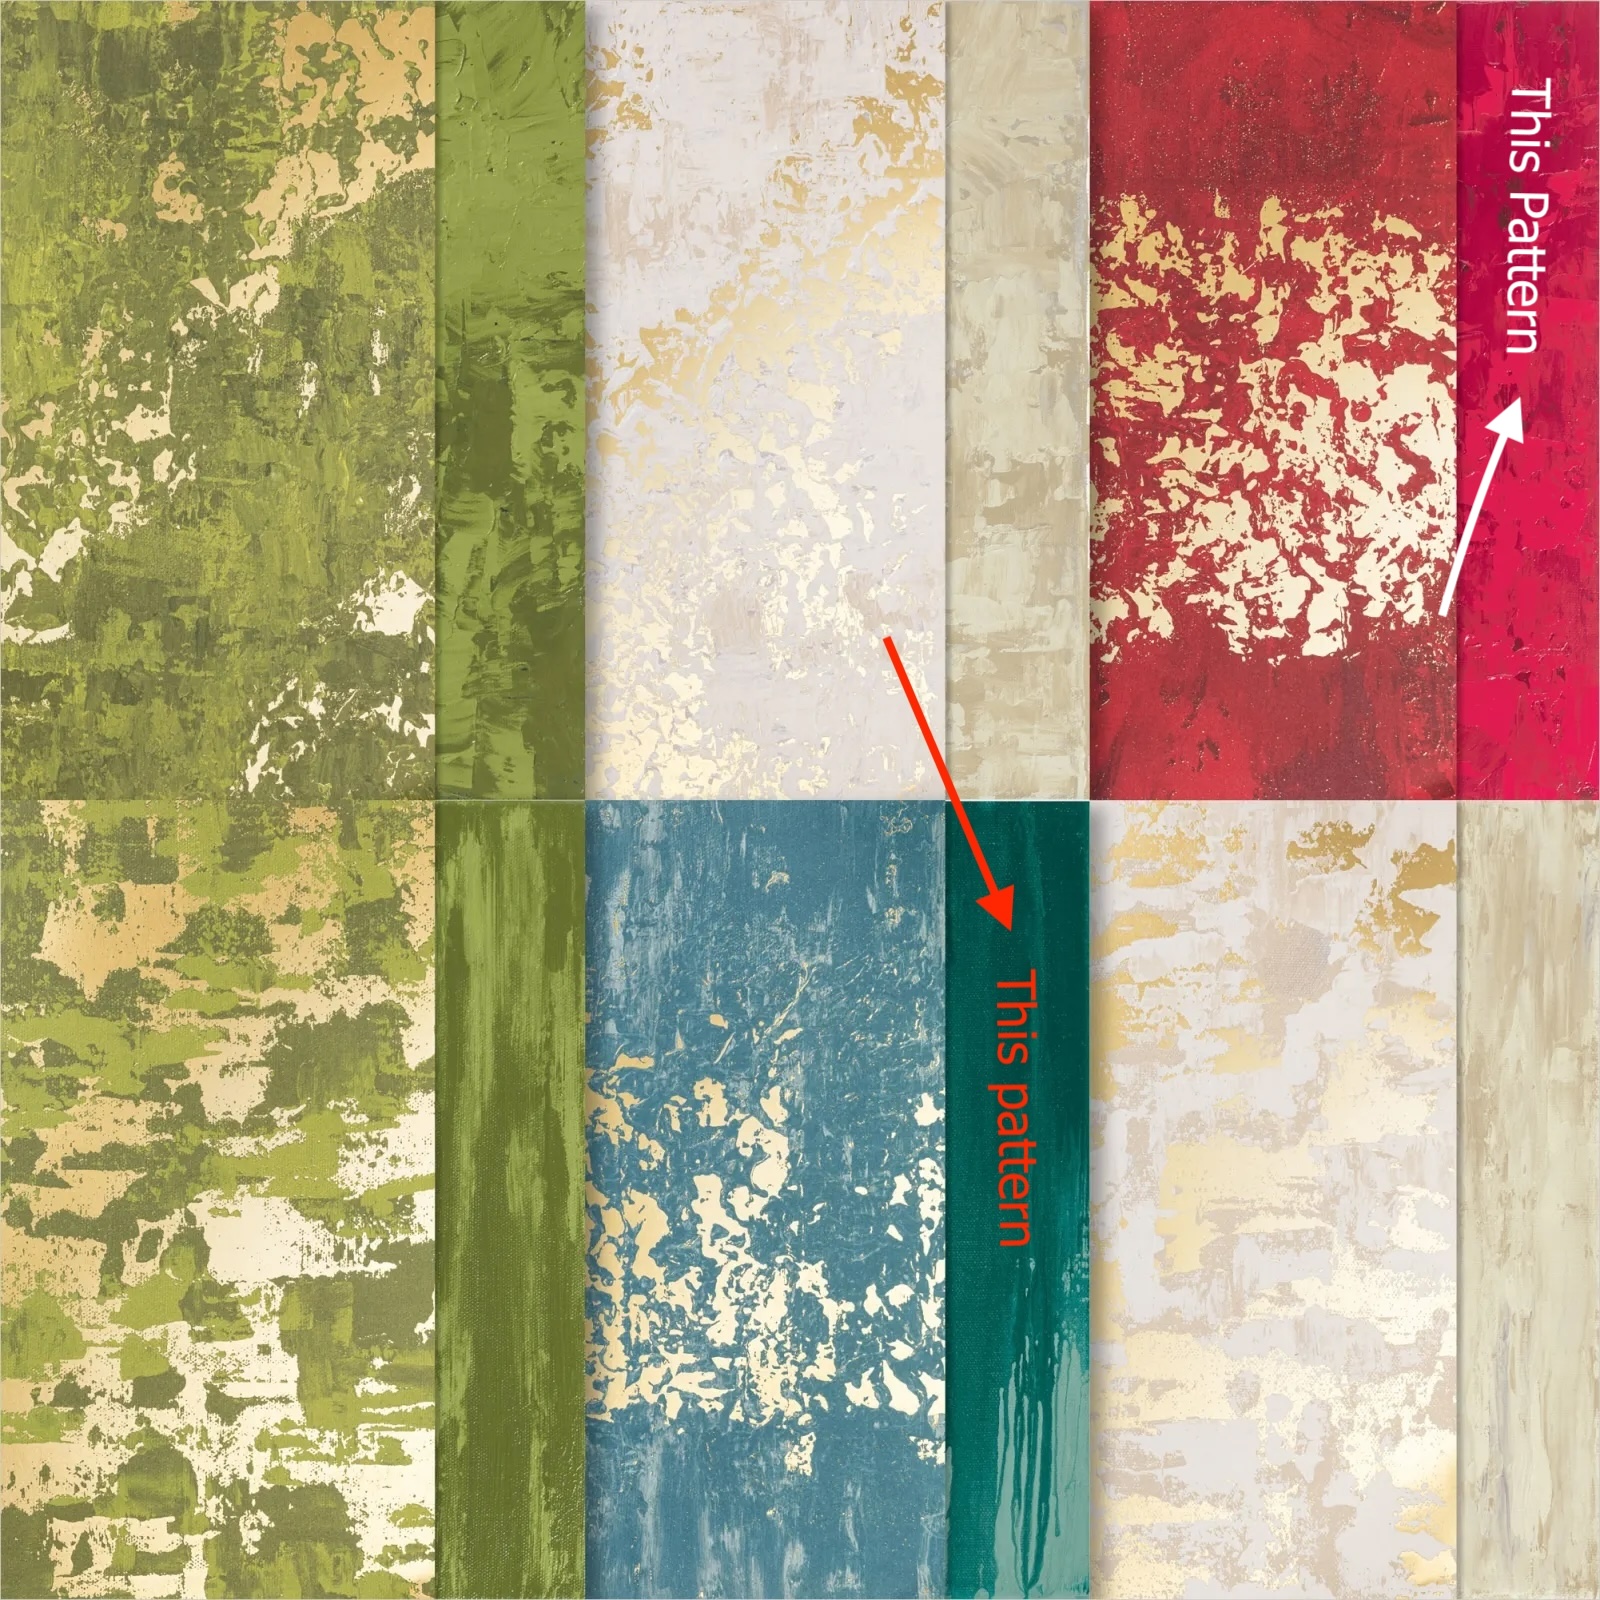
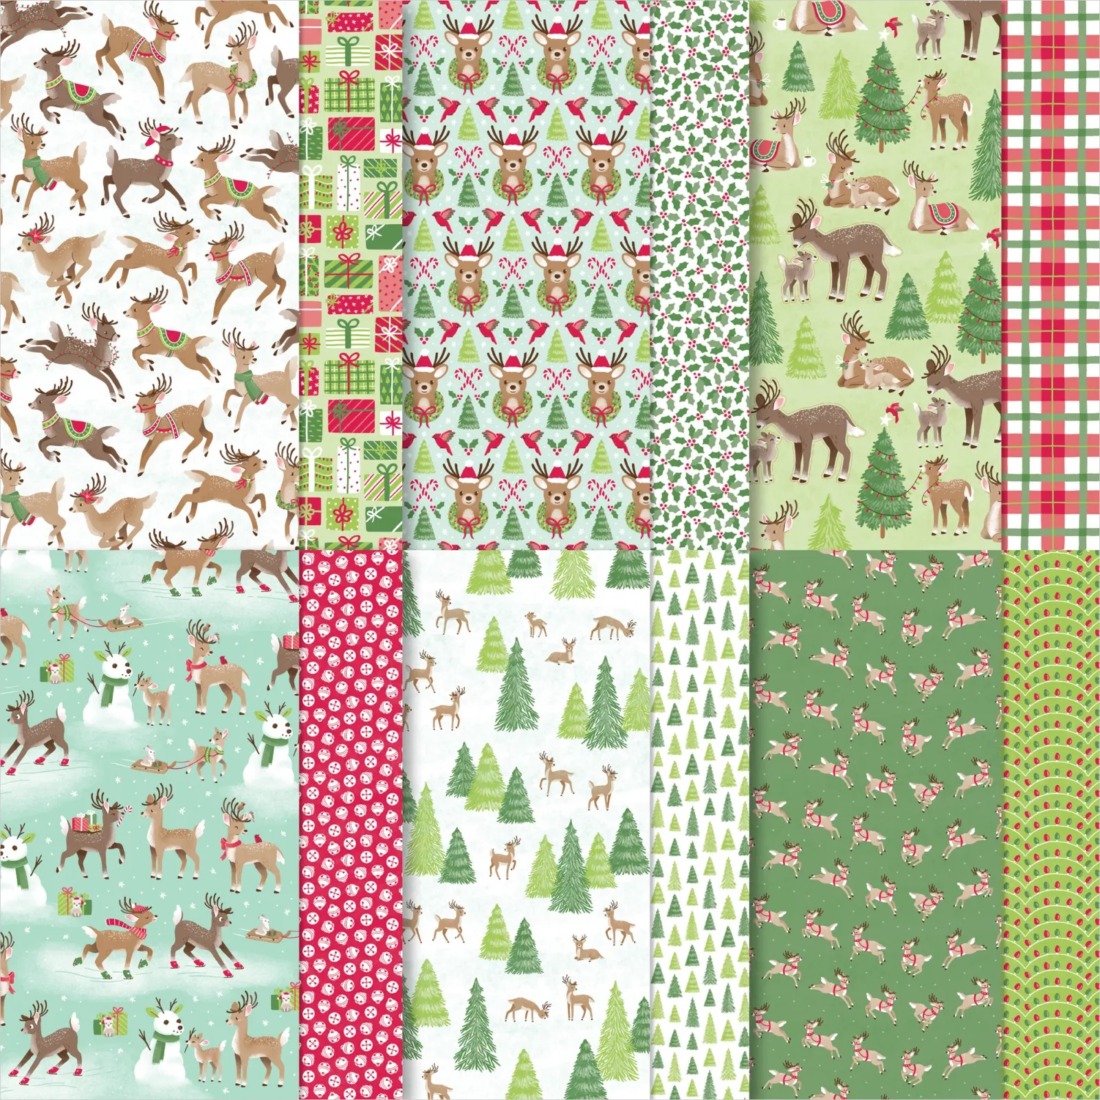
The 2024 September-December Mini Catalog is chock full of beautiful designer series papers. Purchasing a Paper Share allows you to get one 6 x 6 piece of every pattern that you see below. It’s a great way to get your hands on the papers to see which of them you want to buy the whole package!
The cost of the Paper Share is $42. You will receive, from me, 104 sheets of 6″ x 6″ papers:
Sentimental Christmas 12″ x 12″ Designer Series Paper (12 patterns, 12 sheets!)
Season of Elegance Specialty 12″ x 12 Designer Series Paper (12 patterns, 12 sheets!)
Reindeer Days 12″ x 12″ Designer Series Paper (12 patterns, 12 sheets!)
Splendid Autumn 6″ x 6″ Designer Series Paper (24 patterns, 12 sheets!)
Nests of Winter 12″ x 12″ Designer Series Paper (12 patterns, 12 sheets!)
Snowy Scenes 12″ x 12″ Designer Series Paper (12 patterns, 12 sheets!)
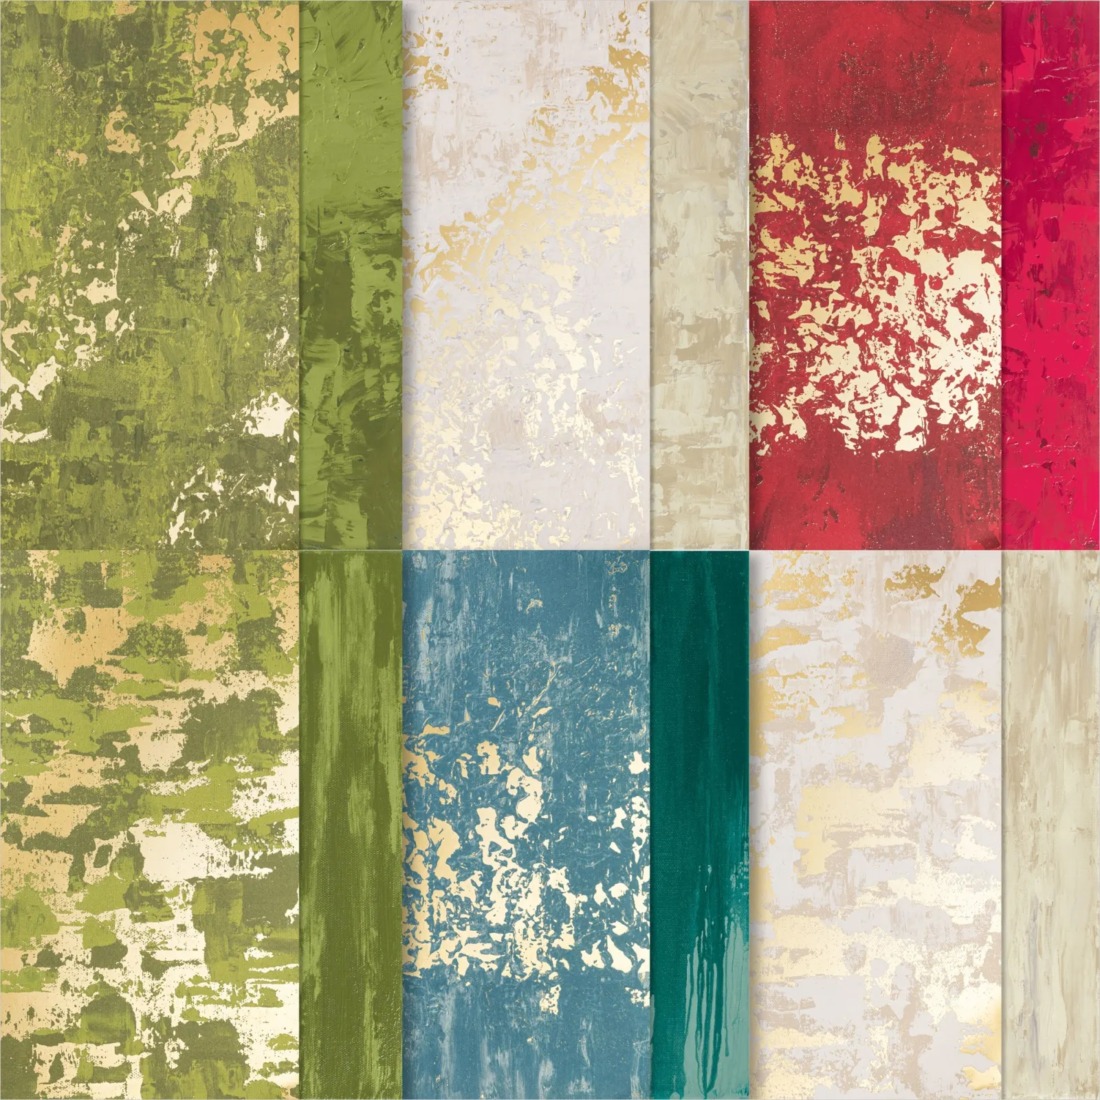
Regal Distressed Specialty 12″ x 12″ Designer Series Paper (3 patterns, 6 sheets!)
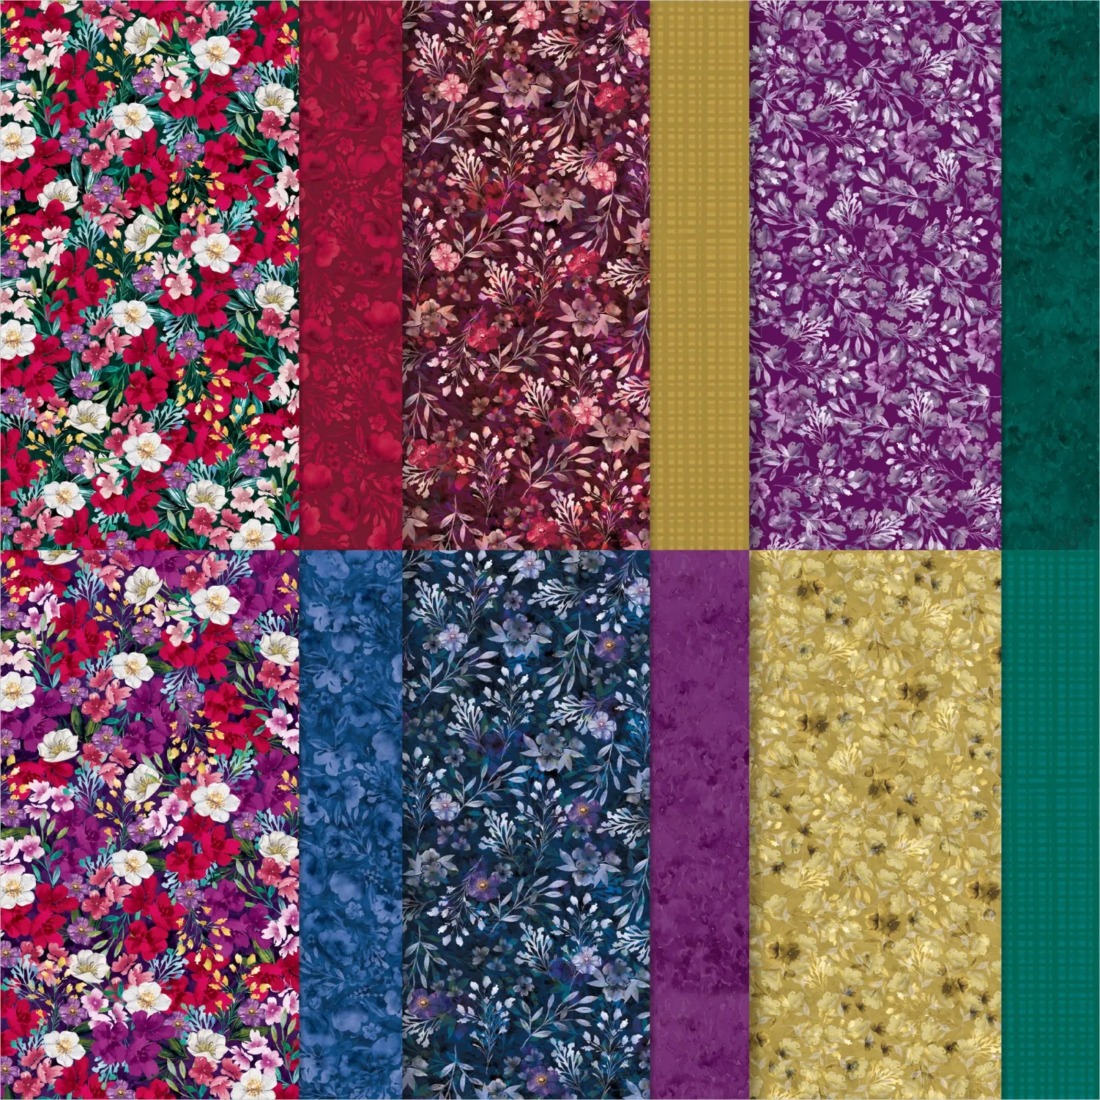
Regal Winter 12″ x 12″ Designer Series Paper (12 patterns, 12 sheets!)
Take a Bow 6″ x 6″ Designer Series Paper (8 patterns, 8 sheets!)
Festive Glimmer Paper (3 colors, 6 sheets!)
Here are all the beautiful designs in the new catalog:
Take a Bow
Regal Winter
Splendid Autumn
Snowy Scenes
Sentimental Christmas
Regal Autumn
Nests of Winter
Reindeer Days
Regally Distressed Specialty Paper
Festive Glimmer Paper
DEADLINE TO ORDER: SUNDAY, AUGUST 25TH!
Please message me or email me at marya2hanson@gmail.com to reserve your paper share. I take PayPal, Venmo, or a personal check if I know you! 🙂
Mark your calendar! Between 6–31 August, you can shop select Designer Series Paper from the 2024–2025 Annual Catalogue* at 15% off! This is the perfect time to stock up and save on some of your favorite paper. Click below to start shopping with me – the sale price will be reflected on the SU! site, starting August 6!
Be sure to use this Host Code for AUGUST if you make an online order of $50 or more. You will receive (from me) a free gift — a tutorial bundle of over 20 card tutorials with complete instructions and measurements!
AUGUST Host Code: DWQ7NPWB
Note: This host code is not for club members.
Please let me know if you have any questions. And be sure to join my Up North Stampin’ Gang Facebook page. We are having SO much fun over there! We post, we share, and just enjoy life! Here’s the link to request to join: https://www.facebook.com/groups/199783410436824
As you may be aware, some months ago, Stampin’ Up! purchased some of the Close to My Heart range of products. Until now, only those who’ve had a Close to My Heart (CTMH) account have been able to purchase these products due to the limited quantity available.
WHAT DOES THIS MEAN FOR YOU?
From today, all the products from their cardmaking and scrapbooking line in our store are available for anyone to purchase! Please be aware that as these quantities are limited, we are anticipated to sell out of these fairly quickly. Be assured that Stampin’ Up! will be adding new products to our scrapbooking line in the very near future.
So you can add to cart anything either the Stampin’ Up! or Close to My Heart lines!
Mark your calendar! Between 6–31 August, you can shop select Designer Series Paper from the 2024–2025 Annual Catalogue* at 15% off! This is the perfect time to stock up and save on some of your favorite paper. Click below to start shopping with me – the sale price will be reflected on the SU! site, starting August 6!
Be sure to use this Host Code for AUGUST if you make an online order of $50 or more. You will receive (from me) a free gift — a tutorial bundle of over 20 card tutorials with complete instructions and measurements!
AUGUST Host Code: DWQ7NPWB
Note: This host code is not for club members.
Please let me know if you have any questions. And be sure to join my Up North Stampin’ Gang Facebook page. We are having SO much fun over there! We post, we share, and just enjoy life! Here’s the link to request to join: https://www.facebook.com/groups/199783410436824
Stampin’ Up! released two new kits this morning, including this fun new home decor piece, the Haunted Home kit.
The Haunted Home Kit ($18) includes everything you need to assemble your very own paper haunted house. It’s a fun paper crafting activity suitable for any gathering with fellow crafters, friends, or family during the spooky season! Prediction: this kit WILL sell out, so get yours as soon as you can!
Your kit is comprised of die-cut cardboard walls, along with precut vellum and other paper pieces, to accessorize your house. After assembling the house and following the instructions, you can add supernatural touches to finish your project. Please note that you will need a glue gun to assemble the home, but other adhesives needed to complete the project are included.
Mark your calendar! Between 6–31 August, you can shop select Designer Series Paper from the 2024–2025 Annual Catalogue* at 15% off! This is the perfect time to stock up and save on some of your favorite paper. Click below to start shopping with me – the sale price will be reflected on the SU! site, starting August 6!
Below are some example of how Designer Series Papers can be an integral part of your papercrafting!
Be sure to use this Host Code for AUGUST if you make an online order of $50 or more. You will receive (from me) a free gift — a tutorial bundle of over 20 card tutorials with complete instructions and measurements!
AUGUST Host Code: DWQ7NPWB
Note: This host code is not for club members.
Please let me know if you have any questions. And be sure to join my Up North Stampin’ Gang Facebook page. We are having SO much fun over there! We post, we share, and just enjoy life! Here’s the link to request to join: https://www.facebook.com/groups/199783410436824
I don’t know about you, but I am always drawn to creating my cards and projects using Stampin’ Up! Designer Series papers, and starting on August 6, they’re 15% off! Scroll down to see a parade of some of my DSP cards!
Mark your calendar! Between 6–31 August, you can shop select Designer Series Paper from the 2024–2025 Annual Catalogue* at 15% off! This is the perfect time to stock up and save on some of your favorite paper. Click below to start shopping with me – the sale price will be reflected on the SU! site, starting August 6!
Be sure to use this Host Code for AUGUST if you make an online order of $50 or more. You will receive (from me) a free gift — a tutorial bundle of over 20 card tutorials with complete instructions and measurements!
AUGUST Host Code: DWQ7NPWB
Note: This host code is not for club members.
Please let me know if you have any questions. And be sure to join my Up North Stampin’ Gang Facebook page. We are having SO much fun over there! We post, we share, and just enjoy life! Here’s the link to request to join: https://www.facebook.com/groups/199783410436824
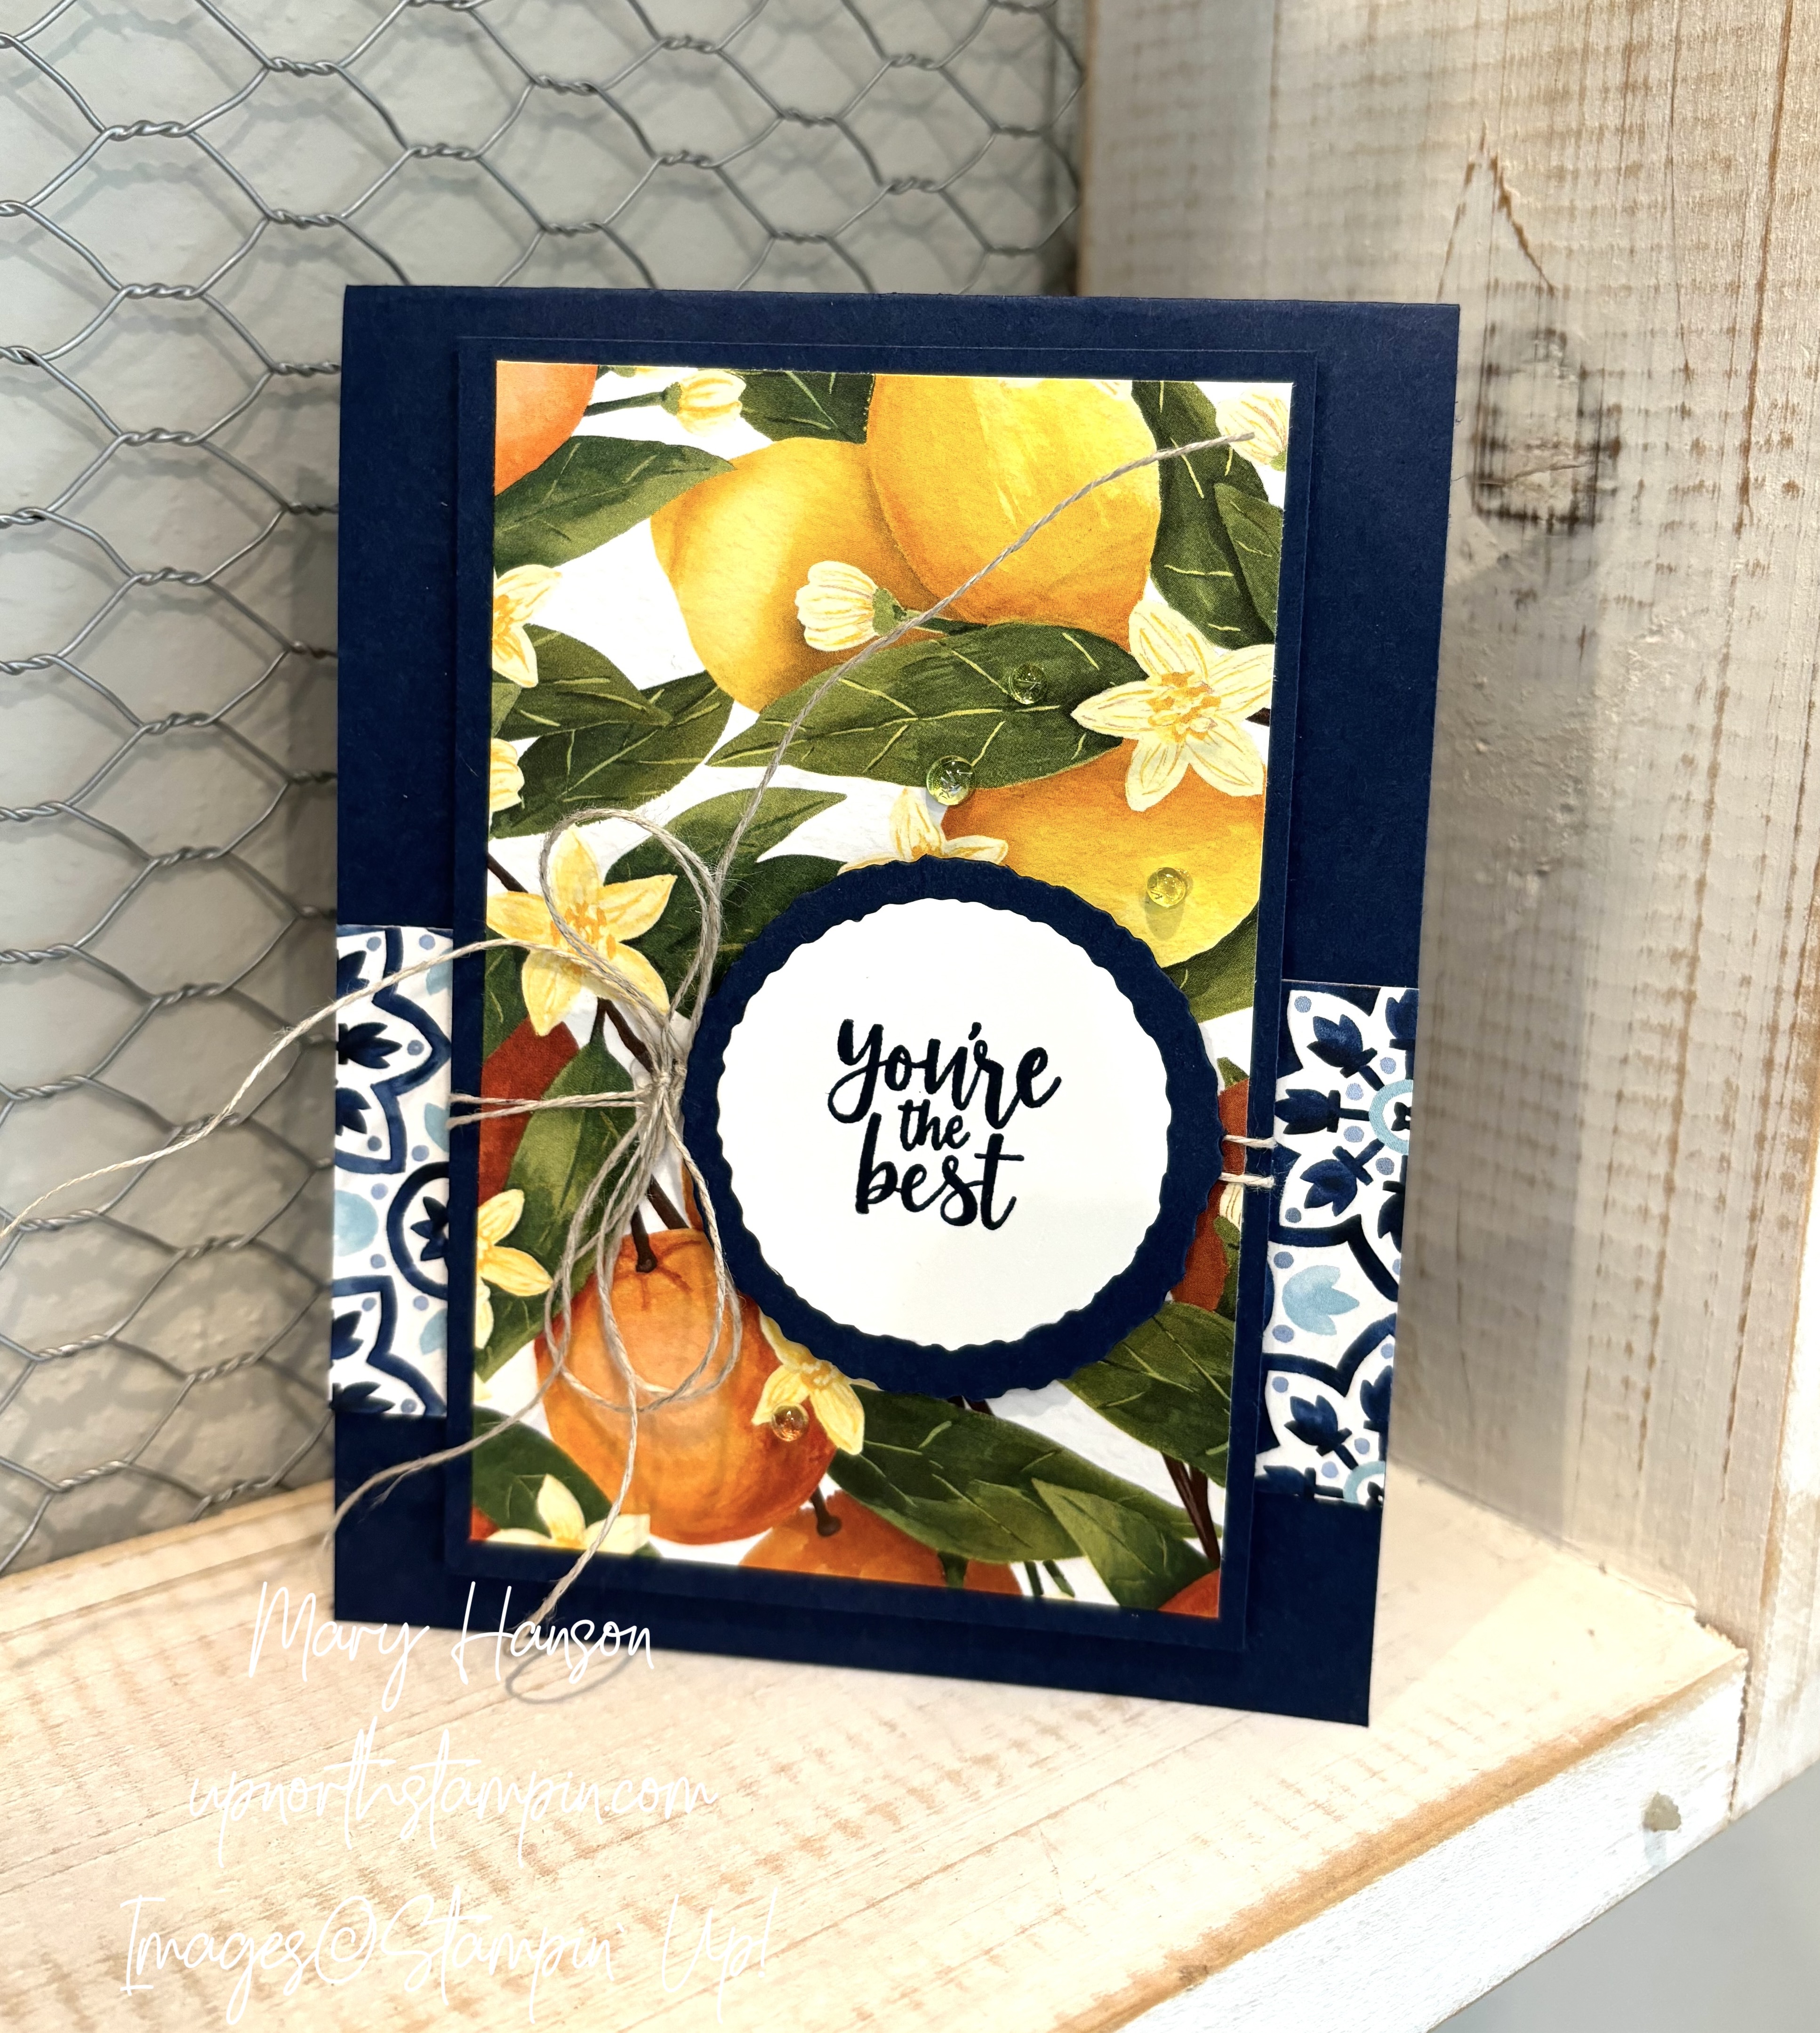
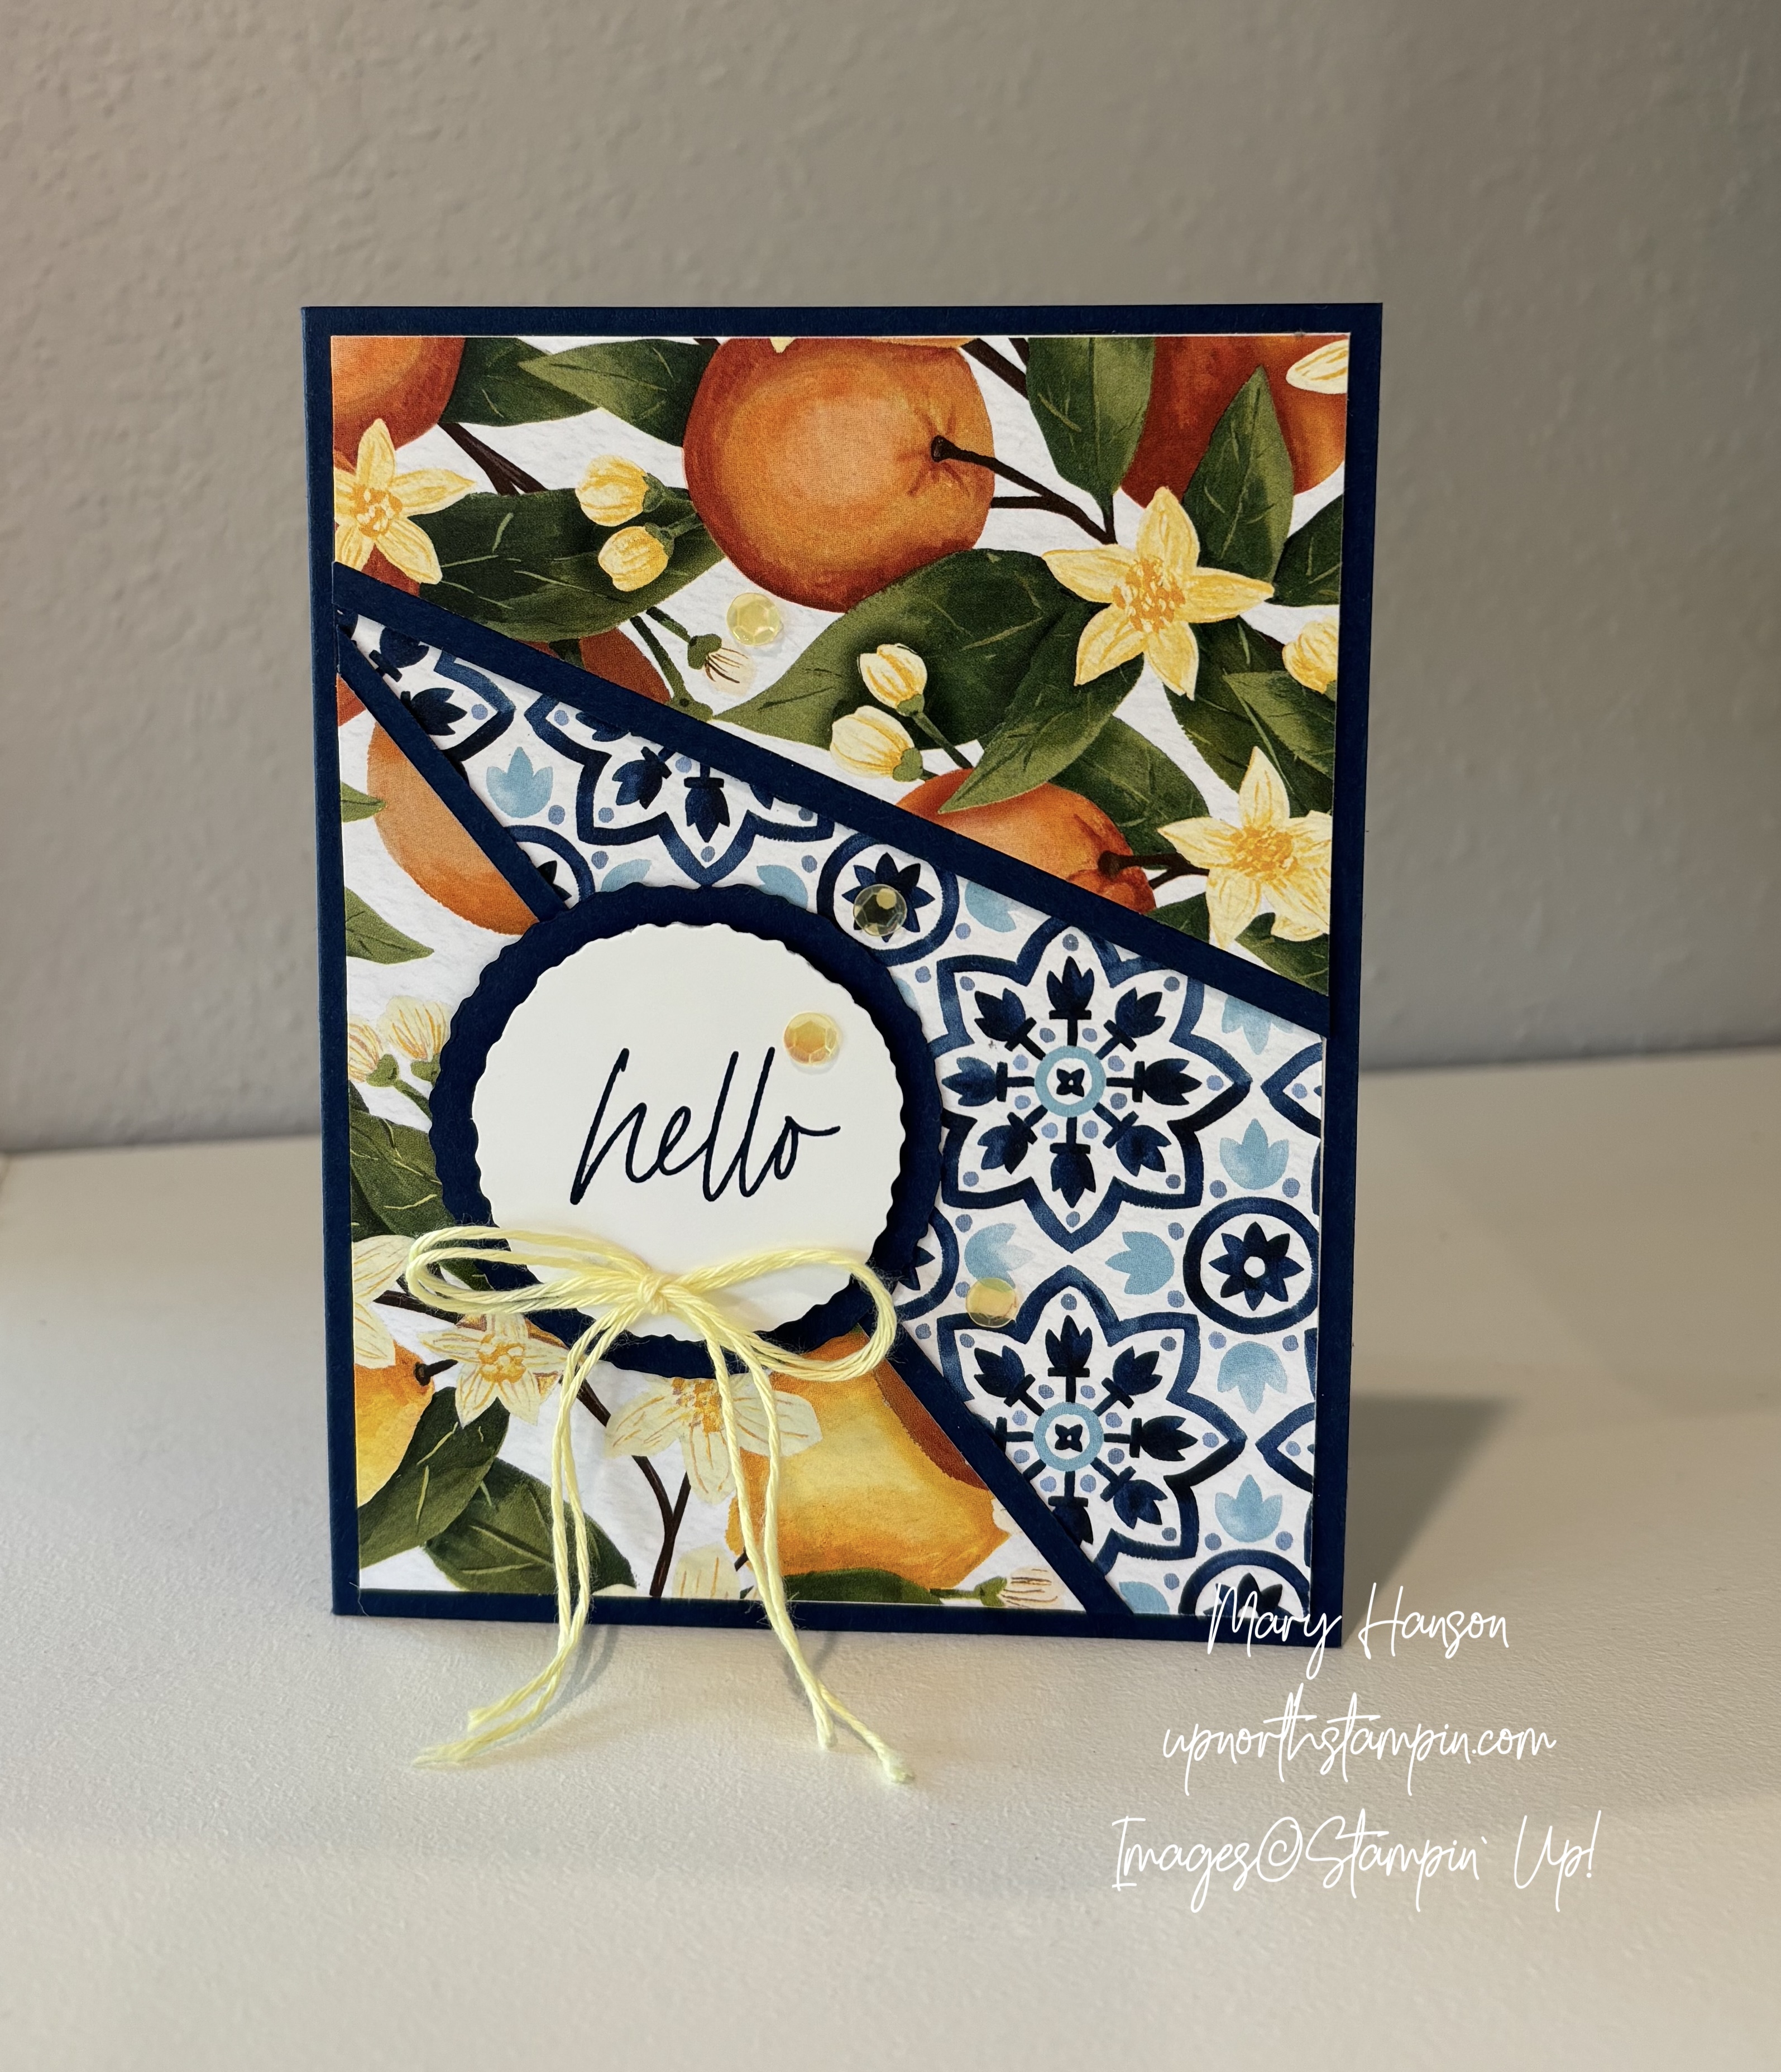
The Split Card design is a fun way to use similar OR contrasting Designer Series Papers in an easy way, even though it looks more difficult than it is. Here’s my card using the Mediterranean Blooms
Here were my supplies:
Night of Navy cardstock base of 5 1/2 x 8 1/2, scored and folded at 4 1/4”
2 pieces of coordinating DSP cut to 5 1/4” x 4”
2 pieces of Basic White cardstock, cut to 5 1/4” x 4”, one for front and one for inside of card
2 strips of Night of Navy cardstock, cut at 5 1/2 x 1/2”
2 circles: one at 2” in Night of Navy cardstock, one at 1 3/4” in white cardstock to stamp the sentiment on.
Cut the DSP papers at angles, BOTH papers at the same time, exactly on top of each other. The cuts do not have to be exact, just eye up and do something similar to what you see on the sample card above – no need to measure! Mix and match the two papers so you have a contrasting paper in the middle. You’ll have three pieces left over for another card, which you can see below. Adhere the middle one down, lining up with the bottom corner. Take the two outer pieces and add the narrow strip of Navy cardstock underneath the panel, and trim off the edges. Adhere those to the card — they will overlap the middle piece.
I used the Deckled Circles Dies to cut out two circles, one in Night of Navy and one in Basic White. Stamp on the white circle and adhere to the bigger circle and pop onto the card front. Add a bow and embellish!
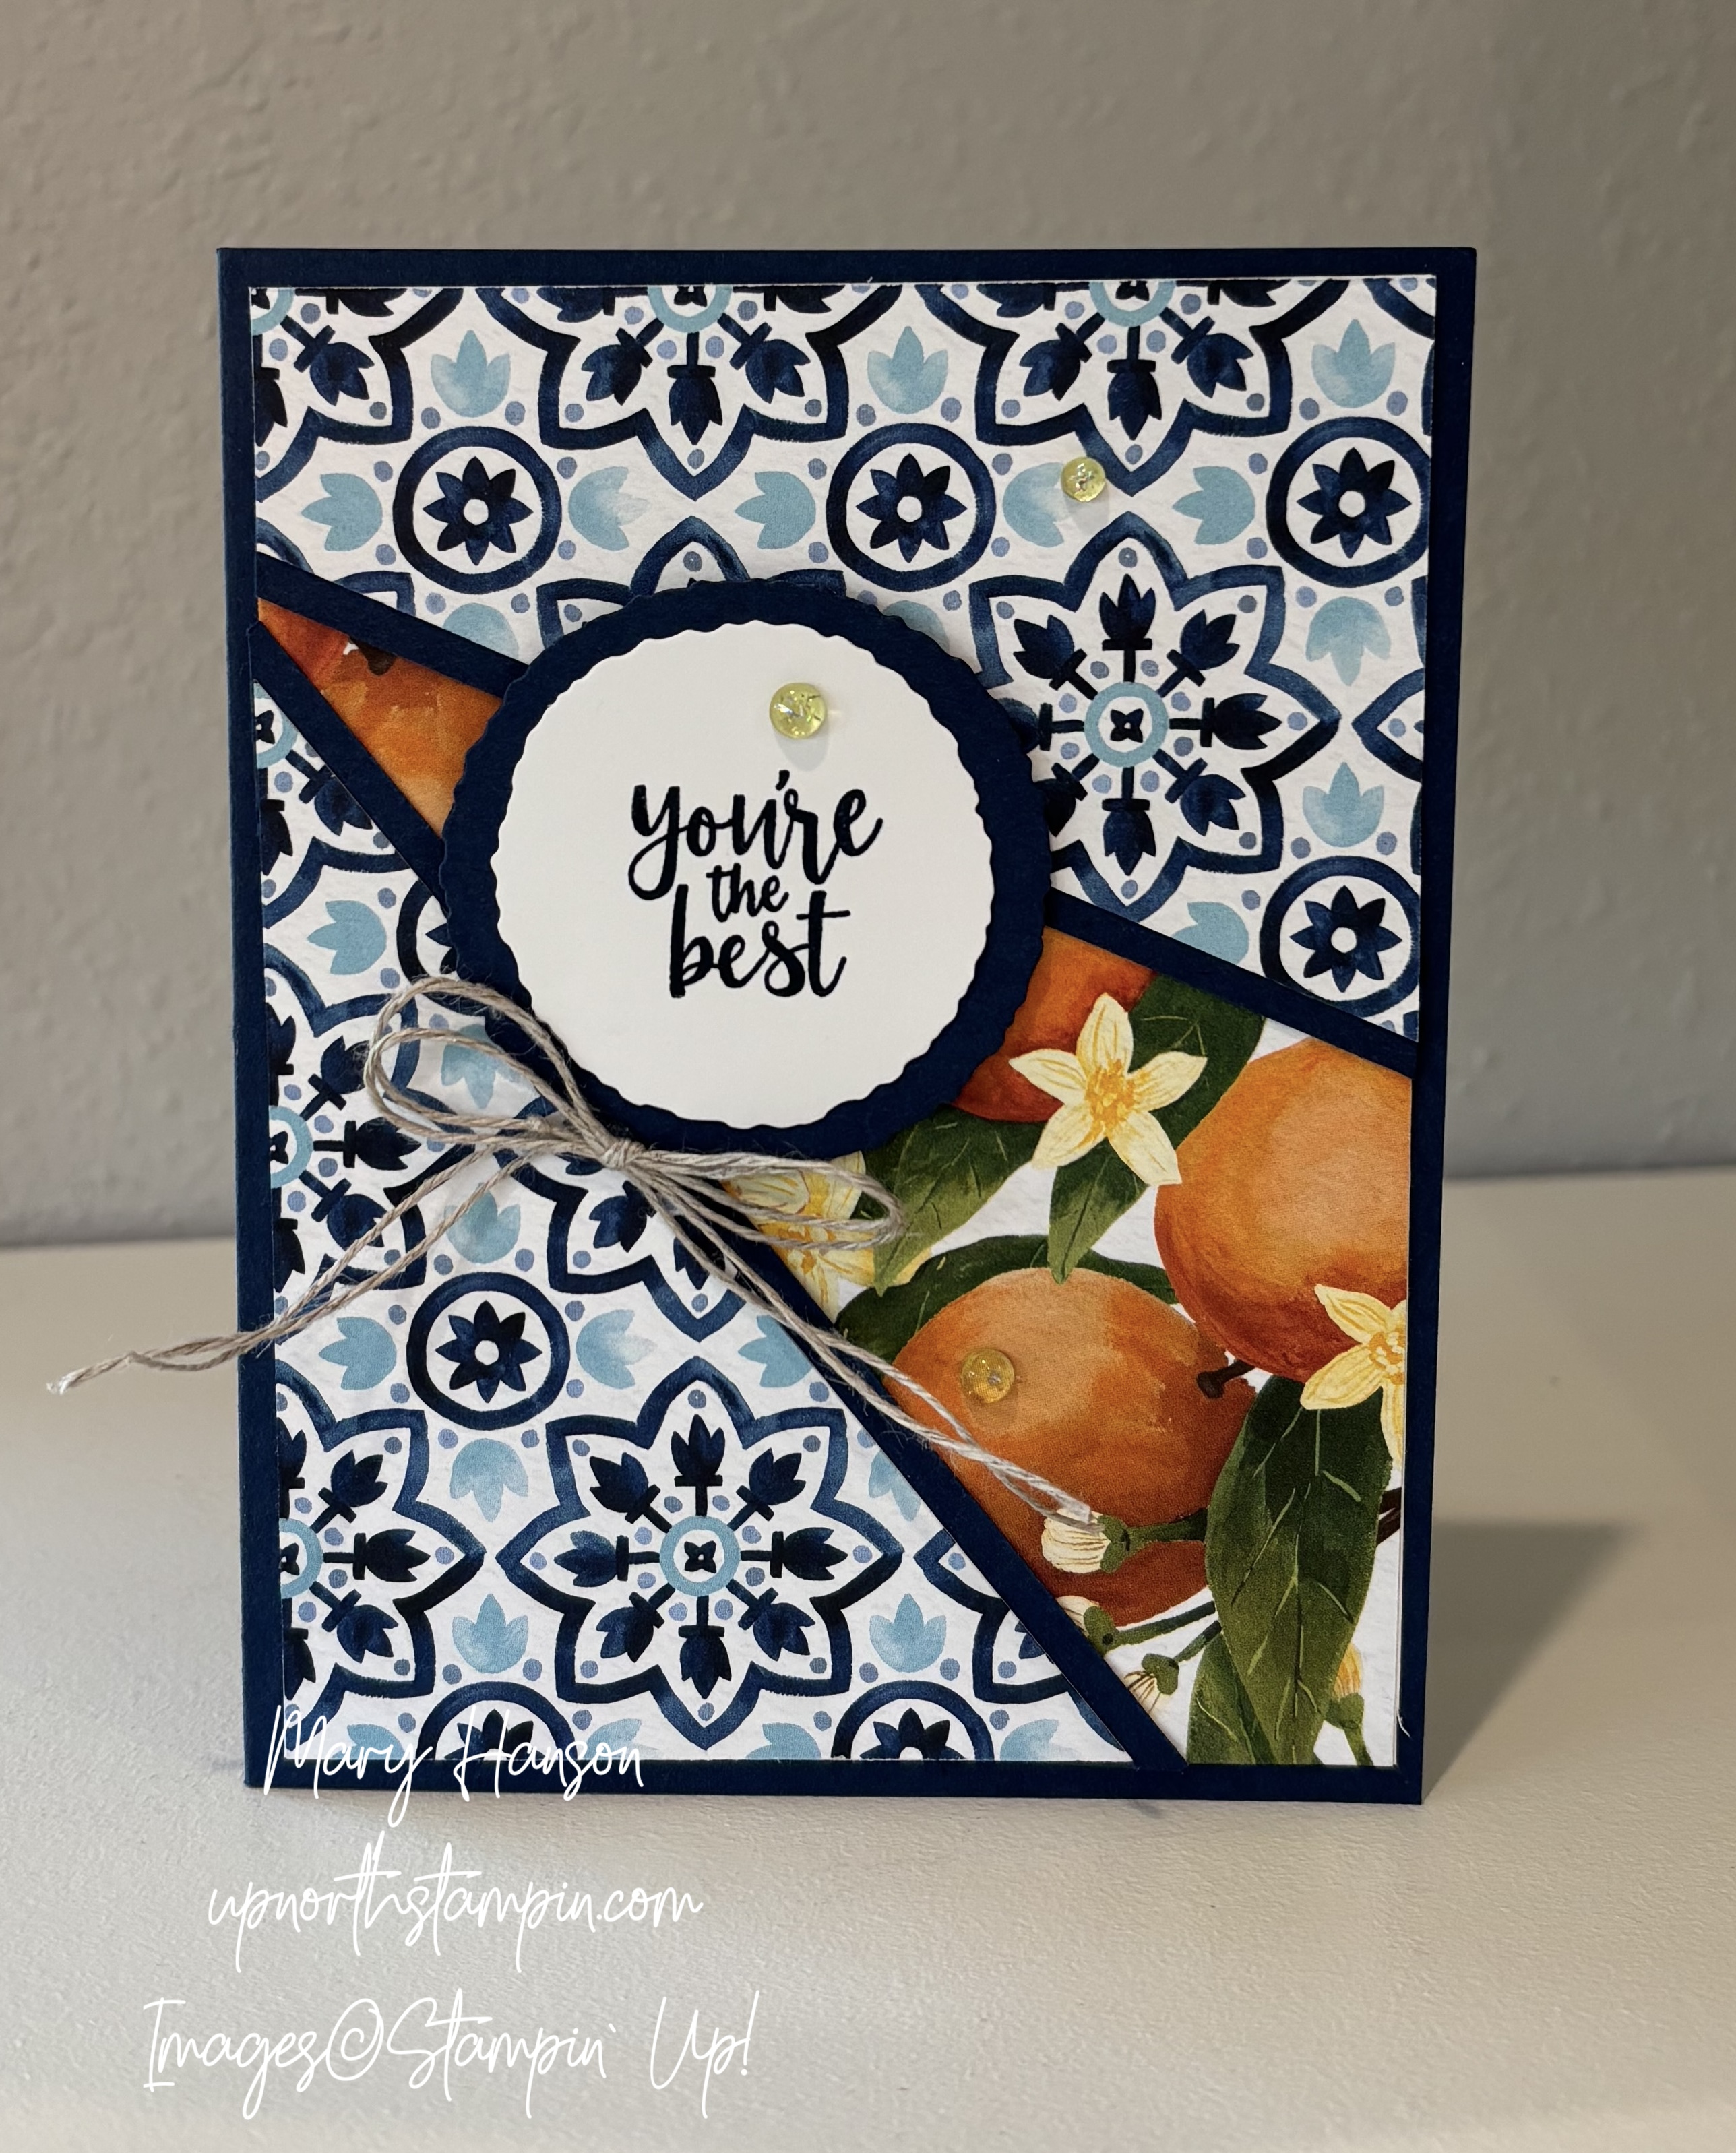
Here’s what the second card will look like using the same two sheets of DSP. Isn’t that fun? You can use with any of your favorite coordinating Designer Series Papers!
A Sale on Designer Series Papers!
Mark your calendar! Between 6–31 August, you can shop select Designer Series Paper from the 2024–2025 Annual Catalogue* at 15% off! This is the perfect time to stock up and save on some of your favorite paper.
Be sure to use this Host Code for AUGUST if you make an online order of $50 or more. You will receive (from me) a free gift from me — a tutorial bundle of over 20 card tutorials with complete instructions and measurements!
AUGUST Host Code: DWQ7NPWB
Note: This host code is not for club members.
Please let me know if you have any questions. And be sure to join my Up North Stampin’ Gang Facebook page. We are having SO much fun over there! We post, we share, and just enjoy life! Here’s the link to request to join: https://www.facebook.com/groups/199783410436824
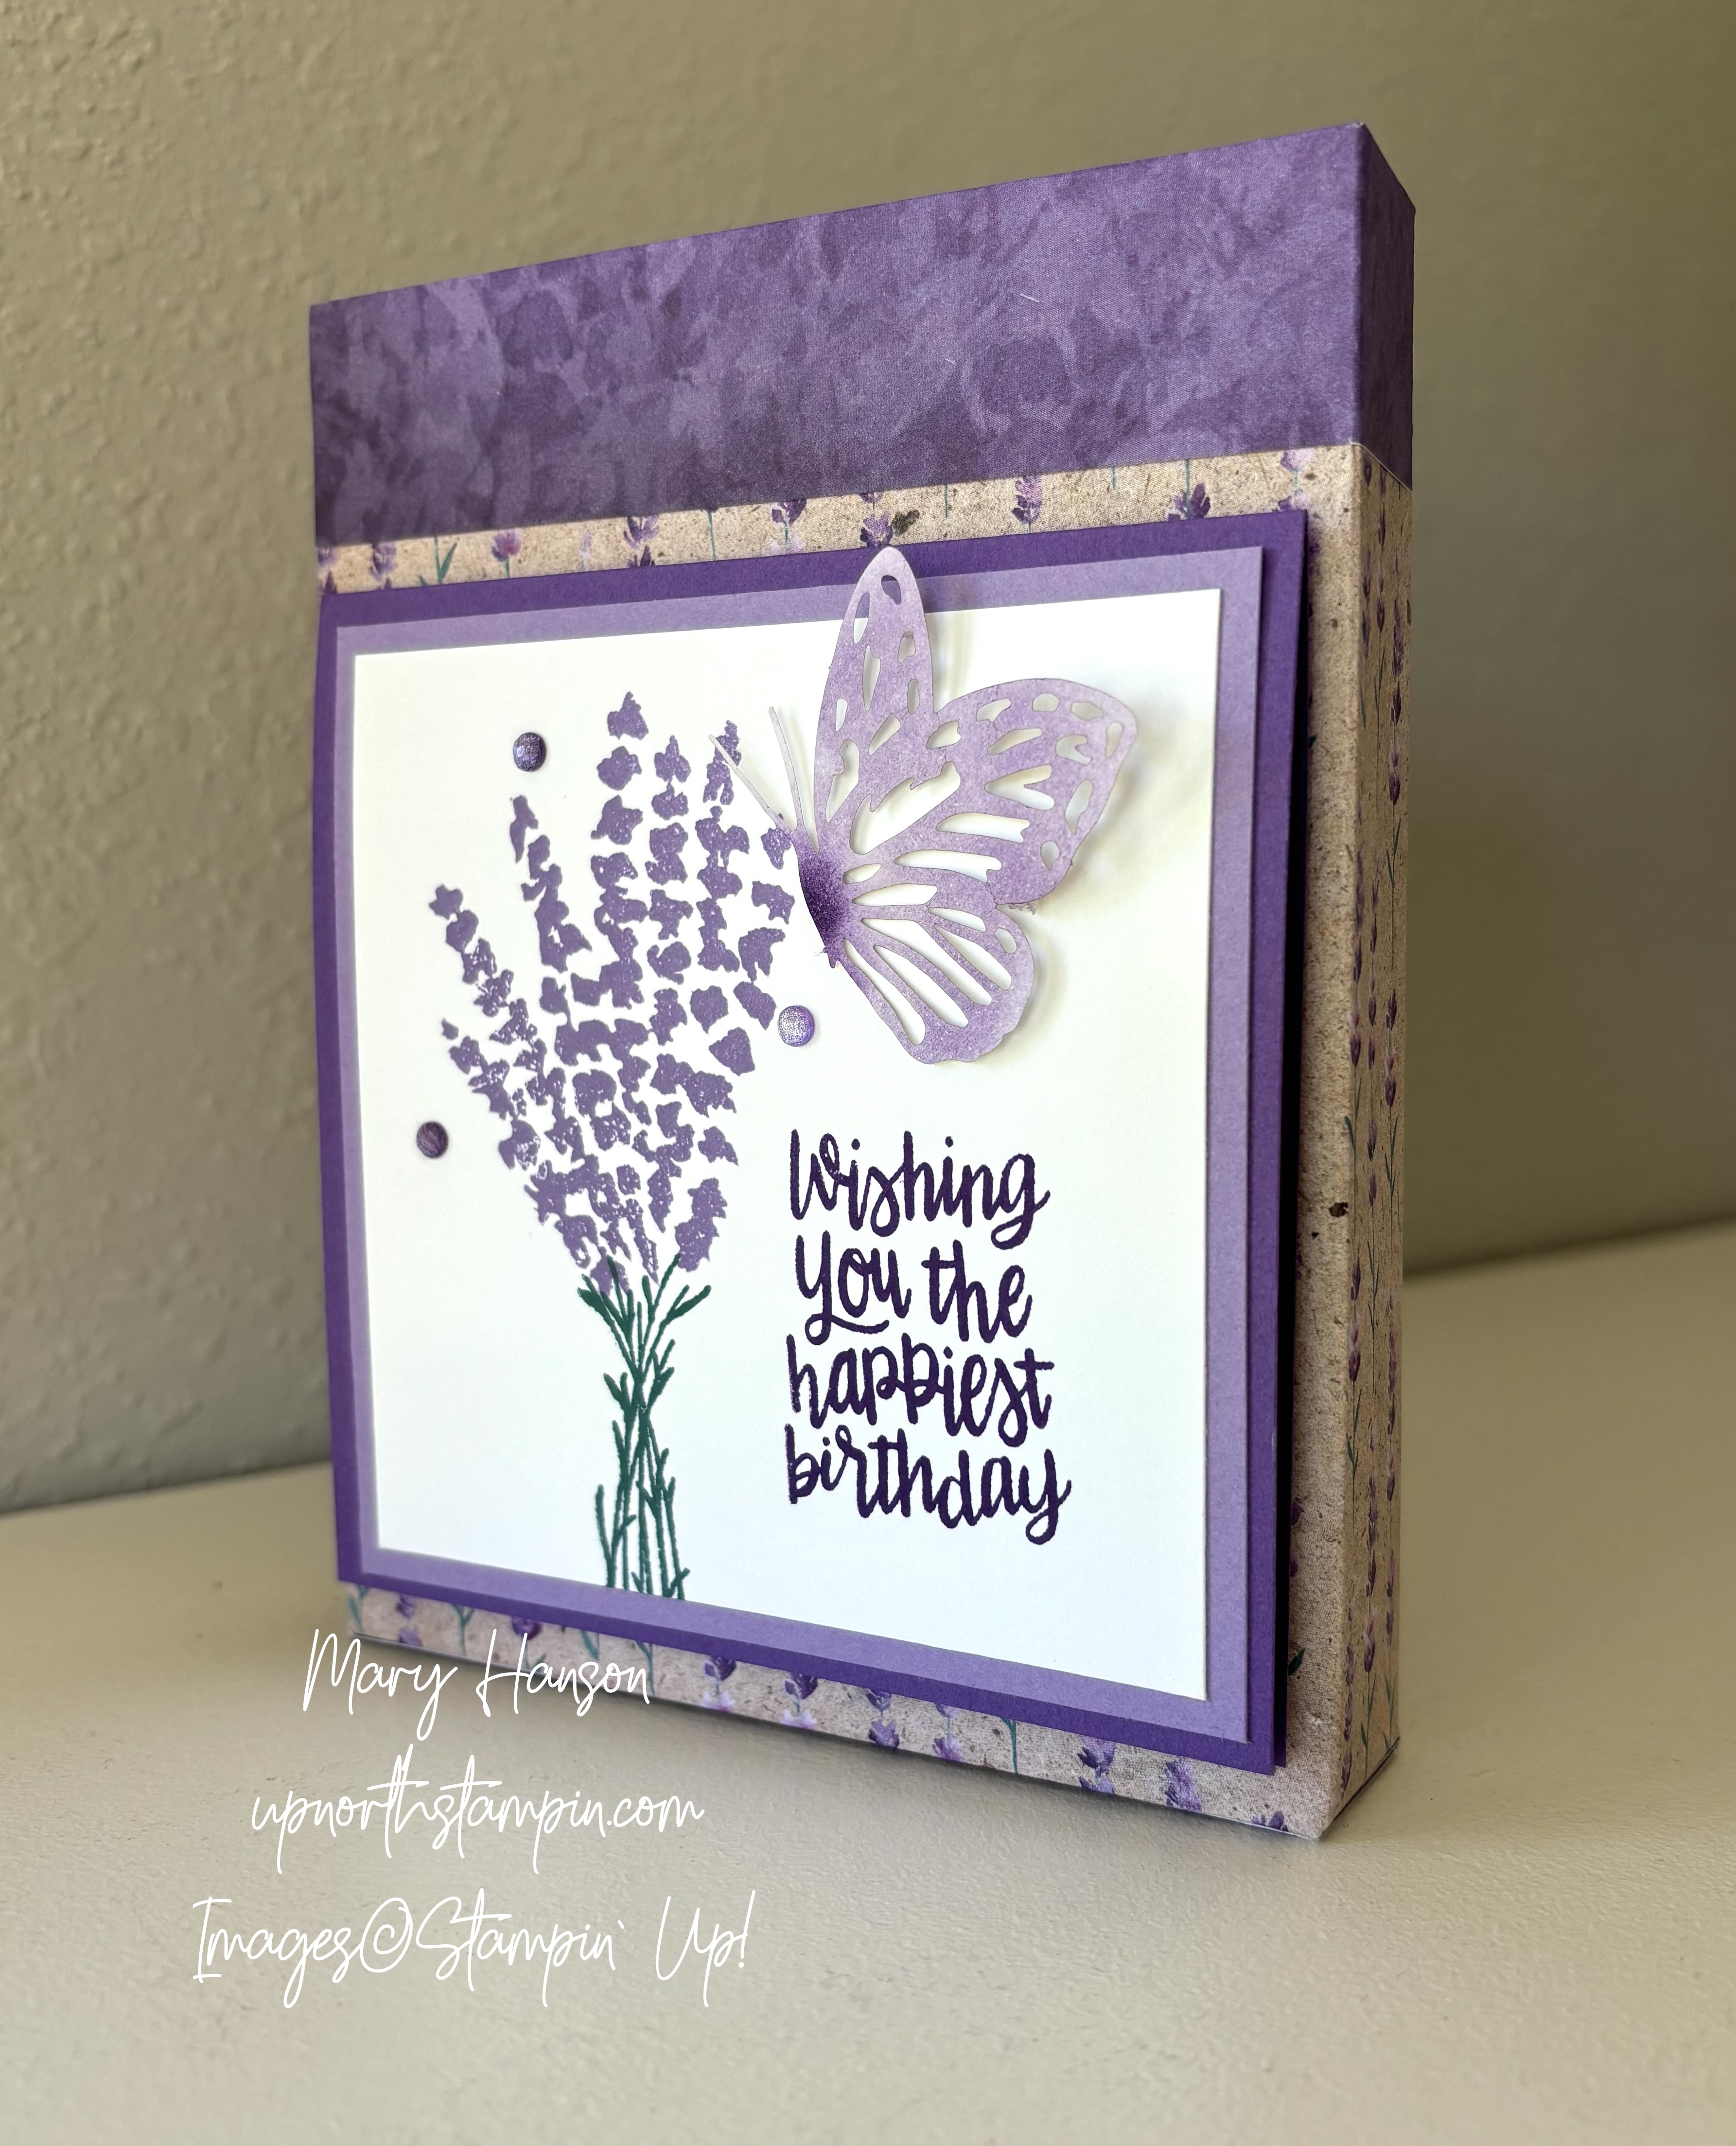
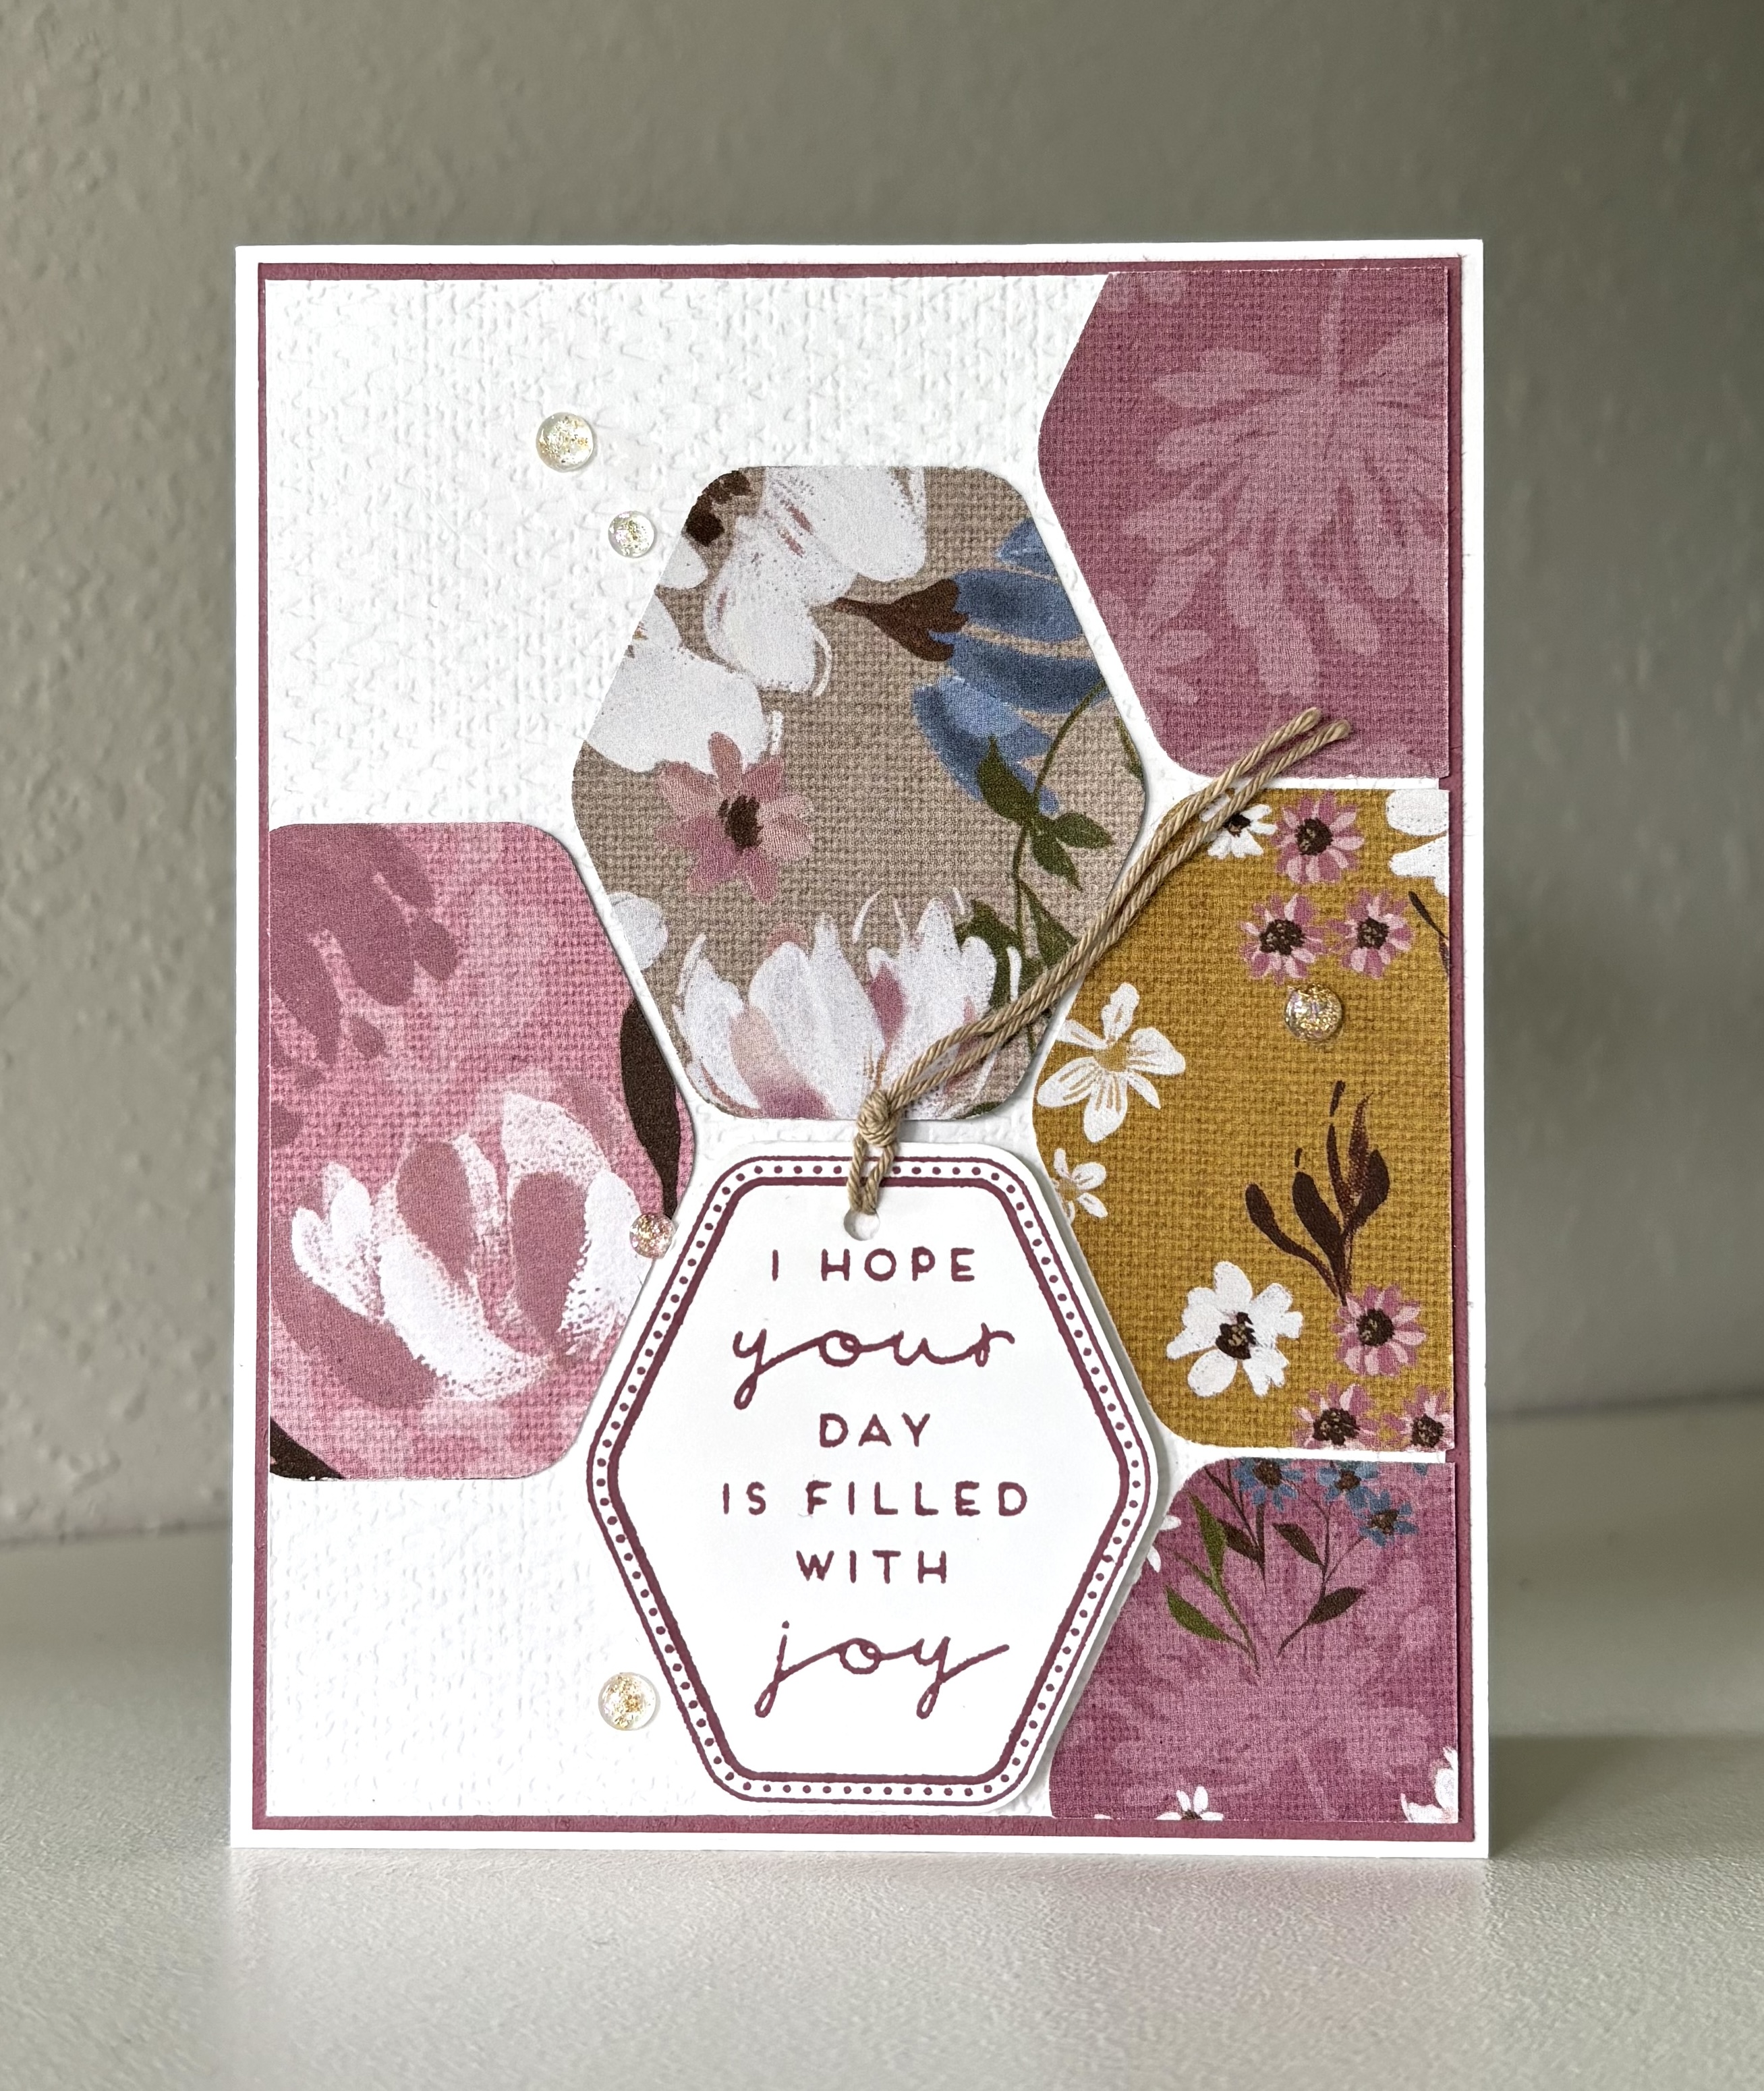
The July Paper Pumpkin kit, Painted Petals, creates nine cards, three each of three gorgeous card designs, each more beautiful than the next. The vellum floral overlays in beautiful shades of summer and the thoughtful sentiments make this one of the best kits yet! Here are the three designs:
This kit is said by many to be the BEST Paper Pumpkin kit ever! BUT — we look to the future now, and to next month’s kit! Meet the..Time for Cake kit!
Bring on a birthday bash with elegant birthday cards made with rose gold details! Catch this sneak peek of one of the cards in the August Paper Pumpkin — an adorable fun fold card. This month’s box is going to be awesome! It even has a BONUS stamp set!
Paper Pumpkin is Stampin’ Up!’s subscription craft box. You get everything you need in each box to make that month’s projects. They give us some hints, but don’t show the projects. I love getting a surprise in the mail each month!
You can start a monthly subscription or purchase pre-paid subscriptions for 1, 3, 6, or 12 months.
For the month-to-month subscription, you can cancel or skip a month at any time.
9 printed card bases, coordinating envelopes, and die cut labels
Night of Navy Classic Stampin’ Spot
Accordion Card Folds
Embellishments and rose gold foils
A Birthday Sentiment Stamp Set
PLUS a FREE – ADDITIONAL – Stamp Set! (Yes, there are TWO stamp sets in this kit!)
AND…We’ve still got that great new ADD-ON, too! It’s the beautiful EVERY CELEBRATION DIE SET that coordinates with all three kits (July – August – September), too!
Add dimension and detail to your cards, scrapbook pages, and gift tags with the Every Celebration Dies! With a flower and leaf shape and a “Hooray” die cut sentiment, these dies are a great way to expand your crafting experience. AND – they coordinate with three Paper Pumpkin Kits: Painted Petals, Time for Cake, and Autumn Abundance (that was a little sneaky foreshadowing for you!). Such easy coordination makes these dies a must-have for any paper craft. Note: you’ll need to be an active Paper Pumpkin Subscriber to pick up this fun die set!
The Paper Pumpkin kits are just getting better and better, aren’t they!?
Remember: sign up by August 10th to get this August kit!
If you’re interested in subscribing to Paper Pumpkin yourself, you can either sign up for a subscription where you are billed monthly for your kit or you can purchase a prepaid subscription in my online store AND – these will help you qualify for ANOTHER Bonus Days Coupon, too!
You can subscribe to Paper Pumpkin with your credit card (to be billed each month), or you can purchase a prepaid Paper Pumpkin subscription on an online order – your order can help you earn Host Rewards and Crown Rewards. You’ll receive a code from Stampin’ Up! that can be applied to your Paper Pumpkin account.
Mark your calendar! Between 6–31 August, you can shop select Designer Series Paper from the 2024–2025 Annual Catalogue* at 15% off! This is the perfect time to stock up and save on some of your favourite paper.
All of the papers are included except the Specialty Designs and 6″x6″ Colour Assortments AND there are no order limits! Start making your Shopping List now!
Be sure to use this Host Code for AUGUST if you make an online order of $50 or more. You will receive (from me) a free gift from me — a tutorial bundle of over 20 card tutorials with complete instructions and measurements!
AUGUST Host Code: DWQ7NPWB
Note: This host code is not for club members.
Please let me know if you have any questions. And be sure to join my Up North Stampin’ Gang Facebook page. We are having SO much fun over there! We post, we share, and just enjoy life! Here’s the link to request to join: https://www.facebook.com/groups/199783410436824


")

 Designer Series Paper")
")
 Specialty Designer Series Paper")


")


 Designer Series Paper")
 Designer Series Paper")
 Designer Series Paper")
 Designer Series Paper")
 Designer Series Paper")
 Designer Series Paper")
 Designer Series Paper")
 Designer Series Paper")
 Designer Series Paper")
 Designer Series Paper")
 Designer Series Paper")
 Designer Series Paper")
 Designer Series Paper")
 Designer Series Paper")


")