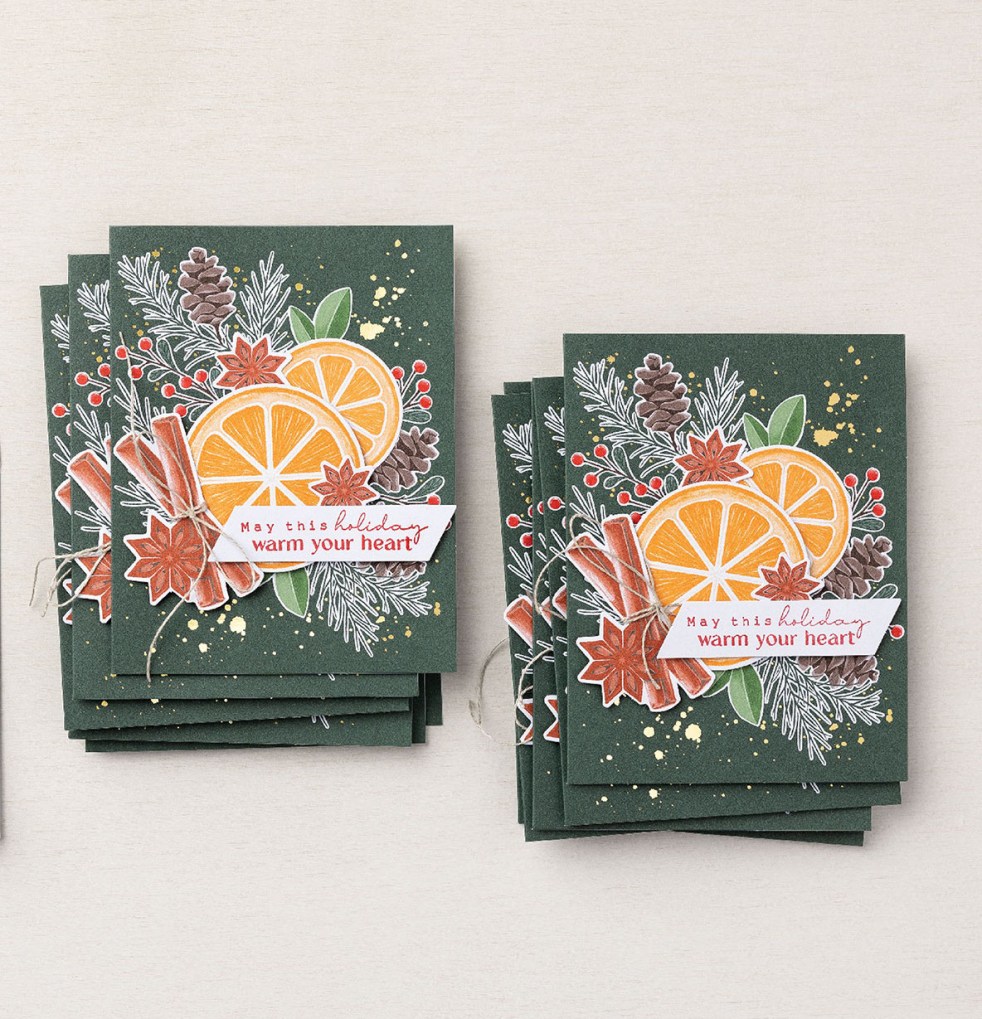
New Cozy & Bright Kit Available August 3 In The Kits Collection!

Celebrate the season with a card kit that has everything you need wish those you love a merry Christmas and a joyous New Year. Don’t let the holidays overwhelm you–get your all-inclusive kit and make quick multiples everyone will love!
Stop by the Kits Collection in the online store tomorrow to pick up this beautiful Christmas card kit!!
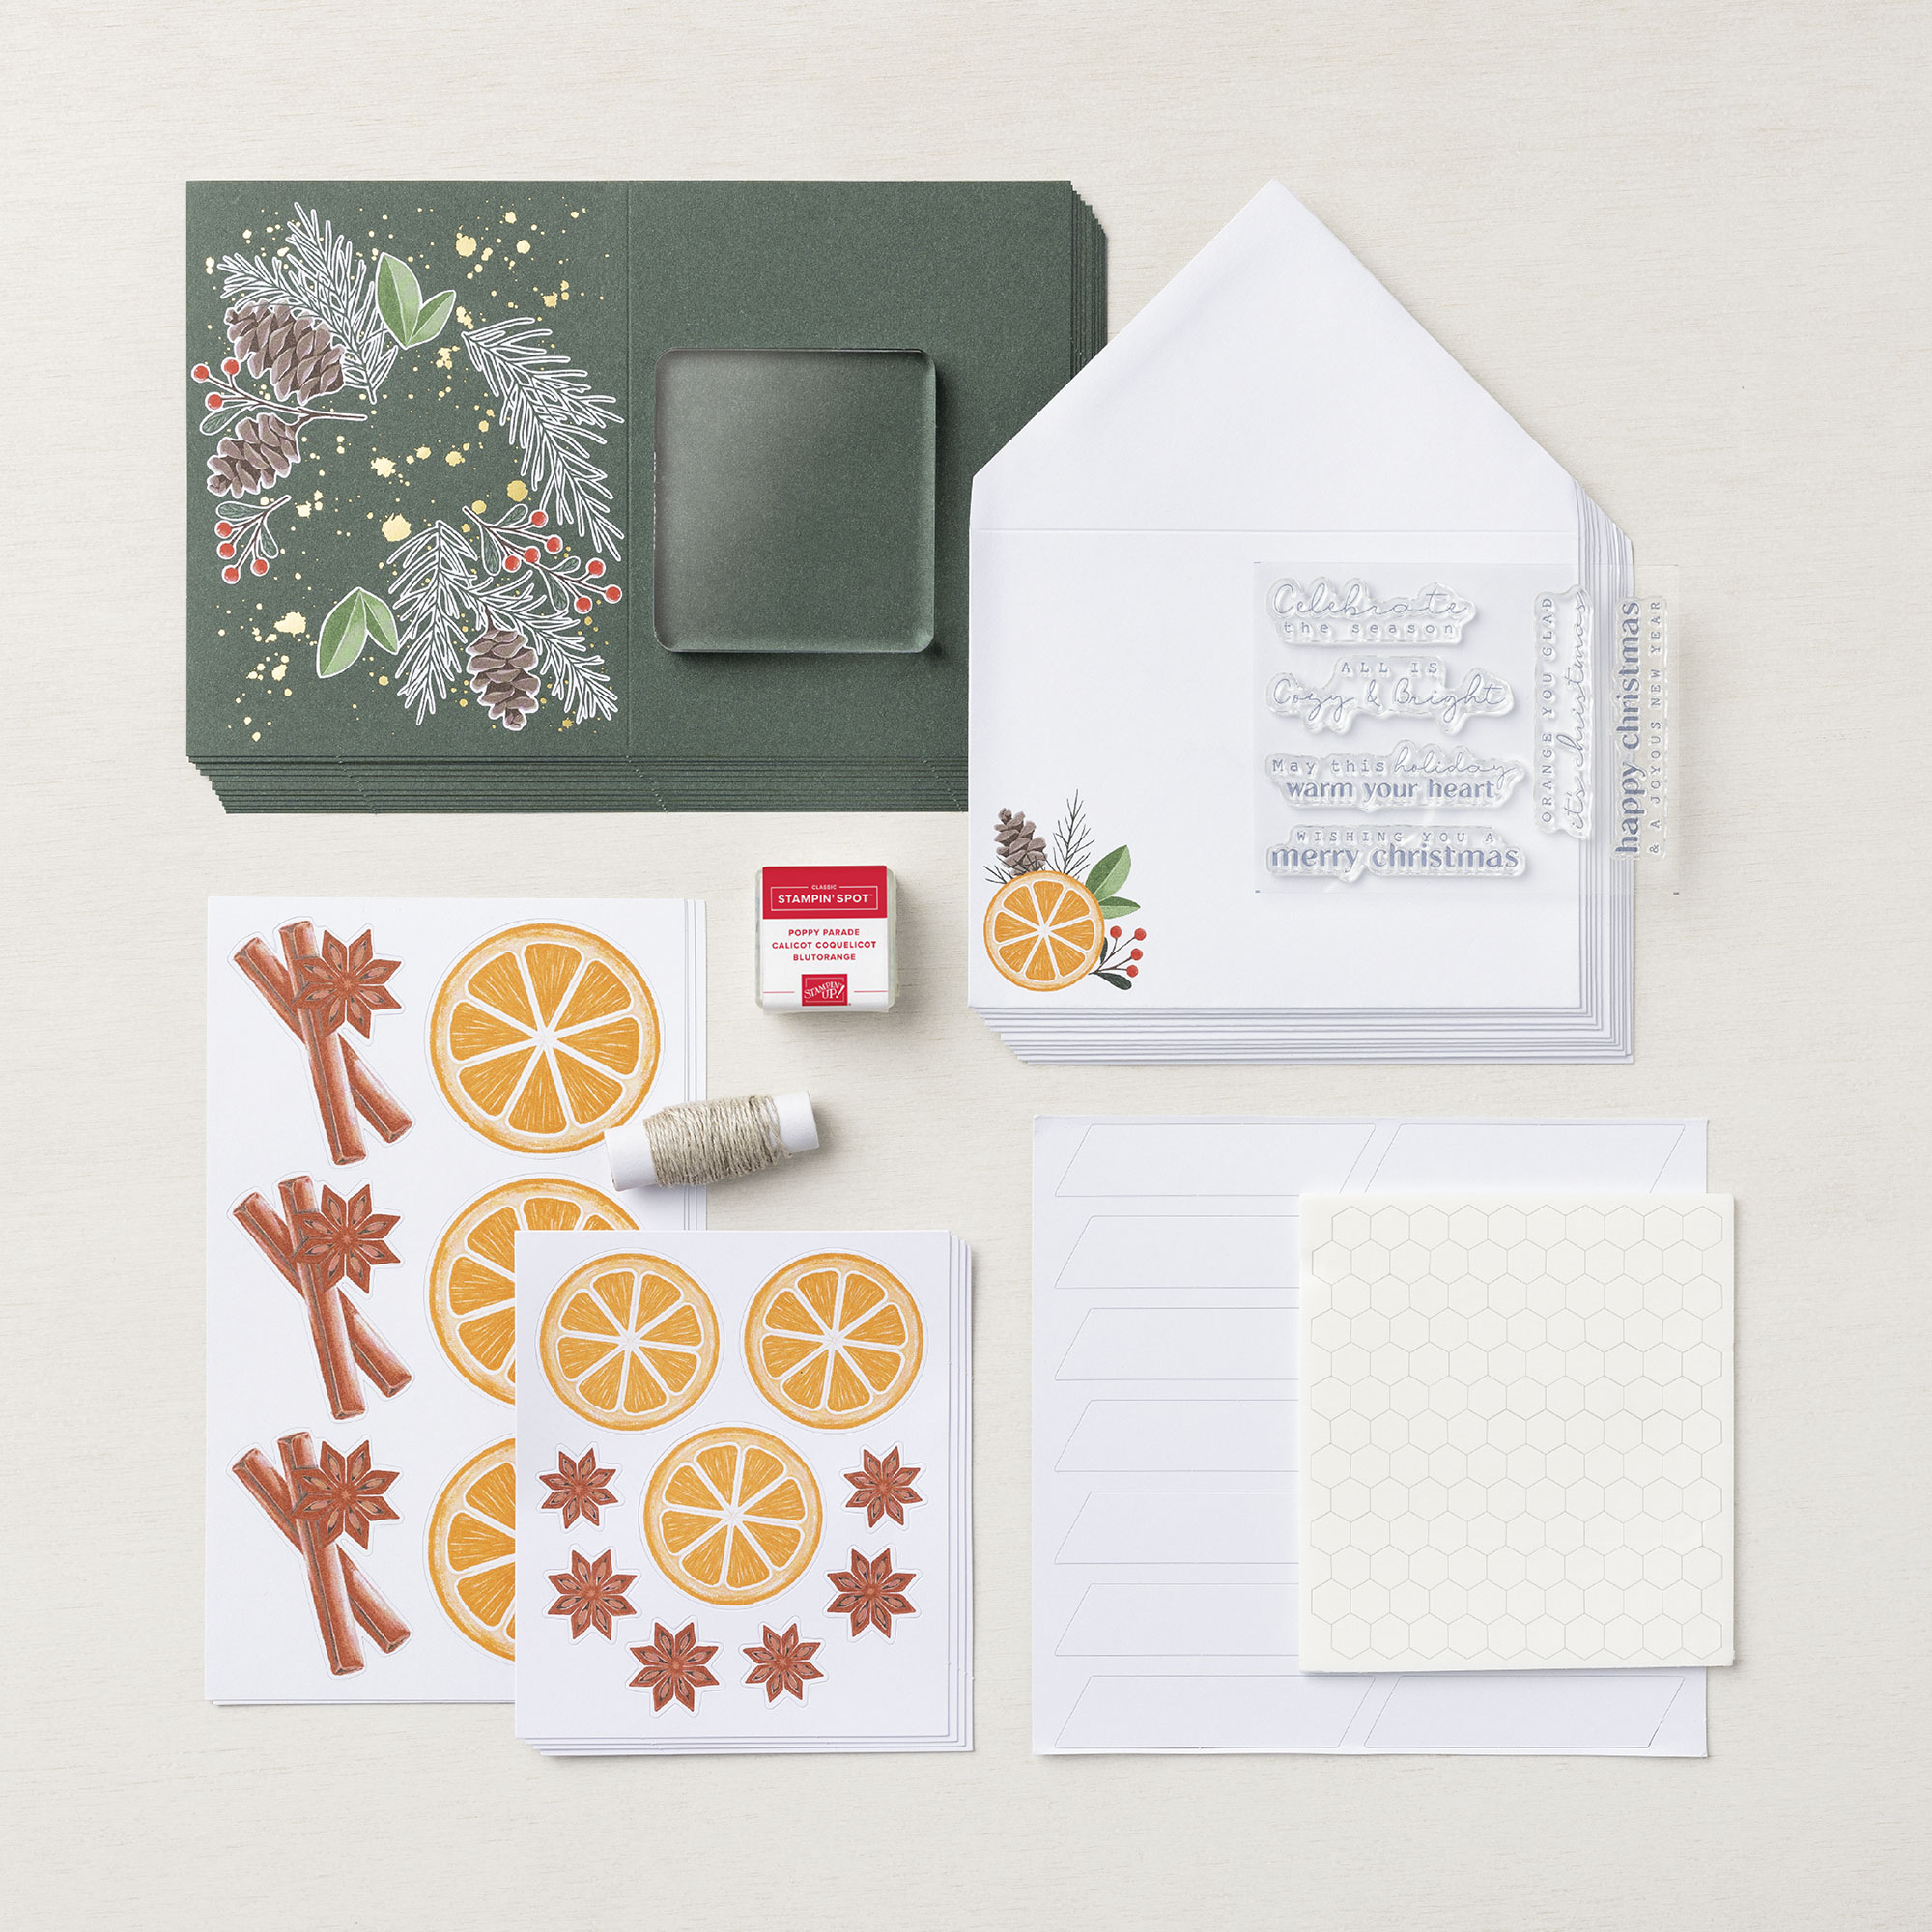
Cozy & Bright Kit Details and what’s included:
- Cozy & Bright Photopolymer Stamp Set
- Acrylic Stamp Block
- Classic Stampin’ Spot: Poppy Parade
- Predesigned projects
- Step-by-step instructions
- Precut pieces (No prep work! Get right to crafting). Including printed die-cut sheets: sticker adhesive sheets & non-adhesive sheets
- Makes 12 cards of 1 design
- Gold foil accents
- Folded card size: 5-1/2″ x 4-1/4″ (14 x 10.8 cm)
- 12 preprinted envelopes
- Enough adhesive to complete projects
- Linen thread
- A 9-7/8″ x 6-1/2″ x 2-3/4″ (25.1 x 16.5 x 7 cm) printed designer box for storage or crafting on the go
- Product colors: Cajun Craze, Early Espresso, Evening Evergreen, Garden Green, Poppy Parade, Pumpkin Pie
This is the stamp set that it included in the kit:

The kit is $23 and the item number is 160338. It will be available beginning tomorrow, August 3 in the Kits Collection in the online store. Love this one!

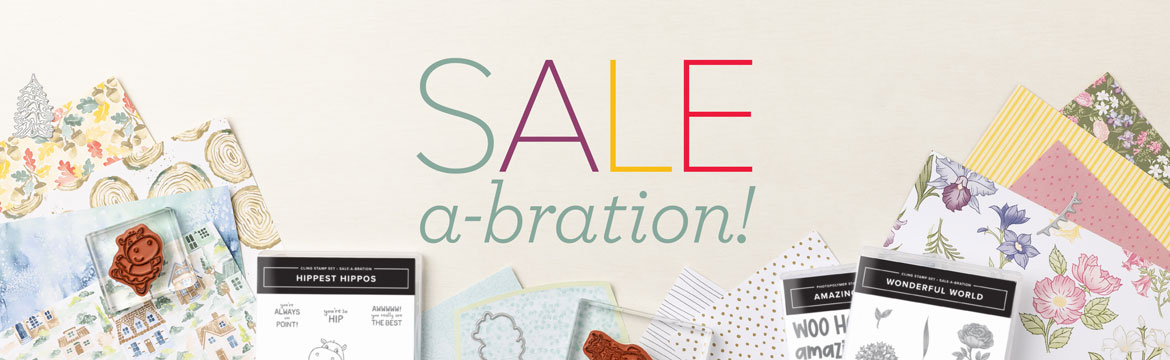
New Sale-a-bration FREE Items Added Today!!
Woohoo! Stampin’ Up! has added some additional items that you can earn for FREE with orders beginning at $50 during Sale-a-bration! You can see the new items in this flyer (click on the image to open in a printable PDF format):
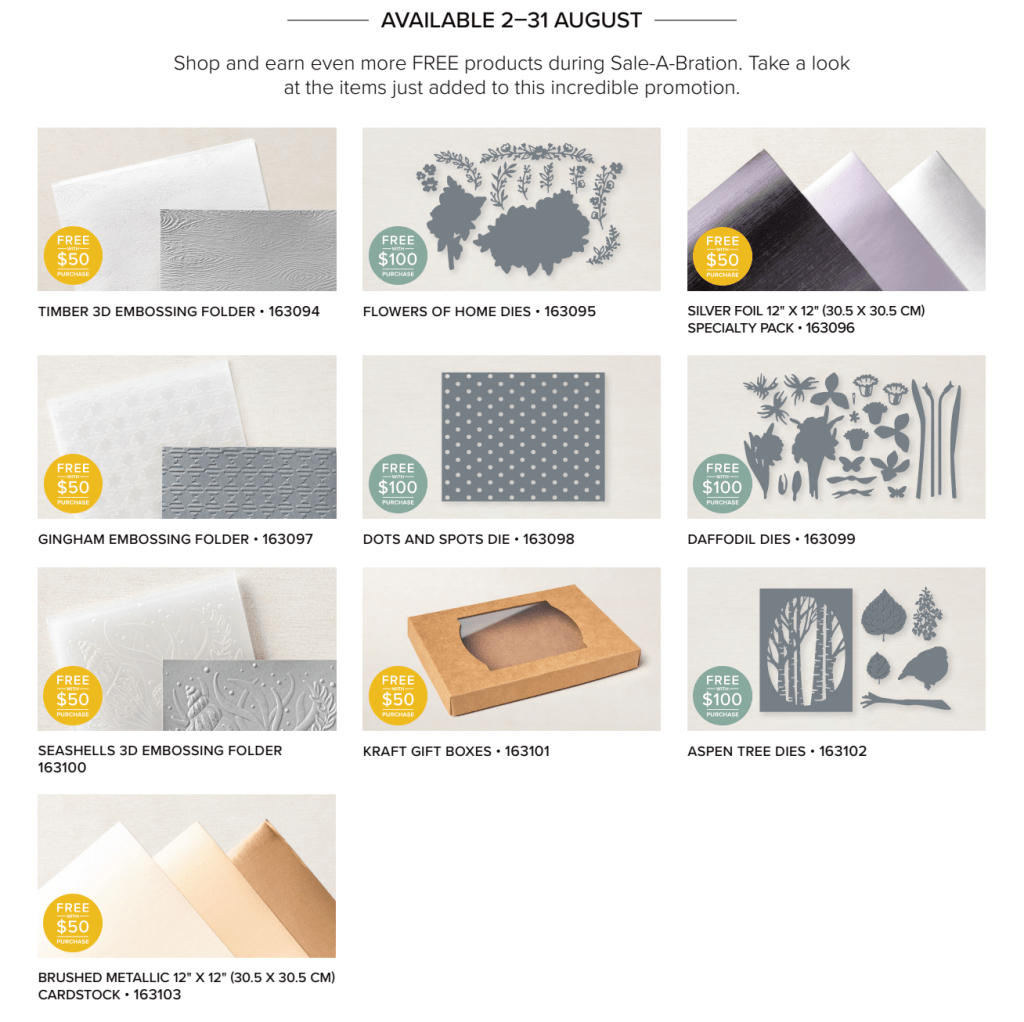
You’ll see them added to the list of options that you can pick for free with orders of $50+ as you go through the checkout process. Let me know if you have any questions. Have fun shopping!
It’s AUGUST, and that means a new host code. Place an online order with me for $50, and besides the Sale-A-Bration free product, you will receive free samples of new embellishments from the from the July-January Mini Catalog from me!
7EHHE9ZK (Non-Club Members Only!)
Please let me know if you have any questions. And be sure to join my Up North Stampin’ Gang Facebook page. We are having SO much fun over there! We post, we share, and just enjoy life! Here’s the link to request to join! https://www.facebook.com/groups/199783410436824
Mary


 Designer Series Paper")

")


 Braided Linen Trim")


 Designer Series Paper")


")


 Frayed Ribbon")


")


")
 Specialty Designer Series Paper")


")


")